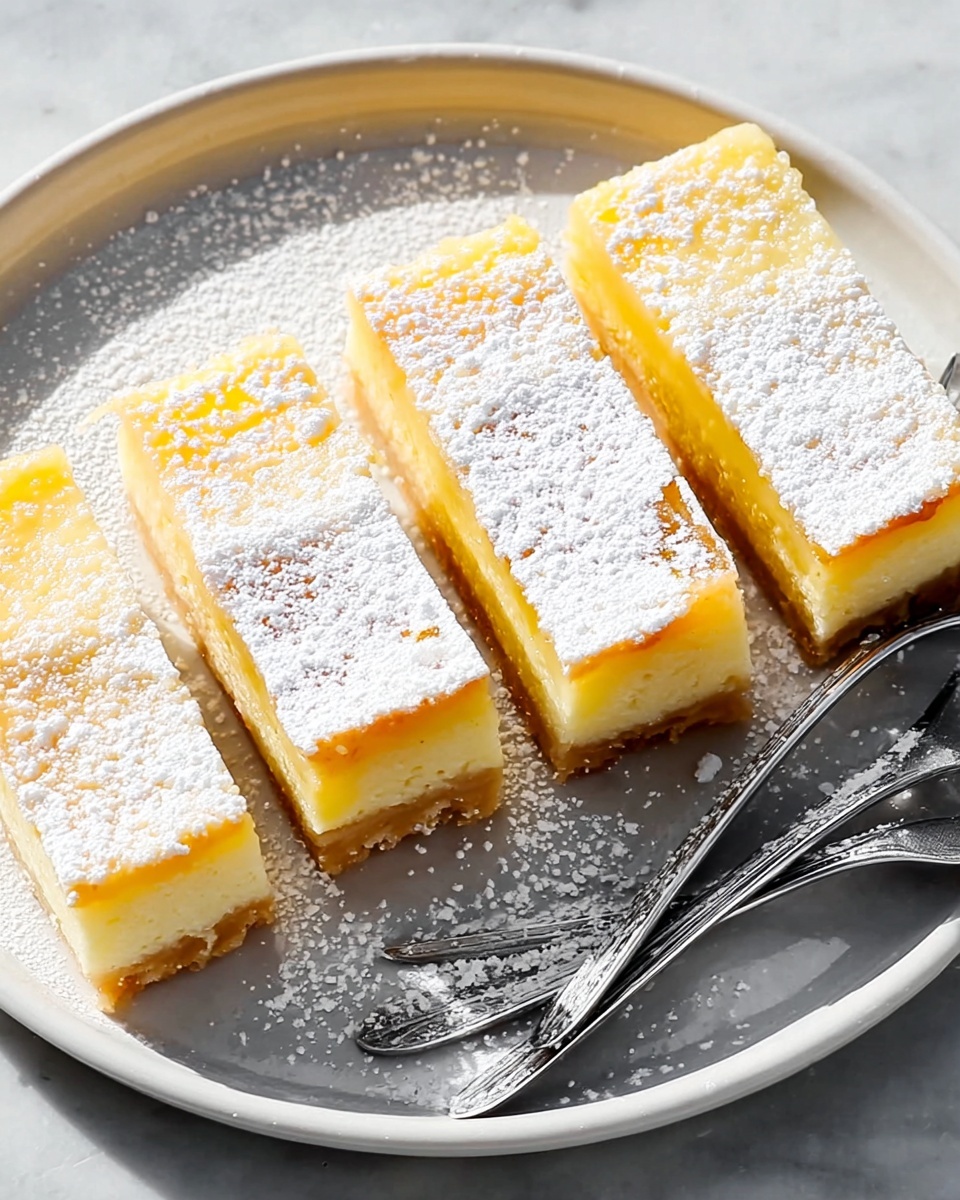
If you’re craving a bright, tangy treat without making a huge batch, this Small Batch Lemon Bars Recipe is your new best friend. Imagine tender, buttery shortbread crust layered with a luscious, zesty lemon filling that strikes the perfect balance between sweet and tart. These lemon bars are the ideal size for a small household or when you want just a few indulgent bites to brighten your day. With straightforward ingredients and an uncomplicated process, they’re a delightful way to bring sunshine to your kitchen.
Ingredients You’ll Need
Every ingredient in this Small Batch Lemon Bars Recipe plays a key role in creating that crave-worthy flavor and texture combination. From the buttery crust that forms the foundation to the fresh lemon juice that delivers that irresistible zing, each element is simple yet essential.
- All-purpose flour: Provides structure both in the crust and the filling for a perfect firm base and silky top layer.
- Powdered sugar: Adds a delicate sweetness to the crust and creates an elegant dusting finish.
- Salt: Enhances all the flavors, balancing the sweetness and brightening the lemon.
- Unsalted butter: Softened butter creates the tender, crumbly crust that melts in your mouth.
- Large eggs: Bind the filling to create that smooth, custardy texture.
- Granulated sugar: Sweetens the tangy lemon filling without overpowering it.
- Fresh lemon juice: Gives that unmistakable tart and lively citrus punch.
- Lemon zest: Adds an aromatic lemon fragrance and a punch of intense flavor.
- Baking powder: Helps the filling set with just the right lift and lightness.
How to Make Small Batch Lemon Bars Recipe
Step 1: Get your oven and pan ready
Start by preheating your oven to 350°F (175°C). Grease an 8×8-inch baking pan or line it with parchment paper. This is the base layer of your lemon bars and preparing the pan early makes sure everything goes smoothly.
Step 2: Mix and press the crust
In a medium bowl, combine the flour, powdered sugar, and salt. Add the softened butter and mix just until the dough comes together. Don’t overmix; you want a tender crust. Press this dough evenly into the bottom of your prepared pan, creating a sturdy but crumbly base that holds all that luscious lemon filling later.
Step 3: Bake the crust until golden
Bake your crust for 10 to 12 minutes or until it’s a lovely light golden color. This not only adds flavor but gives a slight crispness to the base, so your lemon bars have that perfect contrast in texture.
Step 4: Whisk together the zesty filling
While the crust bakes, whisk the eggs and granulated sugar in a bowl until smooth and slightly fluffy. Then stir in fresh lemon juice, lemon zest, flour, and baking powder until everything is fully combined and velvety. This mixture is where the magic happens — bright, tangy, and sweet all at once.
Step 5: Pour the filling and bake again
Pour the prepared lemon filling over your warm crust. Return the pan to the oven and bake for about 18 to 20 minutes, until the filling is set and you see the edges start to turn a gentle golden hue. This baking time ensures the filling will be firm but still tender and melt-in-your-mouth.
Step 6: Cool and serve
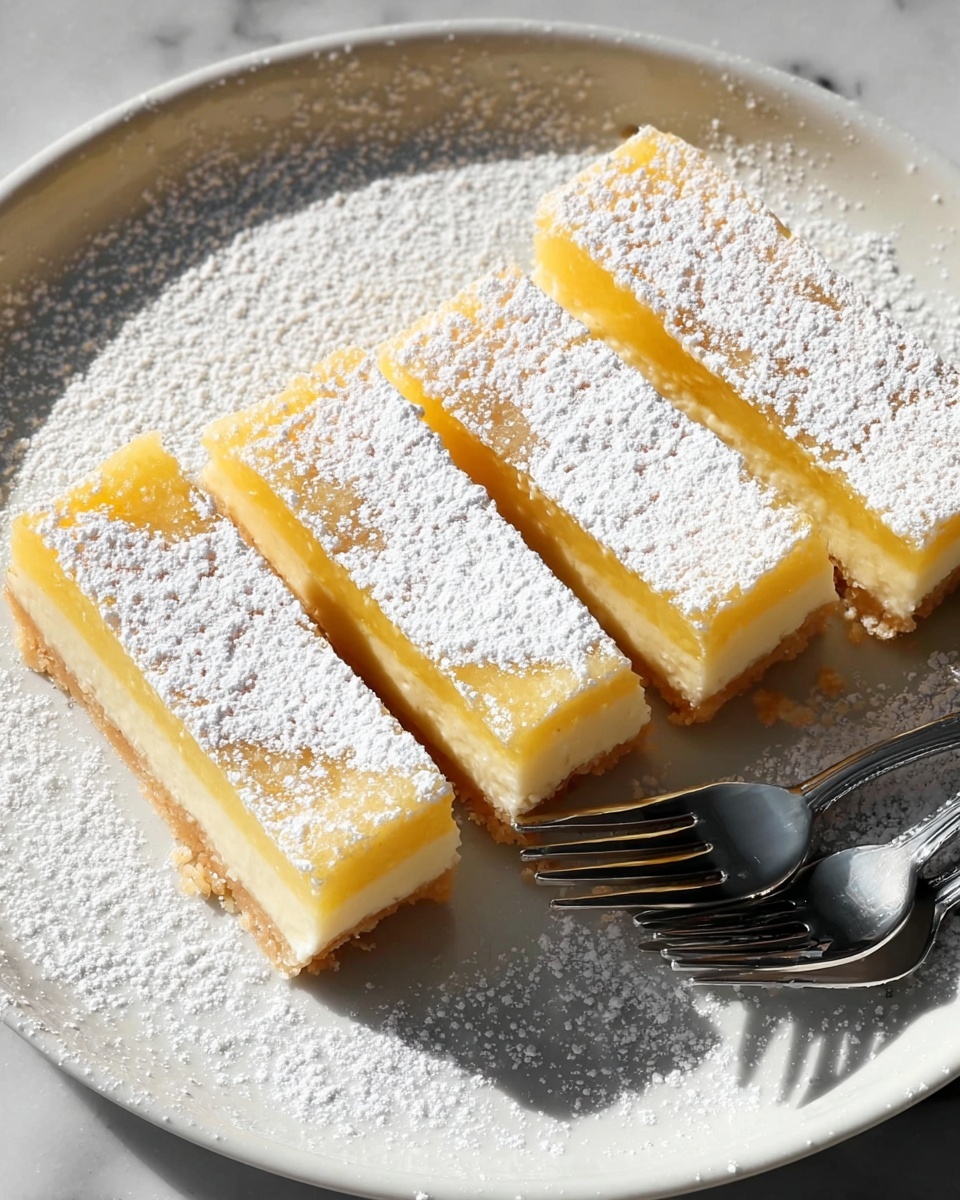
Take your lemon bars out of the oven and allow them to cool completely at room temperature. For an extra touch, dust the top with powdered sugar before slicing into neat squares or bars — this adds a touch of sweetness and a pretty finish.
Step 7: Chill for firm texture
If you prefer your bars with a bit more bite, pop them into the refrigerator to chill for an hour or so. This step is optional, but it gives the lemon bars a wonderful firmness that slices beautifully and keeps well.
How to Serve Small Batch Lemon Bars Recipe

Garnishes
Simple garnishes elevate these bars from casual to special. Try a light dusting of powdered sugar or a few thin lemon slices for a fresh burst of color. A small sprig of mint or a drizzle of honey can add a surprising twist that’s as pretty as it is delicious.
Side Dishes
Pairing lemon bars with the right side can enhance your experience. Serve alongside a scoop of vanilla ice cream or a dollop of whipped cream for a creamy complement to the tartness. Fresh berries or a cup of herbal tea balance the bright flavors wonderfully too.
Creative Ways to Present
For a festive gathering, arrange these bars on a tiered dessert tray with edible flowers for a garden-party vibe. You can also cut them into mini bite-sized pieces for easy sharing at brunch or a potluck. Adding colorful toothpicks or wrapping each bar in parchment for gifts makes them extra special.
Make Ahead and Storage
Storing Leftovers
These lemon bars keep beautifully in an airtight container in the refrigerator for up to 4 days. The flavors even deepen overnight, making them a perfect make-ahead treat to enjoy throughout the week.
Freezing
If you want to keep them longer, wrap the bars tightly in plastic wrap then foil and freeze for up to 2 months. Thaw in the refrigerator overnight and you’ll still have moist, tart bars ready for any occasion.
Reheating
The lemon bars are best served chilled or at room temperature, but if you prefer them slightly warm, just pop a piece in the microwave for about 10 to 15 seconds. This softens the texture while keeping all that bright lemon flavor intact.
FAQs
Can I use bottled lemon juice instead of fresh?
Fresh lemon juice is definitely best for its bright, vibrant flavor, but if bottled is all you have, make sure it’s high quality and 100% lemon juice to keep the tangy essence in your bars.
What pan size should I use for this recipe?
The recipe is designed for an 8×8-inch pan to keep the bars thick and luscious. Using a larger pan will result in thinner bars that bake faster, so adjust baking time accordingly if needed.
Can I make these gluten-free?
Absolutely! You can substitute the all-purpose flour with a gluten-free blend, though the texture may be slightly different. Using a blend with xanthan gum will help keep the crust and filling stable.
How do I know when the filling is set?
The filling should look firm and slightly golden around the edges but still have a slight jiggle in the center when you gently shake the pan. It will continue to set as it cools.
Why should I chill the bars before serving?
Chilling the bars helps the filling firm up, making them easier to cut and enhancing the texture. However, if you prefer a softer bite, serving at room temperature is perfectly fine.
Final Thoughts
This Small Batch Lemon Bars Recipe is a fantastic way to enjoy a sunny, zingy dessert without the stress of making a large quantity. Whether you’re treating yourself after a long day or sharing with a close friend, these bars bring joy with every bite. I can’t wait for you to try them out and discover just how simple and satisfying homemade lemon bars can be.
Print
Small Batch Lemon Bars Recipe
- Prep Time: 15 minutes
- Cook Time: 30 minutes
- Total Time: 45 minutes
- Yield: 9 bars
- Category: Dessert
- Method: Baking
- Cuisine: American
- Diet: Vegetarian
Description
This Small Batch Lemon Bars recipe yields 9 deliciously tangy and sweet bars with a buttery shortbread crust and a smooth lemon filling. Perfect for a smaller crowd or when you crave a fresh, citrusy dessert without making a large batch. The lemon zest and juice create a bright, refreshing flavor balanced by a tender, lightly golden crust.
Ingredients
For the crust:
- 1/2 cup all-purpose flour
- 1/4 cup powdered sugar
- 1/4 teaspoon salt
- 1/4 cup unsalted butter, softened
For the filling:
- 2 large eggs
- 1/2 cup granulated sugar
- 1/4 cup fresh lemon juice (about 2 lemons)
- 1 tablespoon lemon zest
- 1/4 cup all-purpose flour
- 1/4 teaspoon baking powder
For finishing:
- Powdered sugar for dusting (optional)
Instructions
- Preheat oven and prepare pan: Preheat your oven to 350°F (175°C). Grease or line an 8×8-inch baking pan with parchment paper to prevent sticking and make removal easier.
- Make the crust: In a medium bowl, combine flour, powdered sugar, and salt. Add the softened butter and mix until a dough forms. Evenly press the dough into the bottom of the prepared pan creating a flat, uniform layer.
- Bake the crust: Place the pan in the preheated oven and bake for 10–12 minutes, or until the crust is lightly golden brown. This step ensures a crisp base for your lemon bars.
- Prepare the filling: While the crust bakes, whisk together the eggs and granulated sugar in a separate bowl until smooth and well combined. Add the fresh lemon juice, lemon zest, flour, and baking powder, whisking until the mixture is smooth and uniform.
- Bake the filling: Once the crust is baked, pour the lemon filling evenly over the hot crust. Return the pan to the oven and bake for an additional 18–20 minutes until the filling is set and the edges are lightly golden.
- Cool and finish: Remove the lemon bars from the oven and allow them to cool to room temperature. Optionally, dust the top with powdered sugar. For firmer bars, chill in the refrigerator before cutting into 9 equal squares.
- Serve and enjoy: Cut into squares or bars and serve chilled or at room temperature for the best flavor and texture.
Notes
- Use fresh lemon juice and zest for the best citrus flavor.
- Make sure butter is softened, not melted, for the crust to achieve the right texture.
- Chilling the bars after baking helps them set and makes cutting easier.
- Powdered sugar dusting is optional but adds a pretty finish and slight sweetness.
- Store leftovers in an airtight container in the refrigerator for up to 3 days.


