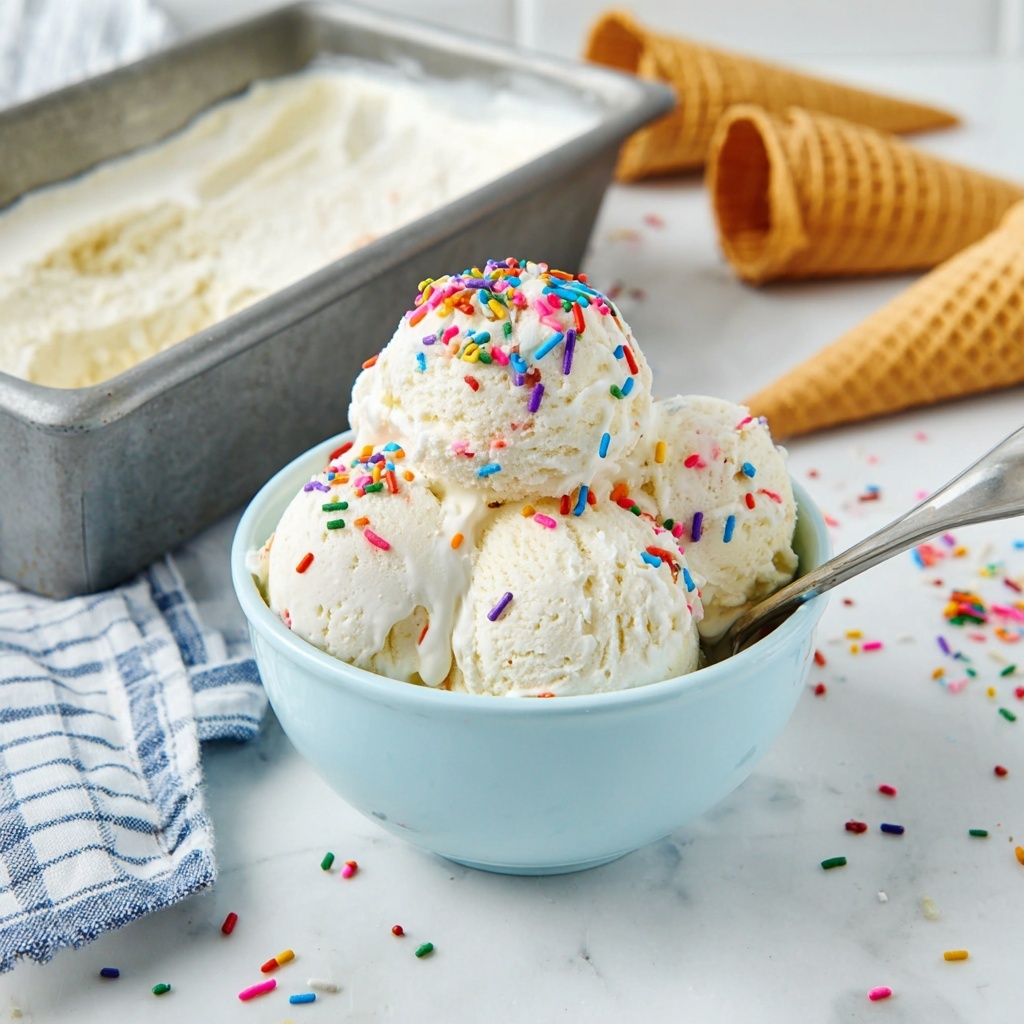
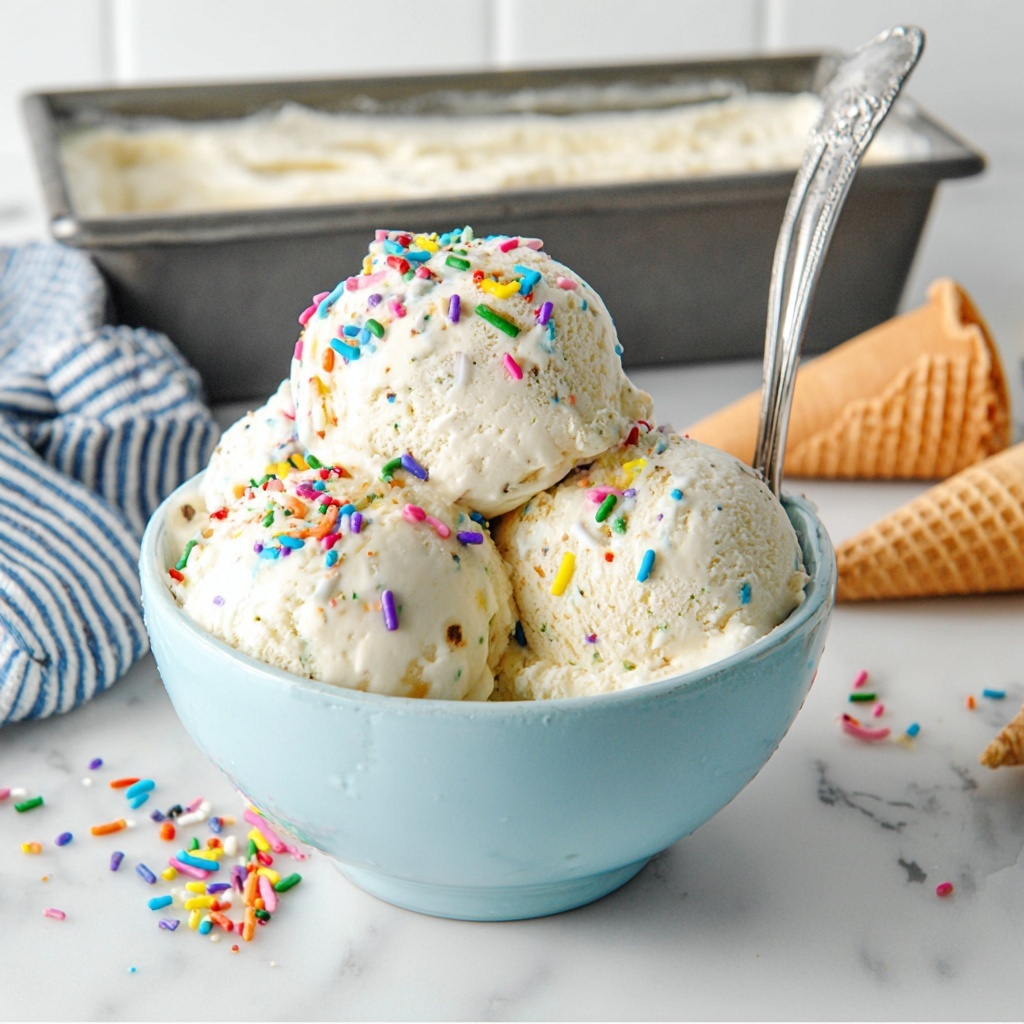
If you have ever dreamed of making homemade ice cream without the hassle of an ice cream maker, then this No Churn Vanilla Ice Cream Recipe is your new best friend. It’s incredibly simple, wonderfully creamy, and captures the pure essence of vanilla in every luscious bite. With just a handful of everyday ingredients and a little patience, you can create a delightful frozen treat that feels like a special indulgence but is surprisingly easy to whip up any time cravings strike.
Ingredients You’ll Need
Gathering the right ingredients is half the fun and ensures your ice cream is perfectly rich and flavorful. Each component plays a vital role: the heavy cream brings that dreamy creaminess, the sweetened condensed milk adds sweetness and a silky texture, vanilla extract infuses that classic aroma, and a pinch of sea salt balances everything beautifully.
- 2 cups heavy cream (cold): Using cold heavy cream helps to whip it into stiff peaks, the foundation of this recipe’s creamy texture.
- 14 ounces sweetened condensed milk: Adds natural sweetness and smoothness without the need for extra sugar.
- 1 teaspoon vanilla extract: Provides that warm, familiar vanilla flavor that makes this ice cream irresistible.
- Pinch of sea salt: Enhances the vanilla and balances out the sweetness perfectly.
- Sprinkles and ice cream cone (optional for serving): For a fun and festive touch when presenting your ice cream.
How to Make No Churn Vanilla Ice Cream Recipe
Step 1: Chill Your Loaf Pan
Start by placing your loaf pan in the freezer. This helps the ice cream mixture set quickly and evenly when you pour it in later. Trust me, this little trick makes all the difference between a creamy texture and an icy one.
Step 2: Whip the Heavy Cream
Take the cold heavy cream and beat it in a large mixing bowl with an electric mixer until stiff peaks form. This means when you lift the whisk, the cream holds its shape firmly without collapsing. This whipped cream is what gives your ice cream that fluffy, luscious mouthfeel.
Step 3: Fold in the Sweetened Condensed Milk and Flavorings
Once your cream is whipped, gently fold in the sweetened condensed milk, vanilla extract, and a pinch of sea salt. Folding—rather than stirring—helps to keep all that air trapped in the cream, so your final ice cream stays light and creamy.
Step 4: Pour into the Chilled Pan
Take the loaf pan out of the freezer and carefully pour your mixture into it, spreading it evenly. This step sets the foundation for your ice cream’s shape and thickness.
Step 5: Freeze Until Firm
Place the loaf pan back in the freezer, making sure it sits on a level surface. Let it chill and firm up for 6 to 8 hours. Patience is key here because this step transforms your mixture into the perfect scoopable ice cream.
How to Serve No Churn Vanilla Ice Cream Recipe

Garnishes
Elevate your ice cream with colorful sprinkles, chopped nuts, or even a drizzle of chocolate or caramel sauce. These touches add texture and flair that turn a simple dessert into a joyful celebration on a plate.
Side Dishes
Pair your No Churn Vanilla Ice Cream Recipe with warm desserts like brownies, apple pie, or freshly baked cookies. The contrast between hot and cold feels downright magical and will impress anyone lucky enough to join you at the table.
Creative Ways to Present
Serve your ice cream in a crisp cone for a nostalgic, handheld treat, or scoop it elegantly into dessert cups with fresh berries and mint leaves. You can even sandwich it between cookies for an inventive twist that’s sure to delight kids and adults alike.
Make Ahead and Storage
Storing Leftovers
If you happen to have leftovers (though I know that’s rare), store your ice cream in an airtight container to prevent freezer burn and maintain its creamy texture. Press a piece of parchment paper directly on the surface before sealing for even better results.
Freezing
Your No Churn Vanilla Ice Cream Recipe keeps well in the freezer for up to two weeks. Just make sure to keep it level to avoid uneven texture, and remember to cover it tightly to lock in freshness and prevent ice crystals from forming.
Reheating
Reheating ice cream might sound odd, but if it becomes too hard, simply let it sit at room temperature for about 10 minutes before scooping. This brief thaw softens it just enough for the perfect scoop without melting it down.
FAQs
Can I use flavored extracts instead of vanilla?
Absolutely! While vanilla is classic, you can swap in almond or peppermint extracts to customize this dessert to your liking. Just use the same amount to keep the balance right.
Is it possible to make this recipe dairy-free?
Yes, you can substitute coconut cream for heavy cream and use a dairy-free sweetened condensed milk alternative. The texture may vary slightly, but the result is still wonderfully creamy and tasty.
Why does the recipe call for a pinch of sea salt?
Salt enhances the flavor by balancing the sweetness and amplifying the rich vanilla notes, making the ice cream taste more vibrant and satisfying.
Do I need to stir the ice cream while it freezes?
No, the beauty of this No Churn Vanilla Ice Cream Recipe is that it requires no stirring. The whipped cream keeps the texture light and smooth without the need for churning.
Can I add mix-ins like chocolate chips or fruit?
Definitely! Fold in your favorite additions gently after combining the condensed milk and flavorings, then freeze as usual. This makes the ice cream extra special and tailored to your cravings.
Final Thoughts
There’s something incredibly satisfying about making your own ice cream with so little fuss, and this No Churn Vanilla Ice Cream Recipe is proof it can be both simple and delicious. Whether you’re a beginner or a seasoned dessert maker, this recipe is a dependable crowd-pleaser that’s ready to become a staple in your kitchen. Give it a try, and get ready to fall in love with homemade ice cream all over again!
Print
No Churn Vanilla Ice Cream Recipe
- Prep Time: 15 minutes
- Cook Time: N/A
- Total Time: 6 hours 15 minutes
- Yield: 6 to 6.5 servings
- Category: Dessert
- Method: No-Cook
- Cuisine: American
Description
This No Churn Vanilla Ice Cream recipe offers a simple and quick way to make creamy, delicious vanilla ice cream at home without an ice cream maker. Combining cold heavy cream with sweetened condensed milk and vanilla extract, this recipe requires minimal prep and freezes into a smooth, scoopable treat perfect for any occasion.
Ingredients
Ice Cream Base
- 2 cups heavy cream (cold)
- 14 ounces sweetened condensed milk
- 1 teaspoon vanilla extract
- pinch of sea salt
For Serving
- sprinkles
- ice cream cone
Instructions
- Chill the Loaf Pan: Place a loaf pan into the freezer to chill while you prepare the ice cream base. This helps the ice cream set evenly once poured in.
- Whip the Heavy Cream: In a large mixing bowl, use an electric mixer to beat the cold heavy cream until stiff peaks form. This creates the airy texture essential for the ice cream.
- Combine Ingredients: Gently fold the sweetened condensed milk, vanilla extract, and a pinch of sea salt into the whipped cream. Folding carefully preserves the airiness of the mixture.
- Pour Mixture into Pan: Remove the chilled loaf pan from the freezer and pour the vanilla ice cream mixture into it, spreading evenly.
- Freeze Until Set: Place the loaf pan back in the freezer on a level surface and chill for 6 to 8 hours or until the ice cream is fully set and scoopable.
- Serve and Enjoy: Scoop the ice cream into cones or bowls, top with sprinkles if desired, and enjoy your homemade no churn vanilla ice cream!
Notes
- Ensure the heavy cream is very cold for better whipping results.
- Do not overbeat the cream; stop when stiff peaks form to avoid turning it into butter.
- Folding the condensed milk gently preserves the fluffiness of the ice cream.
- Use a level spot in the freezer to ensure even freezing and texture.
- Allow the ice cream to soften for a few minutes before scooping for easier serving.


