
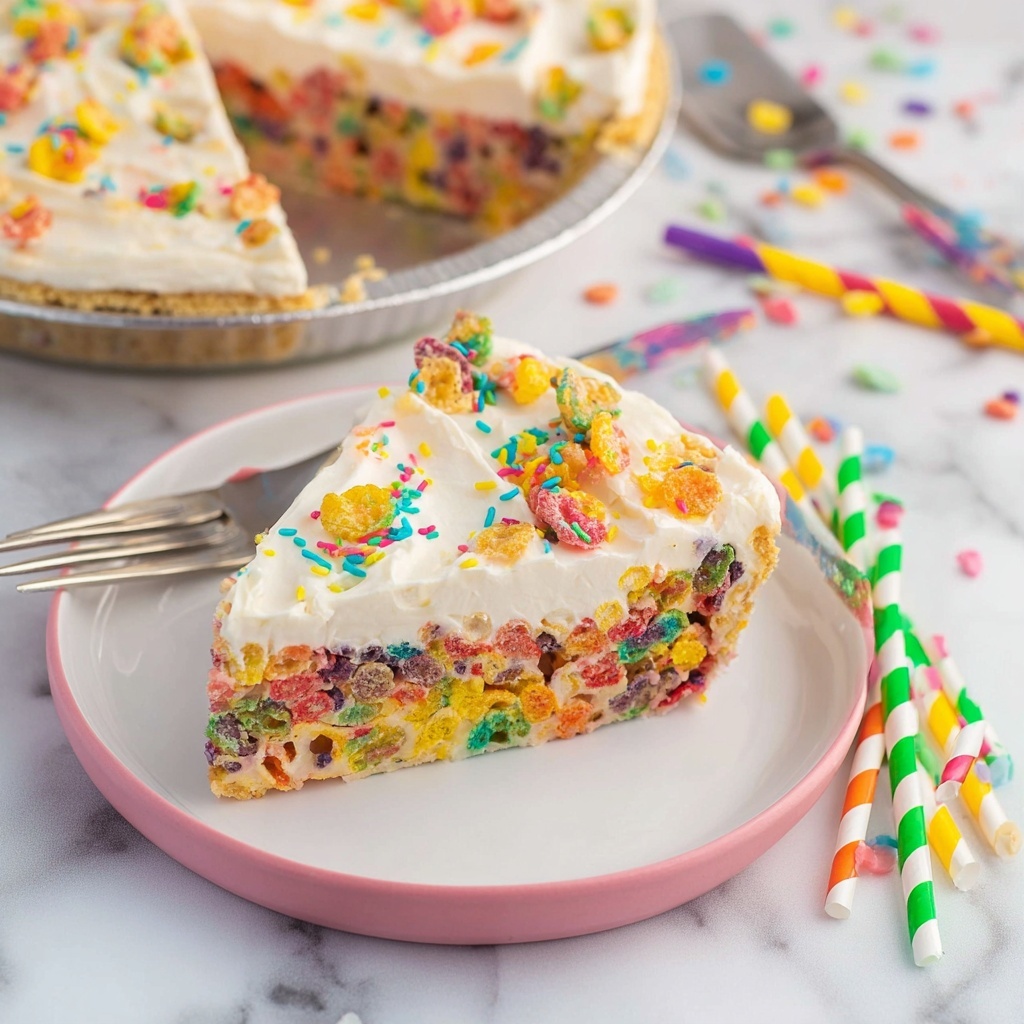
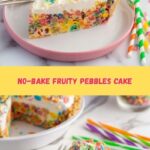
If you’ve been searching for that perfect blend of childhood nostalgia and creamy delight, you’re going to absolutely adore this No-Bake Fruity Pebbles Cheesecake Recipe. It’s a vibrant, delightfully simple treat that bursts with color and flavor, combining crispy Fruity Pebbles cereal with a luscious, smooth cream cheese filling. This cheesecake requires no oven time, making it a breeze to whip up, and it’s guaranteed to become your go-to dessert for parties, family gatherings, or whenever you’re craving a playful, sweet indulgence.
Ingredients You’ll Need
These ingredients are straightforward but carefully chosen to give you that perfect balance of texture, sweetness, and wow-factor color to your No-Bake Fruity Pebbles Cheesecake Recipe. Each component plays a crucial role, so let’s dive into what you’ll need.
- 3 ½ cups Fruity Pebbles Cereal: This provides the signature crunch and vibrant colors that make the crust and filling pop.
- 3 cups mini marshmallows: Essential for binding the crust together with a gooey, chewy texture.
- 2 tablespoons unsalted butter: Adds richness and helps melt the marshmallows for that perfect crust.
- 16 oz cream cheese (softened): Creates the creamy, smooth base of the cheesecake filling.
- ¼ cup powdered sugar: Adds just the right amount of sweetness to balance the tang of the cream cheese.
- 1 teaspoon vanilla: Enhances the overall flavor with a warm, inviting note.
- 7 oz tub marshmallow creme: Gives the filling a fluffy, luscious texture and extra sweetness.
- 1 ½ cup cereal lightly chopped: Mixed into the filling for a delightful crunch throughout.
How to Make No-Bake Fruity Pebbles Cheesecake Recipe
Step 1: Prepare the Fruity Pebbles Crust
You’ll start by combining the Fruity Pebbles cereal, mini marshmallows, and butter in a large microwave-safe bowl. Heating them gently melts the marshmallows and butter together, turning the mixture into a sticky, colorful binder. This step is key to forming that sturdy yet tender crust that holds all the cheesecake magic.
Step 2: Form the Crust in the Pan
After the marshmallows are soft and melted, mix everything well so every single Fruity Pebble is coated with that sweet, gooey goodness. Then transfer it immediately into a lightly greased pie plate. Press the mix firmly across the bottom and up the sides, creating a vibrant, inviting base. Setting it aside now lets the crust firm up perfectly while you move on to the luscious filling.
Step 3: Whip Up the Creamy Filling
In a large mixing bowl, beat softened cream cheese with powdered sugar and vanilla until silky smooth. Adding the marshmallow creme next means your filling will be delightfully airy and sweet. The best part? Gently folding in the chopped Fruity Pebbles cereal gives this cheesecake exciting texture and pops of color in every bite.
Step 4: Assemble and Chill
Pour the creamy filling over your set crust, smoothing its surface with a spatula to achieve that classic cheesecake look. Refrigerate it for 1 to 2 hours so the filling can set nicely. If you’re in a rush, popping it in the freezer for about 30 minutes also does the trick. This chilling phase is what helps the dessert hold its shape and makes the flavors meld beautifully.
Step 5: Add Toppings and Serve
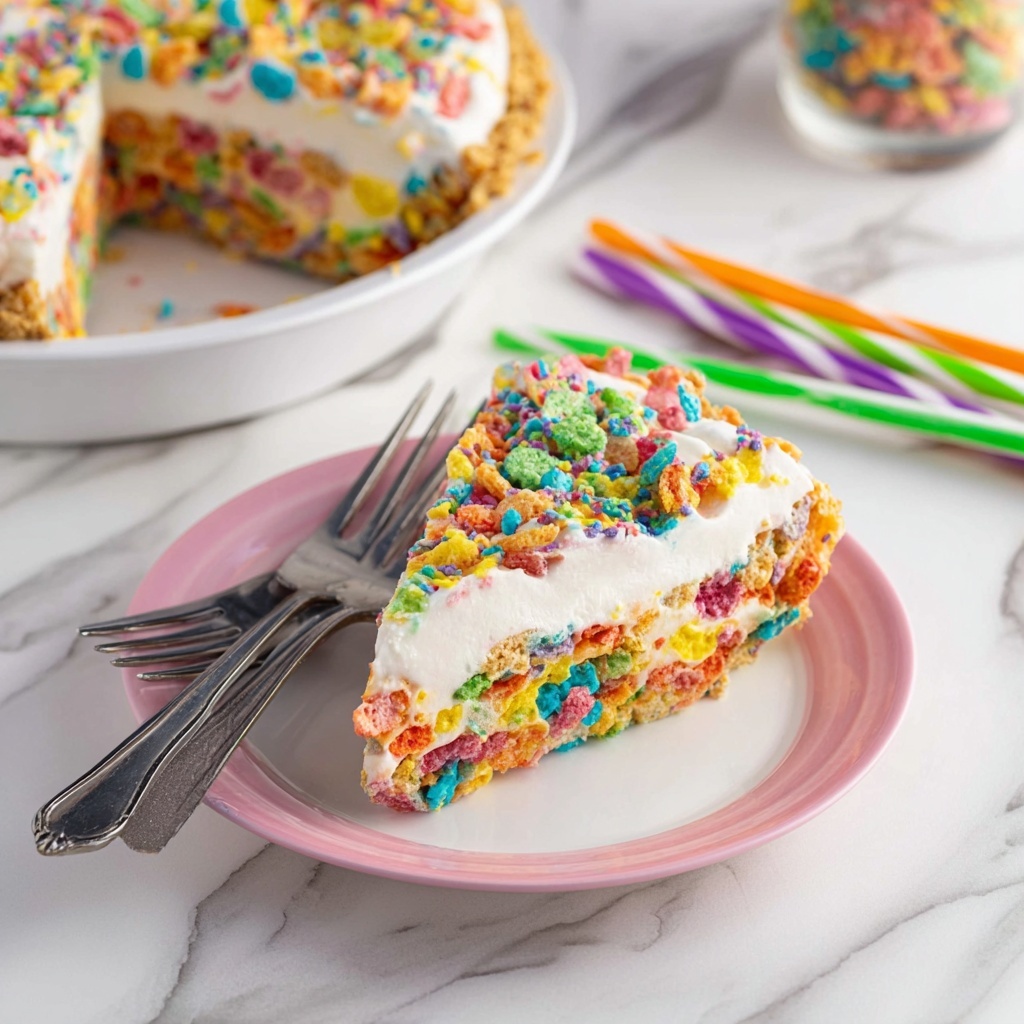
When the cheesecake has fully set, sprinkle extra Fruity Pebbles or your favorite colorful sprinkles on top for an extra layer of fun. This final touch not only brightens the presentation but also adds another burst of flavor and crunch as you dig in.
How to Serve No-Bake Fruity Pebbles Cheesecake Recipe
Garnishes
The playful colors of Fruity Pebbles make this cheesecake a visual delight, but a few fresh touches can take it even further. Consider adding fresh berries for a natural sweetness and contrast, or a drizzle of white chocolate for extra decadence. Whipped cream dollops are another perfect partner, adding lightness to each slice.
Side Dishes
This cheesecake pairs exquisitely with light and fresh sides to balance its rich creaminess. Think along the lines of a crisp fruit salad or a simple citrus sorbet. For a decadent party spread, pairing it with a cup of good-quality vanilla coffee or a fruity herbal tea will round out your dessert experience beautifully.
Creative Ways to Present
Want to impress guests or make this dessert the centerpiece of your table? Try serving the cheesecake in clear glass bowls or jars to showcase its colorful layers. You could also cut it into bite-sized bars and serve on a platter with mini forks, perfect for casual get-togethers or kid-friendly parties. For a fun twist, build a layered parfait by alternating the filling with extra cereal and whipped cream.
Make Ahead and Storage
Storing Leftovers
One of the best things about this No-Bake Fruity Pebbles Cheesecake Recipe is that it keeps beautifully overnight in the fridge. Store leftovers in an airtight container or tightly wrapped with plastic wrap, and it will stay fresh for 3 to 4 days. This makes it great for prepping ahead for celebrations or just having a sweet treat ready to go.
Freezing
If you want to make your cheesecake last longer, freezing is your friend. Wrap it well with plastic wrap and aluminum foil to prevent freezer burn, and it will keep for up to a month. When you’re ready to enjoy it, thaw it overnight in the fridge for the best texture — no rush needed here!
Reheating
Since this cheesecake is no-bake and served chilled, reheating isn’t recommended. Instead, allow frozen slices to thaw fully in the fridge and bring to room temperature for 10-15 minutes before serving, if you prefer a softer texture. This will give you the ideal creamy mouthfeel without losing the fresh flavors.
FAQs
Can I use another cereal instead of Fruity Pebbles?
Absolutely! While Fruity Pebbles provide that iconic look and flavor, you could experiment with other colorful cereals like Trix or Capt’n Crunch Berries. Just make sure the cereal holds up well to the marshmallow mixture for the crust.
Do I need to use marshmallow creme if I already add mini marshmallows?
Yes, marshmallow creme in the filling adds a unique fluffiness and sweetness that mini marshmallows alone can’t provide. It helps create that light, creamy texture inside the cheesecake that balances the crust perfectly.
Is this dessert suitable for kids?
Definitely! This No-Bake Fruity Pebbles Cheesecake Recipe is a huge hit with kids thanks to its bright colors and sweet, familiar flavors. Just be mindful of any dietary restrictions or allergies related to the ingredients.
Can I make this recipe vegan or dairy-free?
While this recipe relies on cream cheese and butter, you could try substituting with dairy-free cream cheese alternatives and vegan butter. Marshmallow products can be tricky, so check for vegetarian or vegan versions to keep it aligned with dietary needs.
How long does it take to set properly?
For the best texture, chilling the cheesecake in the refrigerator for 1 to 2 hours is recommended. If pressed for time, freezer chilling for about 30 minutes will firm it up enough to slice, though letting it rest longer enhances flavor and structure.
Final Thoughts
This No-Bake Fruity Pebbles Cheesecake Recipe is such a joyful surprise—bright, creamy, and crunchy all at once. It’s a wonderful dessert to bring smiles to any occasion without the fuss of baking. I encourage you to give it a try and share it with your friends and family. Once you taste this nostalgic twist on cheesecake, it will surely become a beloved favorite for years to come.
Print
No-Bake Fruity Pebbles Cheesecake Recipe
- Prep Time: 15 minutes
- Cook Time: 0 minutes
- Total Time: 1 hour 15 minutes (including chill time)
- Yield: 8 servings
- Category: Dessert
- Method: No-Cook
- Cuisine: American
Description
This No-Bake Fruity Pebbles Cheesecake is a colorful and fun dessert featuring a crispy Fruity Pebbles crust and a creamy, sweet cheesecake filling mixed with marshmallow creme and more cereal. Perfectly easy to make without any baking, this cheesecake is chilled until firm, making it an ideal treat for summer or quick gatherings that’s sure to delight kids and adults alike.
Ingredients
Crust Ingredients
- 3 ½ cups Fruity Pebbles Cereal
- 3 cups mini marshmallows
- 2 tablespoons unsalted butter
Filling Ingredients
- 16 oz cream cheese, softened
- ¼ cup powdered sugar
- 1 teaspoon vanilla extract
- 7 oz tub marshmallow creme
- 1 ½ cups Fruity Pebbles Cereal, lightly chopped
Instructions
- Make the crust: In a large microwave-safe bowl, combine the Fruity Pebbles cereal, mini marshmallows, and unsalted butter. Microwave uncovered on high for 2-3 minutes until the marshmallows puff up and soften.
- Mix and form crust: Remove from microwave and stir well to coat all the cereal in the melted marshmallows and butter. Transfer the sticky mixture into a lightly sprayed or buttered pie plate, pressing it firmly into the bottom and up the sides to create an even crust. Set aside to firm.
- Prepare cheesecake filling: In a large bowl, beat together softened cream cheese, powdered sugar, and vanilla extract until creamy and smooth. Add the marshmallow creme and mix well to combine.
- Add cereal to filling: Gently fold in the 1 ½ cups of lightly chopped Fruity Pebbles cereal until evenly distributed throughout the cheesecake filling.
- Assemble cheesecake: Pour the filling over the prepared crust, smoothing the top with a spatula to create an even layer. Chill the cheesecake in the refrigerator for 1-2 hours to set, or for a quicker option, freeze for about 30 minutes.
- Garnish and serve: Before serving, optionally sprinkle extra Fruity Pebbles cereal or colorful sprinkles on top for added flair and crunch.
Notes
- Use a microwave-safe bowl and monitor closely when melting marshmallows to prevent burning.
- For best texture, press the crust firmly and chill the cheesecake well to ensure it holds together when sliced.
- You can swap Fruity Pebbles with other colorful puffed cereals if desired.
- Marshmallow creme adds additional sweetness and fluffiness in the filling—do not skip if possible.
- This cheesecake is best served chilled but should be brought to room temperature for a few minutes before slicing to enhance creaminess.
