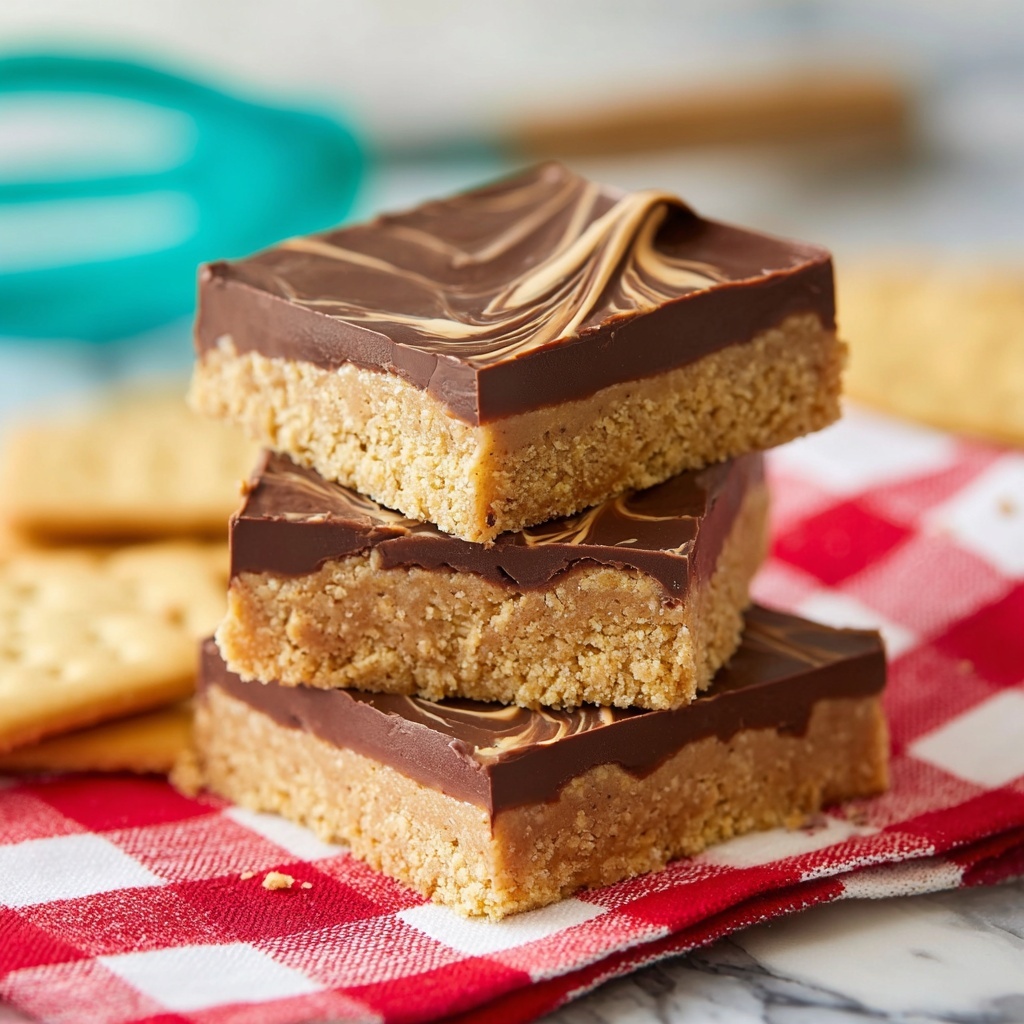
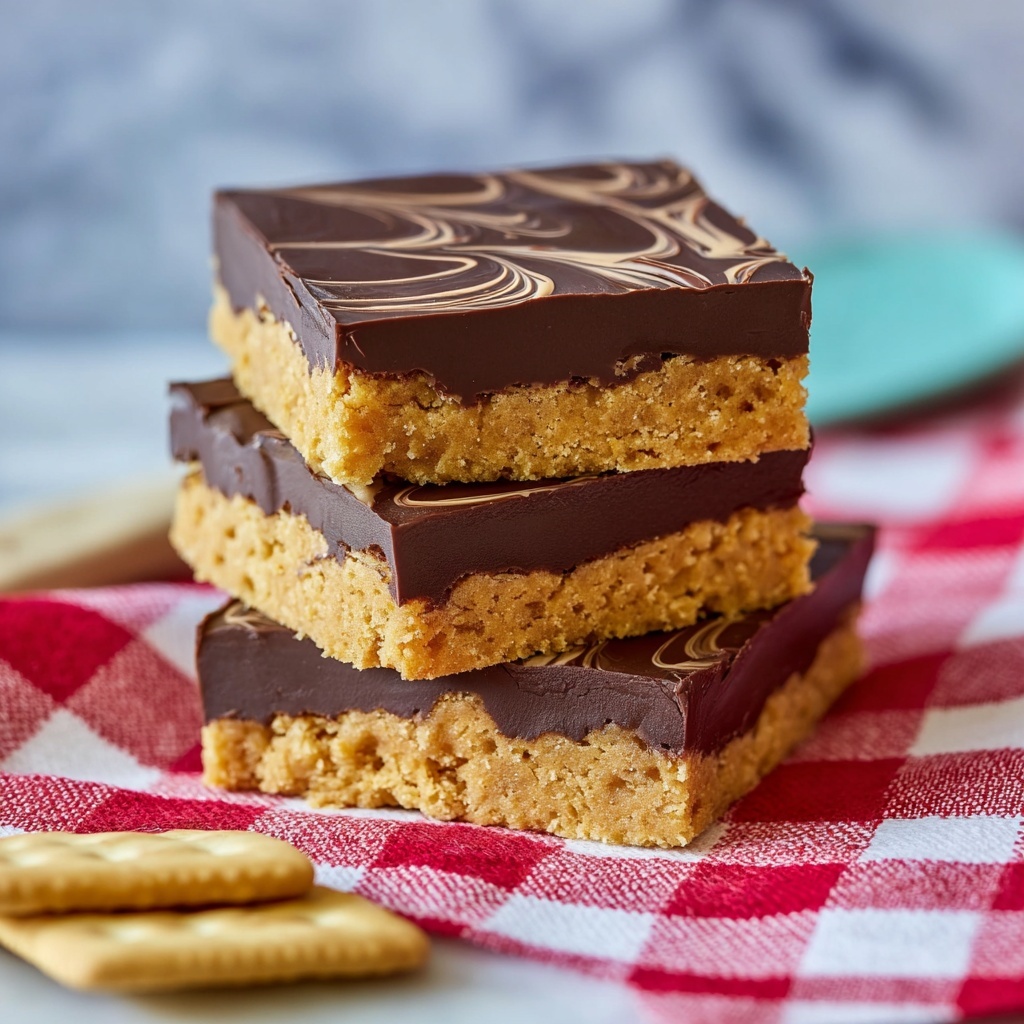
If you’re craving a nostalgic, sweet, and peanut buttery treat that’s as simple to make as it is delicious, this Lunch Lady Peanut Butter Bars Recipe is exactly what you need. These bars boast a perfect harmony of creamy peanut butter, crunchy graham cracker crumbs, and a luscious chocolate topping. Whether you need a crowd-pleaser for a potluck or a quick homemade snack, this recipe nails the childhood favorite vibe with minimal effort and maximum satisfaction.
Ingredients You’ll Need
This recipe relies on just a handful of basic ingredients, each playing a crucial role in creating the signature texture and flavor that make these bars irresistible. From the richness of butter to the smoothness of peanut butter and the crunch of graham cracker crumbs, every component contributes to this classic confection.
- Butter: Provides the rich, creamy base that binds the bars and gives them a smooth texture.
- Powdered sugar: Adds sweetness and helps achieve the perfect dense, fudge-like consistency.
- Graham cracker crumbs: Give the bars a delightful crunch and subtle hint of honey flavor.
- Creamy peanut butter: The star ingredient, for that luscious peanut buttery taste everyone loves.
- Semi-sweet chocolate chips: Melted on top for a glossy, decadent chocolate layer that balances the peanut butter perfectly.
How to Make Lunch Lady Peanut Butter Bars Recipe
Step 1: Prepare Your Pan
Start by lining an 8×8 inch baking dish with foil, leaving an overhang on the sides. This little trick makes it much easier to lift out the bars when they’re set and ready to slice, ensuring no crumb gets left behind.
Step 2: Melt the Butter
Place half a cup of butter in a large microwave-safe bowl and melt it until completely liquid. This will be the delicious fat that holds everything together, so smoothness here is key.
Step 3: Combine the Dry and Peanut Butter Ingredients
To the melted butter, add two cups of powdered sugar, one and a half cups of graham cracker crumbs, and a full cup of creamy peanut butter. These add both texture and that unmistakable peanut butter punch.
Step 4: Mix Until Perfectly Combined
Stir everything thoroughly until you have a uniform mixture with no streaks of peanut butter or clumps of sugar. This ensures every bite has that perfect balance of flavors and textures.
Step 5: Press the Mixture into the Pan
Evenly spread the peanut butter mixture into your prepared dish, pressing it down gently to create a firm, smooth base. This layer forms the heart of your bars.
Step 6: Melt the Chocolate Topping
In a medium microwave-safe bowl, melt 12 ounces of semi-sweet chocolate chips, heating in 30-second intervals and stirring between each until smooth and glossy. A silky chocolate top is what makes these bars absolutely irresistible.
Step 7: Pour and Chill
Spread the melted chocolate evenly over the peanut butter base, then place the entire pan in the refrigerator to chill for at least one hour. This step is essential for letting the bars set to their perfect firm texture.
Step 8: Slice and Serve
Once chilled and firm, use the foil overhang to lift the bars from the pan. Carefully slice into 16 portions using a sharp knife, then get ready to enjoy one of the sweetest, peanut butter-packed treats you’ve ever tasted!
How to Serve Lunch Lady Peanut Butter Bars Recipe

Garnishes
While these bars are superbly tasty on their own, adding a sprinkle of crushed peanuts or a light drizzle of melted white chocolate over the top can elevate their presentation and add an extra layer of texture and flavor.
Side Dishes
Serve these bars alongside a cold glass of milk or a cup of rich coffee or tea for a perfect pairing. The creamy drinks complement the peanut butter and chocolate, making your snack time feel like a mini celebration.
Creative Ways to Present
For gatherings, consider presenting the bars on a decorative tray lined with parchment paper and accented with fresh berries for a pop of color. You can also cut the bars into smaller bite-sized squares for a fun finger food option.
Make Ahead and Storage
Storing Leftovers
You can keep these bars fresh by storing them in an airtight container in the refrigerator for up to a week. Keep the layers intact by stacking them with parchment paper between each slice to prevent sticking.
Freezing
Lunch Lady Peanut Butter Bars Recipe works wonderfully for freezing. Wrap individual bars tightly in plastic wrap and place in a freezer-safe container. They can be frozen for up to three months without losing their fabulous taste.
Reheating
These bars are best enjoyed chilled, but if you prefer a softer texture, remove from the fridge a few minutes before serving. Avoid microwaving as it may soften the chocolate layer too much.
FAQs
Can I use crunchy peanut butter instead of creamy?
Absolutely! Using crunchy peanut butter will add a lovely, nutty texture to your bars, giving an extra crunch that some peanut butter fans might adore.
Is it possible to substitute the semi-sweet chocolate chips?
Yes, feel free to use milk chocolate or dark chocolate chips depending on your preference. Just keep in mind that darker chocolates will give a more intense chocolate flavor while milk chocolate adds extra sweetness.
Can I make this recipe without a microwave?
Of course! You can melt the butter and chocolate on the stove using a double boiler method, which allows gentle, even melting and prevents burning.
How long do these peanut butter bars last at room temperature?
They are best kept refrigerated, but if stored at room temperature in an airtight container, they should stay fresh for up to two days. Beyond that, refrigeration is recommended to maintain texture and taste.
Can I double this recipe for a larger batch?
Yes, doubling the ingredients and using a larger baking dish works well. Just ensure you also adjust your chilling time accordingly to allow the thicker layers to set properly.
Final Thoughts
If you’ve been searching for that perfect blend of nostalgia, simplicity, and pure peanut buttery joy, the Lunch Lady Peanut Butter Bars Recipe is your new best friend. Easy to whip up and impossible to resist, these bars invite you to pause, savor, and share a moment of sweet delight. Give them a try and watch them quickly become a beloved staple in your dessert rotation!
Print
Lunch Lady Peanut Butter Bars Recipe
- Prep Time: 15 minutes
- Cook Time: 0 minutes
- Total Time: 1 hour 15 minutes
- Yield: 16 servings
- Category: Dessert
- Method: No-Cook
- Cuisine: American
Description
Lunch Lady Peanut Butter Bars are a no-bake, easy-to-make treat featuring a buttery, peanut butter and graham cracker crumb base topped with a smooth layer of melted semi-sweet chocolate. Perfect for an effortless dessert or snack that requires minimal prep and no oven time.
Ingredients
Base
- 1/2 cup butter
- 2 cups powdered sugar
- 1–1/2 cups graham cracker crumbs
- 1 cup creamy peanut butter
Topping
- 12 ounces semi-sweet chocolate chips (melted)
Instructions
- Prepare the pan: Line an 8×8 inch baking dish with foil, leaving some overhang on the sides to make it easier to lift the bars out once set.
- Melt the butter: In a large microwave-safe bowl, melt the butter until fully liquid, usually about 30-45 seconds.
- Combine base ingredients: Add the powdered sugar, graham cracker crumbs, and creamy peanut butter to the melted butter in the bowl. Stir thoroughly to create an even, firm mixture.
- Press mixture into pan: Spread the peanut butter base mixture evenly into the bottom of the prepared baking dish, pressing down firmly to form a compact layer.
- Melt chocolate topping: In a medium microwave-safe bowl, melt the semi-sweet chocolate chips in 30-second intervals, stirring between each, until completely smooth and silky.
- Pour chocolate layer: Pour the melted chocolate over the peanut butter base and spread evenly to cover the entire surface.
- Chill to set: Refrigerate the pan for at least 1 hour or until the chocolate topping is firm to the touch.
- Slice and serve: Use the foil overhang to lift the set peanut butter bars from the dish. Carefully slice into 16 equal bars and serve.
Notes
- To easily cut the bars, chill them thoroughly before slicing to avoid the chocolate cracking.
- Substitute creamy peanut butter with natural or chunky peanut butter for variation in texture.
- Store bars in an airtight container in the refrigerator to maintain freshness and firmness.
- For a nut-free variation, swap peanut butter with sunflower seed butter and use allergy-friendly chocolate chips.


