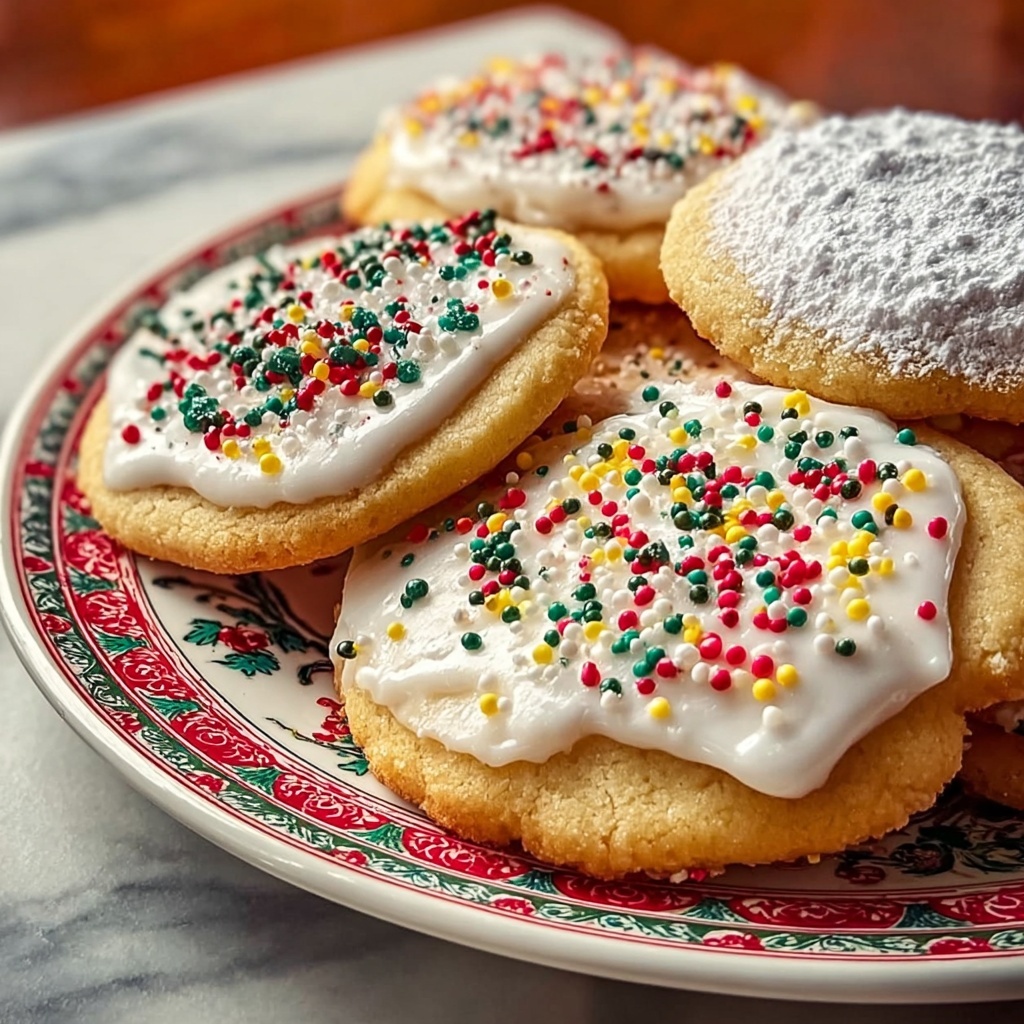
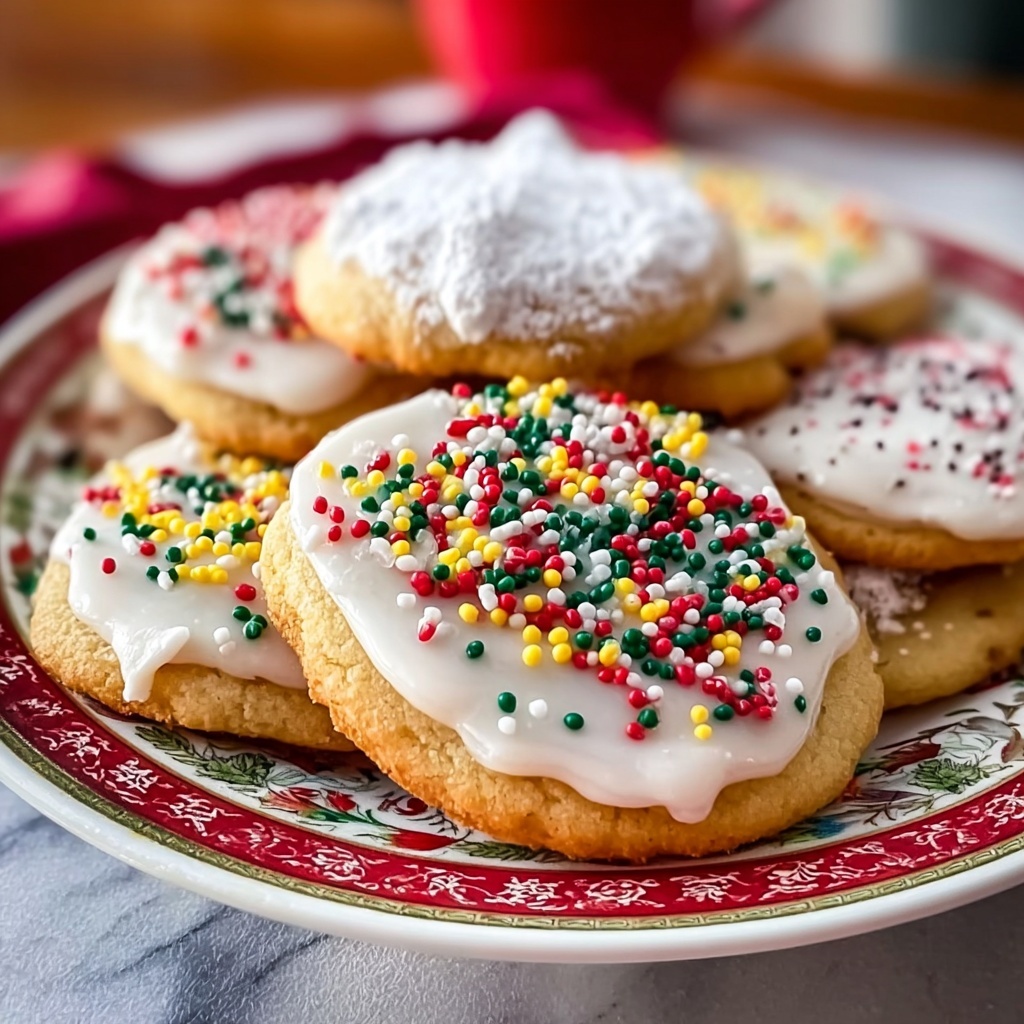
If you’re dreaming of festive, colorful treats that capture the magic of the season, then this Iced Sugar Holiday Lights Cookies Recipe is exactly what you need. These cookies are not only soft and buttery but come alive with vibrant icing that mimics the twinkling holiday lights we all adore. Perfect for sharing with loved ones or brightening up your holiday cookie platter, this recipe combines simple ingredients and a fun decorating step that will fill your kitchen with joy and the irresistible aroma of freshly baked sugar cookies.

Ingredients You’ll Need
Each ingredient in this Iced Sugar Holiday Lights Cookies Recipe plays an essential role to create that perfect balance of flavor, texture, and look. From the tender, buttery base to the smooth, colorful icing, these ingredients turn straightforward baking into a holiday celebration.
- All-purpose flour (2 3/4 cups): Provides the sturdy yet tender structure for your cookies.
- Baking soda (1 teaspoon): Helps the cookies rise for a soft texture.
- Baking powder (1/2 teaspoon): Adds extra lift so the cookies stay light.
- Unsalted butter, softened (1 cup): Delivers rich flavor and a melt-in-your-mouth crumb.
- White sugar (1 1/2 cups): Sweetens and tenderizes for delightful sweetness in every bite.
- Egg (1): Binds ingredients together and adds moisture.
- Vanilla extract (1 teaspoon): Provides that warm, familiar aroma perfect for holiday baking.
- Almond extract (1/2 teaspoon): Gives a subtle nutty nuance that makes the cookies taste extra special.
- Powdered sugar (3 cups): The base for the smooth icing that decorates the cookie “holiday lights.”
- Milk (2 to 3 tablespoons): Adjusts the icing to just the right consistency for piping and spreading.
- Food coloring (red, green, yellow, blue, etc.): Brings each cookie to vibrant life, mimicking festive holiday bulbs.
- Sprinkles or edible decorative glitter (optional): Adds sparkle and extra holiday cheer.
How to Make Iced Sugar Holiday Lights Cookies Recipe
Step 1: Preparing to Bake
Begin by preheating your oven to 375°F (190°C) and lining baking sheets with parchment paper. This simple prep ensures your cookies bake evenly and release easily from the tray, setting the stage for perfect cookies every time.
Step 2: Combining Dry Ingredients
In a medium bowl, whisk together the flour, baking soda, and baking powder. This step evenly distributes the leavening agents, which is crucial for the cookies to rise properly and maintain a soft texture.
Step 3: Creaming Butter and Sugar
Use an electric mixer to cream the softened butter and white sugar until light and fluffy, about 2 to 3 minutes. This process not only blends the ingredients but also incorporates air, contributing to a tender crumb in the finished cookies.
Step 4: Adding Egg and Extracts
Beat in the egg, vanilla, and almond extracts until the mixture is smooth and well combined. These ingredients add richness and layers of warm, inviting flavors classic for holiday cookies.
Step 5: Mixing in Dry Ingredients
Gradually fold the flour mixture into the wet ingredients, mixing just until combined. Overmixing can make the cookies tough, so be gentle here to keep them soft.
Step 6: Shaping the Cookies
Roll the dough into small balls and place them on the prepared baking sheets, spacing them about 2 inches apart. Flatten each ball slightly with a glass bottom or your hand to create the perfect base for your holiday light design.
Step 7: Baking
Bake for 8 to 10 minutes until the cookies are lightly golden at the edges. Then, let them cool on the baking sheet for 5 minutes before transferring to a wire rack to cool completely—cool cookies hold their shape better once decorated.
Step 8: Making the Icing
Combine powdered sugar and milk, starting with 2 tablespoons and adding more as needed, until the icing is smooth and pourable. This is your canvas, so get the consistency just right for easy decorating.
Step 9: Coloring the Icing
Divide the icing into separate bowls and add different food coloring drops to each. This step is where the magic happens, turning simple sugar cookies into vibrant holiday light replicas.
Step 10: Decorating the Cookies
Once cooled, use a piping bag or a small spatula to carefully decorate each cookie with the colored icing in the shapes of holiday lights. This part is especially fun and lets your creativity shine.
Step 11: Adding Sparkle
Sprinkle edible glitter or holiday-themed sprinkles on top of the icing while it’s still wet for an extra festive touch that twinkles just like real lights.
Step 12: Setting the Icing
Allow the icing to dry completely before storing the cookies to prevent smudging and keep your holiday creations looking picture-perfect.
How to Serve Iced Sugar Holiday Lights Cookies Recipe
Garnishes
Consider adding festive garnishes such as crushed candy canes or mini edible pearls atop the colored icing to enhance the look and add delightful texture contrasts to your Iced Sugar Holiday Lights Cookies Recipe.
Side Dishes
Pair these cookies with a warm cup of spiced hot chocolate, eggnog, or a simple glass of milk to balance the sweetness and make your holiday treat moments even cozier.
Creative Ways to Present
Arrange your cookies on a decorative platter shaped like a Christmas tree or string them together on a ribbon to make edible garlands. These whimsical presentations turn your cookies into festive decor as well as delicious goodies.
Make Ahead and Storage
Storing Leftovers
Store your decorated cookies in an airtight container at room temperature for up to one week. Keeping them away from heat and humidity ensures the icing stays intact and the cookies remain soft.
Freezing
You can freeze undecorated cookie dough balls for up to 3 months. To freeze decorated cookies, place them in a single layer on a baking sheet first, freeze until firm, then stack with parchment paper between layers inside a sealed container.
Reheating
Since these cookies are best enjoyed soft, avoid microwaving as it may melt the icing. Instead, bring frozen cookies to room temperature before serving to preserve their perfect texture and decoration.
FAQs
Can I use different extracts in this recipe?
Absolutely! While vanilla and almond extracts are classic, you can experiment with lemon or peppermint extracts to tweak the flavor to your liking.
What type of food coloring works best for icing?
Gel food coloring is ideal because it provides vibrant color without thinning the icing, helping maintain that easy-to-pipe consistency.
How long does the icing take to dry?
Icing usually takes about 1 to 2 hours to dry at room temperature, depending on humidity. Make sure it is fully set before storing to prevent smudging.
Are these cookies suitable for children to decorate?
Definitely! Decorating cookies is a wonderful holiday activity for kids, just be sure to supervise when using piping bags or spreading the icing.
Can I make these cookies gluten-free?
You can substitute all-purpose flour with a gluten-free baking blend, but results may vary slightly in texture. Be sure to use a blend that contains xanthan gum for best results.
Final Thoughts
Making the Iced Sugar Holiday Lights Cookies Recipe is more than just baking; it’s creating joyful moments and memories shared with family and friends. The ease of the recipe combined with the fun of colorful decoration makes it a delightful holiday tradition. I genuinely encourage you to try this recipe and watch your kitchen come alive with flavor, color, and holiday cheer.
Print
Iced Sugar Holiday Lights Cookies Recipe
- Prep Time: 0h 30m
- Cook Time: 0h 10m
- Total Time: 0h 40m
- Yield: Approximately 3 dozen cookies
- Category: Dessert
- Method: Baking
- Cuisine: American
Description
Iced Sugar Holiday Lights Cookies are festive, buttery sugar cookies decorated with colorful icing to resemble holiday lights. These soft, sweet treats are perfect for holiday celebrations and gift-giving, featuring a tender crumb and vibrant, customizable decorations.
Ingredients
Dry Ingredients
- 2 3/4 cups all-purpose flour
- 1 teaspoon baking soda
- 1/2 teaspoon baking powder
Wet Ingredients
- 1 cup unsalted butter, softened
- 1 1/2 cups white sugar
- 1 egg
- 1 teaspoon vanilla extract
- 1/2 teaspoon almond extract
Icing Ingredients
- 3 cups powdered sugar
- 2 to 3 tablespoons milk
- Food coloring (red, green, yellow, blue, etc.)
- Sprinkles or edible decorative glitter (optional)
Instructions
- Preheat Oven: Preheat your oven to 375°F (190°C). Line several baking sheets with parchment paper to prevent cookies from sticking.
- Mix Dry Ingredients: In a medium bowl, whisk together the all-purpose flour, baking soda, and baking powder. Set aside.
- Cream Butter and Sugar: In a large bowl, cream together the softened butter and white sugar until smooth and fluffy using an electric mixer. This should take about 2-3 minutes.
- Add Egg and Extracts: Beat in the egg, vanilla extract, and almond extract until well combined.
- Combine Flour Mixture: Gradually add the flour mixture to the creamed mixture, mixing just until incorporated. Avoid overmixing to maintain tender cookies.
- Shape Cookies: Roll the dough into small balls and place them on the prepared baking sheets, spacing them about 2 inches apart. Flatten each ball slightly with the bottom of a glass or the palm of your hand.
- Bake Cookies: Bake the cookies in the preheated oven for 8 to 10 minutes, or until they are lightly golden at the edges. Remove them from the oven and allow them to cool on the baking sheets for about 5 minutes before transferring to a wire rack to cool completely.
- Prepare Icing: While the cookies are cooling, in a medium bowl, mix the powdered sugar and 2 tablespoons of milk until smooth. Adjust consistency with additional milk, a teaspoon at a time, to make the icing pourable.
- Color Icing: Divide the icing into small bowls and add a few drops of food coloring to each bowl to create your desired colors for decorating holiday lights.
- Decorate Cookies: Once the cookies have cooled completely, use a piping bag or small spatula to decorate the cookies with the colored icing, creating shapes that resemble holiday lights.
- Add Sprinkles: If desired, sprinkle edible glitter or colored sprinkles on top of the icing for extra sparkle.
- Dry and Store: Allow the decorated cookies to dry completely before storing them in an airtight container to keep them fresh.
Notes
- Ensure the butter is softened to room temperature for easy creaming and a tender cookie texture.
- Do not overmix the dough once the flour is added to avoid tough cookies.
- Use parchment paper or silicone baking mats to prevent sticking and ease cleanup.
- Adjust the thickness of the icing with milk carefully to make piping easier.
- These cookies can be stored in an airtight container at room temperature for up to a week.
- For a gluten-free version, substitute the all-purpose flour with a gluten-free baking blend.

