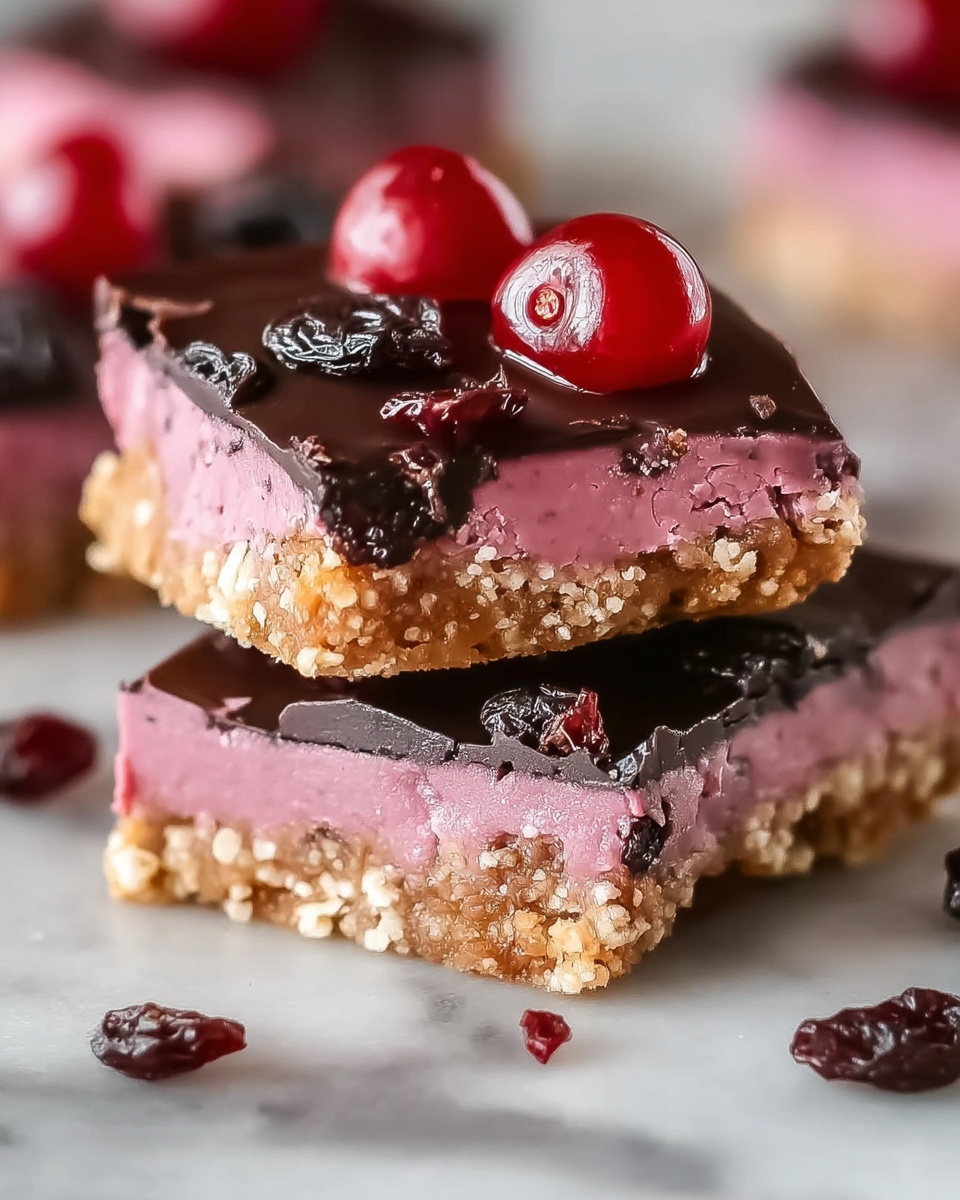
If you’ve ever dreamed of a treat that perfectly balances sweet, nutty, and fruity flavors with a chewy, melt-in-your-mouth texture, then you are going to be absolutely in love with this Homemade Cherry Mash Bars Recipe. It’s a nostalgic classic reinvented for today’s kitchens, combining luscious cherry chips, decadent peanut butter, and rich chocolate in one irresistible bar. These bars are the perfect little bites to satisfy your sweetest cravings and bring a wave of joy with every mouthful. Trust me, once you try making this recipe, it’ll become your go-to dessert masterpiece for gatherings and cozy nights alike.
Ingredients You’ll Need
This Homemade Cherry Mash Bars Recipe calls for a handful of simple, well-chosen ingredients that together create a perfect harmony of flavor and texture. Each component plays an important role—from creamy peanut butter adding richness to cherry chips lending that lovely, fruity pop and vibrant color.
- Granulated sugar: Key for sweetness and caramelization during cooking.
- Evaporated milk: Adds creaminess and depth to the candy base.
- Salt: Enhances all the sweet flavors beautifully.
- Large marshmallows: Provide chewiness and help blend everything smoothly.
- Unsalted butter: Brings richness and a smooth, melt-in-your-mouth texture.
- Cherry chips: Offer a burst of fruity flavor and gorgeous color; can substitute with white almond bark plus cherry extract and red coloring if needed.
- Vanilla extract: Rounds out the cherry flavor perfectly (omit if using cherry extract).
- Semi-sweet chocolate chips: Give a luscious chocolate layer that complements the fruity and nutty notes.
- Creamy peanut butter: Adds that iconic nutty decadence and silky texture.
- Salted peanuts (crushed): Provide a satisfying crunchy contrast and extra flavor dimension.
How to Make Homemade Cherry Mash Bars Recipe
Step 1: Prepare the Candy Base
Begin by combining the granulated sugar, evaporated milk, and salt in a heavy saucepan over medium heat. Stir constantly to dissolve the sugar and avoid burning. Once it starts to thicken and bubble, toss in the marshmallows and butter, stirring gently until everything melts into a creamy, velvety mixture. This is the luscious candy base that will hold all those fabulous flavors together in the perfect chewiness you crave.
Step 2: Incorporate the Cherry Flavor
Once your base is smooth, fold in the cherry chips, allowing them to melt slightly and infuse their signature fruity sweetness and striking color into the mix. If you’re opting for the white almond bark version instead, melt it gently and stir in cherry extract along with a few drops of red food coloring before folding in. Don’t forget to add vanilla extract now if you’re not using cherry extract—it deepens the aroma and ties all the flavors beautifully.
Step 3: Spread and Set the Candy Layer
Pour the warm cherry candy mixture evenly into a greased or parchment-lined baking pan. Use a spatula to gently press and smooth the surface so it chills evenly. This layer forms the chewy, fruity heart of your bars, so take your time ensuring it’s spread just right for that perfect bite every time.
Step 4: Make the Chocolate Peanut Butter Layer
While the cherry layer begins to cool, melt the semi-sweet chocolate chips with the creamy peanut butter in a microwave or double boiler, stirring until silky smooth. This glossy, nutty topping not only tastes heavenly but also adds an indulgently rich contrast to the fruity candy base below. Pour it evenly over the set cherry layer and smooth it out with a spatula for a beautiful finish.
Step 5: Add the Crunch and Chill
Sprinkle the crushed salted peanuts generously over the chocolate peanut butter layer while it’s still warm so they stick nicely. Press them in gently to ensure every bite has that delightful crunch. Refrigerate the entire pan for at least an hour, or until the bars are fully set and easy to slice into perfect squares.
How to Serve Homemade Cherry Mash Bars Recipe
Garnishes
To elevate these bars even further, consider garnishing with a light dusting of powdered sugar or a drizzle of white chocolate. A few fresh cherries on the side create a charming presentation and emphasize the fruity flair that makes this recipe so special.
Side Dishes
These bars shine beautifully when served alongside a scoop of creamy vanilla ice cream or a cup of freshly brewed coffee. The combination of warm beverage or smooth ice cream with these rich and chewy bars is downright irresistible and makes any moment feel like a mini celebration.
Creative Ways to Present
For a party or festive gathering, try cutting the bars into bite-sized squares and arranging them on a decorative platter lined with colorful doilies or parchment paper. Wrapping individual bars in wax paper tied with a festive ribbon can turn them into charming edible favors that your guests will rave about.
Make Ahead and Storage
Storing Leftovers
Leftover Homemade Cherry Mash Bars Recipe treats can be stored in an airtight container at room temperature for up to 3 days. If your kitchen is warm, keeping them in the refrigerator is best to maintain their shape and freshness without losing any of that beloved chewy texture.
Freezing
Want to keep these bars longer? Wrap individual squares tightly in plastic wrap and place them in a freezer-safe container or zip bag. They freeze wonderfully for up to 3 months, making it easy to enjoy your favorite treat anytime you want with minimal effort.
Reheating
If you prefer a softer bite after freezing, allow the bars to thaw at room temperature or microwave for about 10 seconds to gently warm them. Be careful not to overheat so you preserve their perfect chewy texture and the rich flavors remain intact.
FAQs
Can I use fresh cherries instead of cherry chips?
Fresh cherries would add moisture, which may affect the texture of the bars. Cherry chips are specially formulated to retain their shape and flavor when heated, so it’s best to stick with them or the almond bark and extract substitute for the perfect result.
Is it possible to make these bars nut-free?
Yes! You can replace peanut butter with a nut-free spread such as sunflower seed butter and omit the salted peanuts or swap them for seeds like roasted pumpkin seeds to keep the crunch without nuts.
How long do these bars last once made?
Stored properly in an airtight container, these bars stay fresh for up to 3 days at room temperature, or up to a week refrigerated. Beyond that, their texture and flavor start to decline.
Can I make this recipe vegan?
Adapting this recipe to be fully vegan can be tricky because of marshmallows, butter, evaporated milk, and chocolate chips. However, using vegan marshmallows, plant-based butter, nondairy evaporated milk alternatives, and dairy-free chocolate chips can get you close!
What’s the best way to cut the bars cleanly?
Chill the bars thoroughly before slicing. Use a sharp knife warmed under hot water and wiped dry for smooth, clean cuts without crumbling or sticking.
Final Thoughts
There’s something truly magical about the Homemade Cherry Mash Bars Recipe—each bite is a celebration of delightful flavors and textures that brings back fond memories and creates new favorites to share. If you’re ready to treat yourself and your loved ones, don’t hesitate to dive in and make these luscious bars. I promise they’ll become a treasured part of your baking repertoire, filled with joy and sweetness every time.
Print
Homemade Cherry Mash Bars Recipe
- Prep Time: 15 minutes
- Cook Time: 10 minutes
- Total Time: 25 minutes
- Yield: 24 bars
- Category: Dessert
- Method: Stovetop
- Cuisine: American
Description
Delicious Homemade Cherry Mash Bars combine a rich, creamy cherry-flavored center with a smooth peanut butter and chocolate topping. These bars are a nostalgic treat featuring melted marshmallows, cherry chips, and a crunchy peanut crust, perfect for dessert or a sweet snack.
Ingredients
For the Cherry Mash Base
- 2 cups granulated sugar
- ⅔ cup evaporated milk
- ¼ teaspoon salt
- 12 large marshmallows
- ½ cup unsalted butter
- 6 ounces cherry chips (or substitute with 6 ounces white almond bark, 1 teaspoon cherry extract, and red food coloring)
- 1 teaspoon vanilla extract (omit if using cherry extract)
For the Topping
- 12 ounces semi-sweet chocolate chips
- ¾ cup creamy peanut butter
- 1 cup salted peanuts, crushed
Instructions
- Prepare the Cherry Mash Base: In a large saucepan, combine the granulated sugar, evaporated milk, salt, marshmallows, unsalted butter, and cherry chips (or the white almond bark with cherry extract and red food coloring). Heat the mixture over medium heat, stirring constantly to ensure the sugar dissolves and the ingredients melt smoothly together.
- Cook until Smooth and Thickened: Continue stirring the mixture until it becomes smooth and thickened, resembling a creamy, cherry-flavored candy base. Remove from heat immediately to prevent burning.
- Add Flavoring: Stir in the vanilla extract if you are using cherry chips; if you substituted with cherry extract, skip this step. Mix thoroughly to blend the flavors evenly.
- Transfer to Pan and Cool: Pour the cherry mash mixture into a greased or parchment-lined 9×13 inch baking pan. Spread it evenly with a spatula. Let it cool at room temperature until it sets enough to hold its shape, about 15-20 minutes.
- Prepare and Add the Topping: Melt the semi-sweet chocolate chips and creamy peanut butter together in a microwave-safe bowl or over a double boiler, stirring until smooth. Pour this chocolate peanut butter mixture evenly over the set cherry mash base. Sprinkle the crushed salted peanuts evenly on top, pressing lightly to adhere. Let the bars cool completely, then cut into approximately 24 squares before serving.
Notes
- For the cherry chips substitute, add red food coloring gradually until you reach the desired cherry color.
- Using salted peanuts adds a nice contrast to the sweetness; you can adjust saltiness by using unsalted peanuts and seasoning to taste.
- Make sure to stir constantly when cooking the cherry mash base to avoid burning the sugar and ensure smooth texture.
- If you prefer a firmer bar, chill the pan in the refrigerator after assembling before cutting.
- Store bars in an airtight container at room temperature for up to 3 days or refrigerate for longer freshness.

