
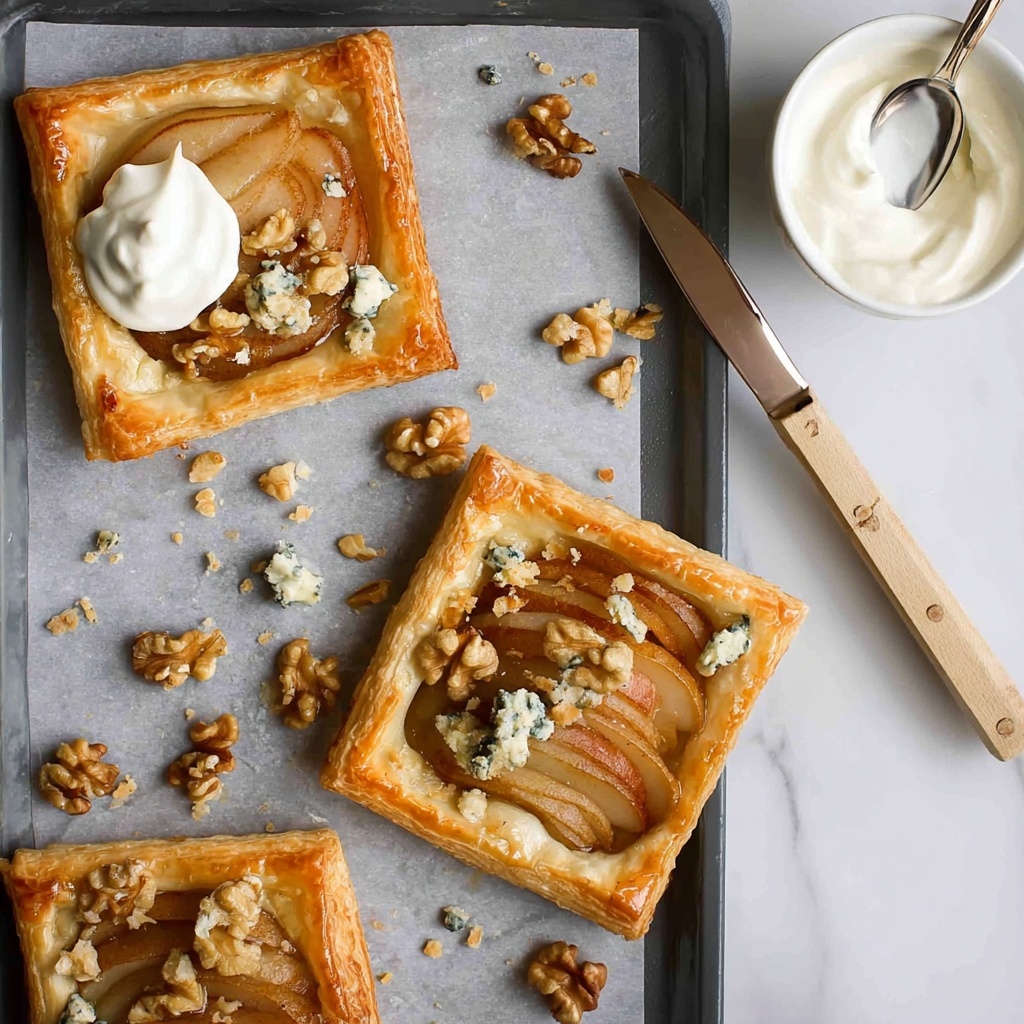
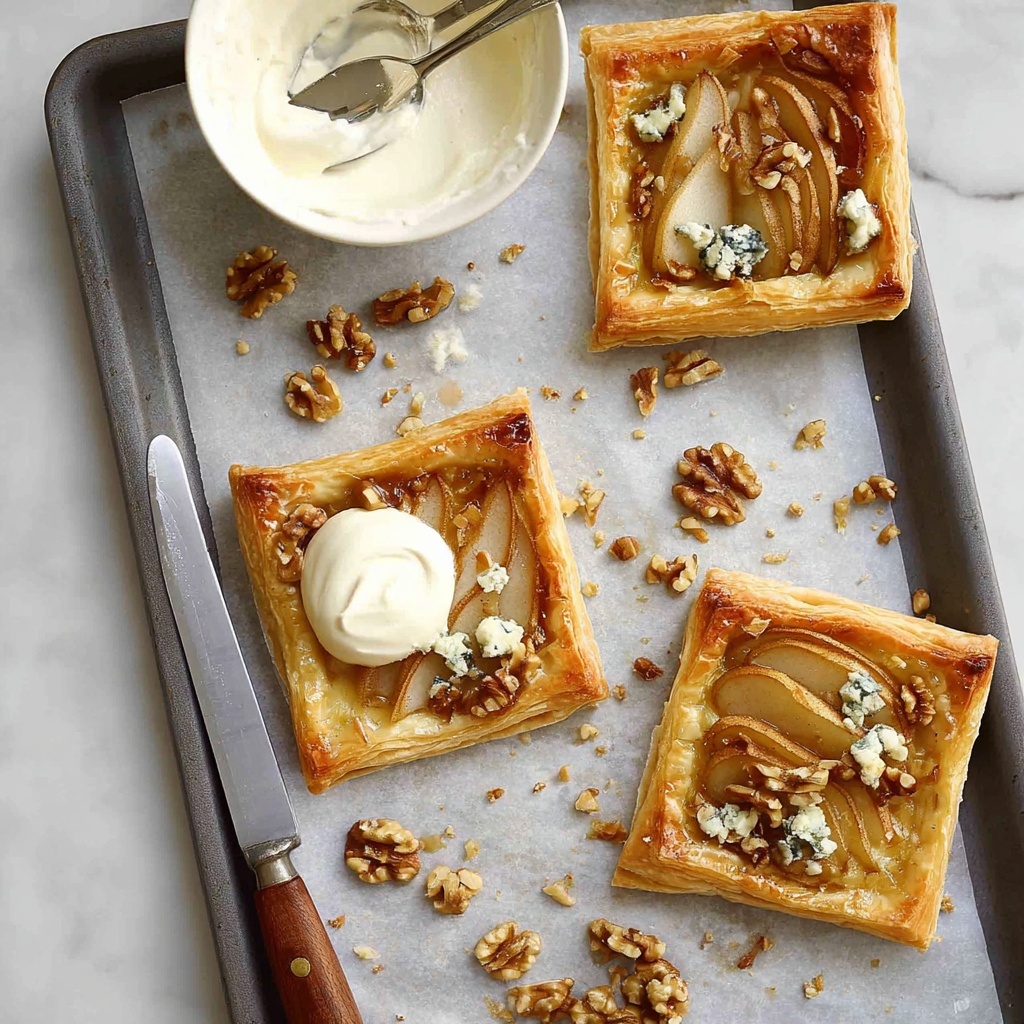
If you love the irresistible blend of sweet and savory, you are absolutely going to adore this Caramelized Pears and Blue Cheese Tarts Recipe. Imagine tender, juicy pears gently caramelized in a buttery, brown sugar syrup, resting atop flaky puff pastry and crowned with bold, creamy blue cheese and crunchy walnuts. Each bite delivers a harmonious mixture of textures and flavors that feels both sophisticated and comfortingly homemade. Whether you’re aiming to impress guests or treat yourself, these tarts bring a unique elegance to any table with surprisingly simple ingredients and straightforward steps.
Ingredients You’ll Need
The beauty of this Caramelized Pears and Blue Cheese Tarts Recipe lies in its straightforward ingredients. Each element plays a vital role—the puff pastry gives a golden, flaky base, the pears bring juicy sweetness, while blue cheese adds an assertive tang that cuts through the richness. The walnuts provide a lovely crunch, making every bite a delightful experience.
- 1 sheet store bought frozen puff pastry, thawed (25 cm x 25cm / 10″ x 10″): This easy-to-use base creates a buttery, flaky tart shell without fuss.
- 2 pears: Choose ripe but firm pears to ensure they soften perfectly without becoming mushy.
- 2 tbsp unsalted butter: Essential for caramelizing the pears and developing a luscious syrup.
- 1/3 cup brown sugar, lightly packed: Adds rich sweetness and helps create that beautiful caramel glaze.
- Pinch of salt: Balances the flavors and enhances the overall taste.
- 1 egg, lightly beaten: Used to brush the pastry borders for a gorgeous golden finish.
- 1/3 to 1/2 cup crumbled blue cheese (I used gorgonzola): Provides a bold, salty contrast to the sweet pears.
- 3 tbsp walnuts, roughly chopped: Adds texture and a nutty depth to complete the tarts.
How to Make Caramelized Pears and Blue Cheese Tarts Recipe
Step 1: Preheat and Prepare
Start by heating your oven to 180°C (350°F) and lining a baking tray with parchment paper. This simple prep step ensures your tarts bake evenly and come off the tray with ease.
Step 2: Cut the Puff Pastry
Slice the thawed puff pastry into four equal squares. This division forms the perfect size for individual tarts — ideal for sharing or serving as delightful appetizers.
Step 3: Score the Pastry Borders
Gently score a border about 2/3 inch (1.5 cm) from the edges of each puff pastry square without cutting through. This step creates a lovely raised edge once baked, helping the filling stay beautifully contained.
Step 4: Slice the Pears
Core the pears and slice each quarter into 3 or 4 thin slices. Uniform slices cook evenly and look stunning piled on the pastry later.
Step 5: Caramelize the Pears
Place the pear slices into a small frying pan with butter, brown sugar, and a pinch of salt over medium-high heat. Cook for about 5 minutes, stirring occasionally, until the pears soften and the mixture thickens into a rich syrup that’s nothing short of magical.
Step 6: Cool and Egg Wash
Set the pear mixture aside to cool for 5 minutes. Meanwhile, brush the pastry borders with the beaten egg—this little trick will give your tarts a stunning, golden shine once baked.
Step 7: Assemble the Tarts
Carefully spoon the caramelized pear mixture onto each puff pastry square, staying within the scored borders. Drizzle some of the caramel syrup over the pears for extra flavor and gloss.
Step 8: Bake to Perfection
Pop the tarts in the oven for 20 to 25 minutes or until golden brown and puffed. Add the walnuts onto the baking tray during the last 5 minutes so they toast gently, adding a beautiful crunch.
Step 9: Cool Slightly
Remove the tarts from the oven and let them rest for 5 minutes. This short cooling period allows the flavors to settle and prevents burning your mouth with molten hot filling.
Step 10: Finish with Blue Cheese and Walnuts
Generously scatter the crumbled blue cheese atop the warm tarts, followed by the toasted walnuts. Drizzle any remaining caramel syrup over for that final touch of indulgence. Serve immediately and enjoy the balance of sweet, salty, crunchy, and creamy in every bite.
How to Serve Caramelized Pears and Blue Cheese Tarts Recipe
Garnishes
Fresh herbs like thyme or rosemary are wonderful garnishes that add a fragrant, earthy note to the tarts. A dollop of creme fraiche or plain yogurt on the side can tone down the intensity of the blue cheese, creating a pleasant creaminess that complements the caramelized pears.
Side Dishes
These tarts pair beautifully with a crisp green salad tossed in a light vinaigrette—this contrast helps balance the richness of the dish. Serving alongside a glass of chilled white wine or dry rosé makes it an exceptional appetizer or a light lunch option.
Creative Ways to Present
Try serving the tarts on a rustic wooden board with small bowls of extra blue cheese and walnuts for guests to customize their bites. Alternatively, arrange smaller tartlets on individual plates garnished with microgreens for a refined party presentation. Either way, they’re sure to steal the show.
Make Ahead and Storage
Storing Leftovers
If you happen to have leftovers (though that rarely happens!), store the tarts in an airtight container in the refrigerator. They will stay fresh for up to 2 days without losing too much of their delightful texture and flavor.
Freezing
While freezing is an option, it’s best to freeze the unbaked assembled tarts before baking. Wrap them tightly in plastic wrap and freeze for up to 1 month. When ready to enjoy, bake directly from frozen, adding a few extra minutes to the cooking time for perfect results.
Reheating
To revive the fresh-baked taste and texture, reheat the tarts in a preheated oven at 160°C (320°F) for about 10 minutes. Avoid microwaving, as this can make the pastry soggy and the blue cheese oily.
FAQs
Can I use a different type of cheese?
Absolutely! While blue cheese offers a fantastic sharpness, goat cheese or feta can make interesting substitutes if you prefer a milder flavor. Just keep in mind how the cheese pairs with the sweetness of the pears.
What variety of pears works best?
Firm pears like Bosc, Anjou, or Bartlett are ideal because they hold their shape well during caramelization without turning mushy or losing flavor.
Is it possible to make this recipe vegan?
Yes, you can swap the butter for a plant-based alternative and use vegan puff pastry. For the cheese, try a tangy vegan cheese or omit it entirely, perhaps adding toasted pecans for flavor and texture.
Can I make these tarts gluten-free?
Definitely! Just use gluten-free puff pastry available at many specialty stores or bakeries. The rest of the ingredients are naturally gluten-free, making this recipe adaptable for various dietary needs.
How do I prevent the puff pastry from getting soggy?
Scoring the borders and brushing them with egg wash helps create a barrier that keeps the filling contained. Also, don’t overload the pastry with too much syrup—reserving some to drizzle after baking is a great trick to avoid sogginess.
Final Thoughts
This Caramelized Pears and Blue Cheese Tarts Recipe is truly a wonderful way to celebrate the harmonious dance between sweet fruit and tangy cheese atop flaky pastry. Each step feels manageable, and the results are impressive, perfect for treating yourself or sharing with friends. I can’t wait for you to give this recipe a try and savor the incredible flavors and textures—trust me, it’s one of those dishes that keeps people coming back for more.
Print
Caramelized Pears and Blue Cheese Tarts Recipe
- Prep Time: 10 minutes
- Cook Time: 30 minutes
- Total Time: 40 minutes
- Yield: 4 tarts
- Category: Appetizer
- Method: Baking
- Cuisine: Western
Description
These elegant Caramelized Pears and Blue Cheese Tarts blend sweet, buttery caramelized pears with tangy, creamy blue cheese on a flaky puff pastry base. Crisp walnuts add a delightful crunch, making this a perfect sophisticated appetizer or light dessert that balances sweetness and savory flavors beautifully.
Ingredients
Pastry
- 1 sheet store bought frozen puff pastry, thawed (25 cm x 25 cm / 10″ x 10″)
Fruit and Caramel
- 2 pears
- 2 tbsp unsalted butter
- 1/3 cup brown sugar, lightly packed
- Pinch of salt
Toppings
- 1 egg, lightly beaten
- 1/3 to 1/2 cup crumbled blue cheese (gorgonzola recommended)
- 3 tbsp walnuts, roughly chopped
Instructions
- Preheat the oven. Preheat your oven to 180°C (350°F) and line a baking tray with parchment paper to prevent sticking and promote even baking.
- Prepare the pastry. Cut the thawed puff pastry sheet into four equal squares. Transfer these squares carefully onto the prepared baking tray.
- Score the pastry borders. Using a knife, lightly score a 2/3-inch (1.5 cm) border around each square without cutting all the way through, to help the edges rise during baking.
- Slice the pears. Core the pears and cut each quarter into 3 or 4 thin slices for easy caramelization and layering on the tart.
- Caramelize the pears. In a small frying pan or saucepan over medium-high heat, combine the pear slices, butter, brown sugar, and a pinch of salt. Cook for about 5 minutes, stirring occasionally, until pears soften and the mixture turns into a rich syrup.
- Cool and egg wash. Remove the pan from heat and let the pear mixture cool for 5 minutes. Meanwhile, brush the scored borders of each pastry square with the beaten egg to achieve a golden edge while baking.
- Assemble the tarts. Spoon the pear mixture evenly onto the center of each pastry square, staying within the scored border. Drizzle some of the caramel syrup from the pan over the pears.
- Bake and toast walnuts. Bake the tarts in the preheated oven for 20 to 25 minutes, until the pastry is deep golden brown. Add the roughly chopped walnuts to the baking tray for the last 5 minutes to toast them lightly.
- Cool slightly. Remove the tarts from the oven and allow them to cool for 5 minutes to set and cool slightly before adding toppings.
- Finish and serve. Top each tart with the crumbled blue cheese, scatter the toasted walnuts over them, and drizzle any remaining syrup on top. Serve immediately, optionally with yoghurt on the side for added creaminess.
Notes
- Note 1: Cutting the pastry into four equal squares ensures even cooking and presentation.
- Note 2: Scoring the border helps the pastry puff up around the edges, creating a raised crust that holds the filling.
- Note 3: Brushing the pastry border with egg wash gives a glossy, golden finish to the edges when baked.
- Optionally serve with plain or Greek yoghurt for a creamy contrast.
