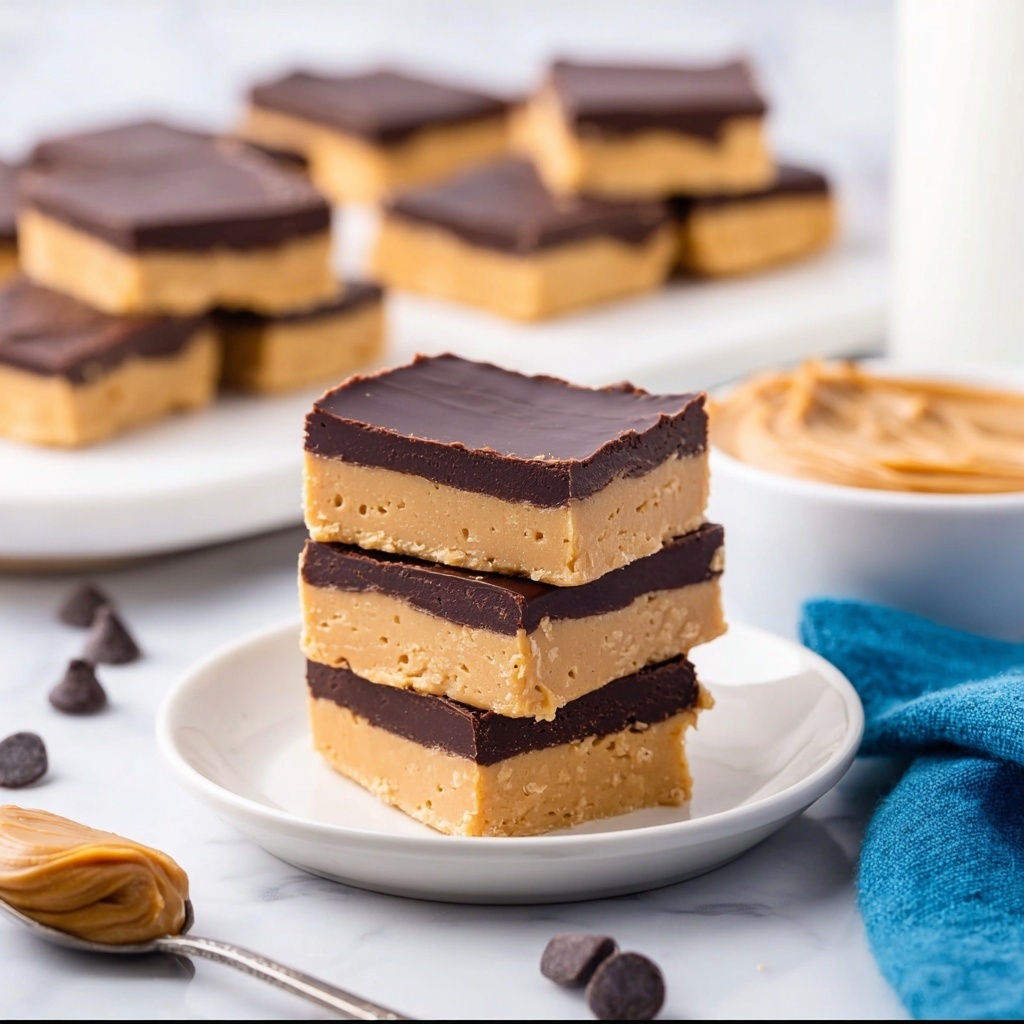
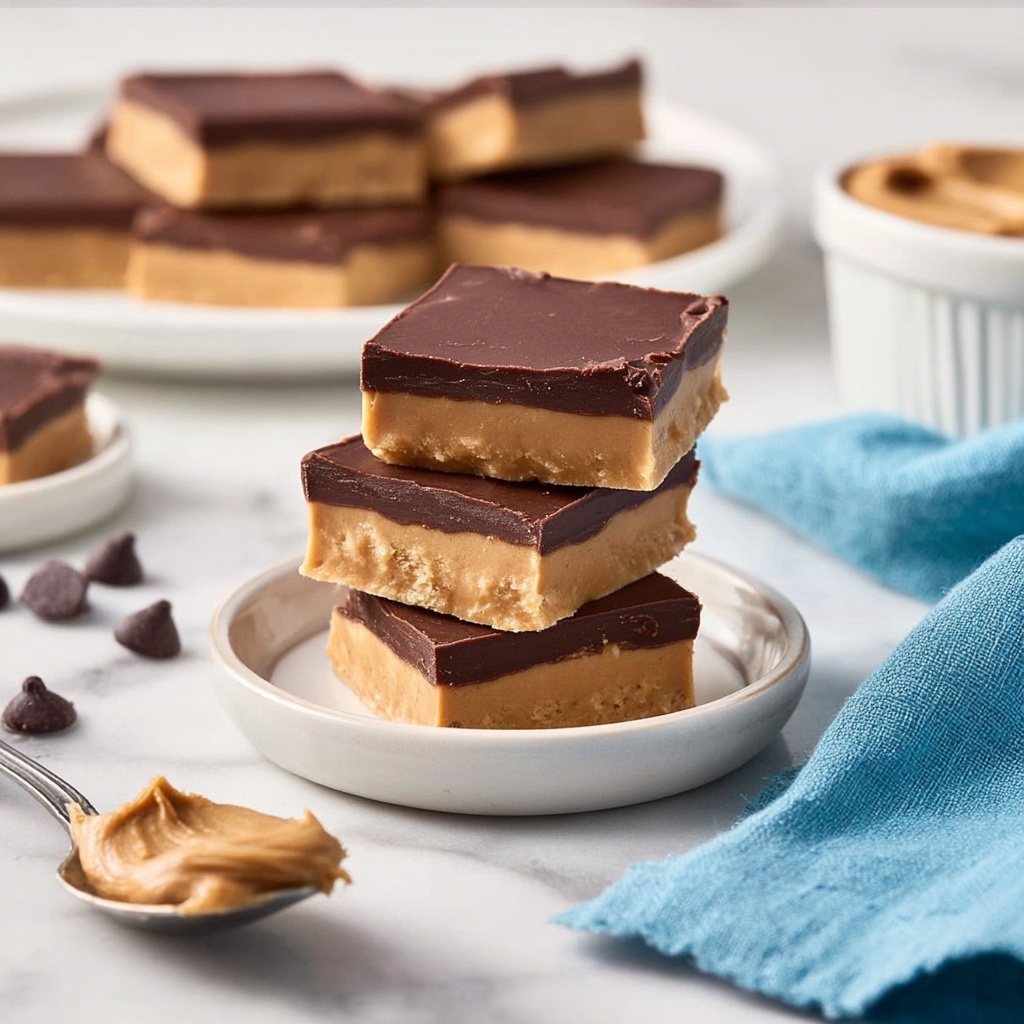
If you’re a lover of peanut butter and chocolate, then you are going to absolutely adore this Buckeye Bars Recipe. These bars combine the rich, creamy texture of peanut butter with a luscious layer of melted chocolate on top, creating a sweet, dreamy treat that’s simple to make but tastes like something from a fancy bakery. Whether you’re making them for a potluck, a cozy night in, or just because you deserve a little indulgence, these bars hit the perfect balance between nutty and chocolatey that’s downright irresistible.
Ingredients You’ll Need
Getting started on this Buckeye Bars Recipe means gathering a handful of straightforward ingredients, each playing an important role in creating that signature flavor and texture. The peanut butter gives the bars their richness and signature flavor, powdered sugar provides sweetness and structure, and the chocolate topping finishes everything off with glossy, melty perfection.
- Butter (1/2 cup, softened): Helps bind the peanut butter mixture and adds a silky mouthfeel.
- Creamy peanut butter (3 cups): The star of the dish, providing creaminess and that classic nutty flavor.
- Powdered sugar (4 cups): Sweetens and thickens the peanut butter layer to a perfect, sliceable consistency.
- Pure vanilla extract (1 1/2 tsp): Enhances the overall flavor with a subtle sweetness and aroma.
- Chocolate chips (12-ounce package, semi-sweet, about 2 cups): Melt down to create the glossy chocolate topping that contrasts the peanut butter base.
- Butter (1 tbsp): Added to chocolate chips while melting for smoothness and shine.
How to Make Buckeye Bars Recipe
Step 1: Prepare the Peanut Butter Layer
Start by placing the softened butter, creamy peanut butter, powdered sugar, and vanilla extract into a large bowl. Using an electric mixer, beat these ingredients together until smooth. The mixture will be thick and crumbly, but that’s exactly what you want for the perfect airy, dense peanut butter base.
Step 2: Press the Peanut Butter Dough
Line a 9×13-inch pan with parchment paper – this makes removing the bars a breeze later on. Transfer the peanut butter dough into the pan, pressing it firmly and evenly until it covers the entire bottom. Getting a compact and level base ensures every bite stays together beautifully.
Step 3: Melt the Chocolate Topping
In a microwave-safe bowl, combine the chocolate chips and the remaining tablespoon of butter. Microwave in 30-second increments, stirring well between each, until the mixture is fully melted and smooth. This silky chocolate will be spread over the peanut butter layer for that signature look and rich flavor contrast.
Step 4: Add the Chocolate Layer and Chill
Pour the melted chocolate evenly over the peanut butter layer and use a spatula to spread it out smoothly. Pop the pan into the refrigerator for at least 1 hour so the chocolate can firm up nicely. When chilled, lift the bars out using the parchment paper edges and transfer them to a cutting board for slicing.
Step 5: Slice and Chill Again
With a sharp knife, cut the cold bars into squares. For best texture and ease of serving, return them to the fridge for at least another hour to set completely. This extra chill time makes the bars perfect for handling and eating without making a mess.
How to Serve Buckeye Bars Recipe

Garnishes
While these bars are delightful on their own, you can add a few simple garnishes to elevate their presentation. A sprinkle of flaky sea salt on top of the chocolate adds a fantastic contrast and depth of flavor. For an added festive touch, drizzle a little white chocolate over the bars or dust them with mini crushed peanuts for crunch and visual interest.
Side Dishes
Buckeye Bars Recipe moments are best enjoyed with cozy accompaniments. Serve them alongside a scoop of vanilla ice cream or a dollop of whipped cream to lighten up the richness. If you’re enjoying them as a party treat, coffee or a cold glass of milk are classic companions that bring out the nutty chocolate goodness.
Creative Ways to Present
For a party presentation, arrange the bars on a rustic wooden board or colorful platter to make them pop visually. You might even sandwich two bars together with marshmallow fluff or extra peanut butter for a fun twist. Wrapping individual bars in parchment paper tied with twine makes for darling, gift-worthy treats anyone would love to receive.
Make Ahead and Storage
Storing Leftovers
Leftover Buckeye Bars stay fresh when stored in an airtight container in the refrigerator for up to one week. The cool environment keeps the chocolate solid and the peanut butter layer perfectly firm, so every bite remains as delicious as the first.
Freezing
If you want to prepare these bars well in advance or save some for later, they freeze beautifully. Wrap each bar individually in plastic wrap, then place them in a freezer-safe container or bag. They can be frozen for up to three months without losing texture or flavor.
Reheating
When you’re ready to enjoy frozen bars, simply thaw them overnight in the refrigerator. Because they are best served cool and firm, you don’t need to warm them up. However, if you prefer a softer texture, let them sit at room temperature for about 15 minutes before serving.
FAQs
Can I use crunchy peanut butter for Buckeye Bars Recipe?
Absolutely! Crunchy peanut butter will add a little extra texture to the bars, giving you delightful bites of peanuts throughout. Just keep in mind that it might alter the smoothness of the peanut butter layer slightly.
Is it necessary to refrigerate the bars?
Yes, refrigeration is crucial for Buckeye Bars Recipe to ensure the chocolate topping hardens properly and the peanut butter layer stays firm. Serving them cold also helps maintain their structure and makes slicing easier.
Can I make these bars vegan or dairy-free?
You can! Substitute the butter with a plant-based alternative and choose dairy-free chocolate chips. Make sure your peanut butter doesn’t contain any dairy additives, and you’ll have a delicious vegan version of Buckeye Bars.
How long do Buckeye Bars last at room temperature?
Because of the peanut butter and butter content, it’s best not to leave Buckeye Bars out for more than 2 hours. They can become soft and lose their firmness, so keep them chilled until ready to serve.
Can I use natural peanut butter in this recipe?
Natural peanut butter tends to be runnier, which may affect the consistency of the dough. If using natural peanut butter, consider chilling your mixture before pressing it into the pan to help it firm up properly.
Final Thoughts
If you’re familiar with classic Buckeye candies, you’re going to fall head over heels for this Buckeye Bars Recipe. It’s a no-fuss, crowd-pleasing dessert that blends the perfect balance of chocolate and peanut butter into every bar. Next time you want to whip up something sweet and reliably delicious, pull together these bars and watch them disappear faster than you can say “more please.” Trust me, this will become one of your favorite recipes to share and savor again and again.
Print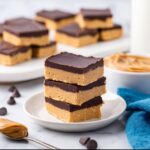
Buckeye Bars Recipe
- Prep Time: 10 minutes
- Cook Time: 0 minutes
- Total Time: 2 hours 10 minutes
- Yield: 12 bars
- Category: Dessert
- Method: No-Cook
- Cuisine: American
Description
Deliciously rich and peanut buttery Buckeye Bars featuring a creamy peanut butter base topped with a smooth, semi-sweet chocolate layer. These no-bake bars are easy to prepare, perfect for satisfying your sweet tooth with a blend of creamy and chocolatey flavors.
Ingredients
Peanut Butter Layer
- 1/2 cup butter, softened
- 3 cups creamy peanut butter
- 4 cups powdered sugar
- 1 1/2 teaspoons pure vanilla extract
Chocolate Topping
- 12-ounce package chocolate chips (approximately 2 cups, semi-sweet)
- 1 tablespoon butter
Instructions
- Prepare Peanut Butter Layer: In a large bowl, combine softened butter, creamy peanut butter, powdered sugar, and pure vanilla extract. Using an electric mixer, beat the mixture until smooth. Expect the dough to be thick and slightly crumbly but cohesive.
- Press Peanut Butter Dough: Line a 9×13-inch baking pan with parchment paper. Transfer the peanut butter dough into the pan and press firmly and evenly to cover the entire bottom of the pan, creating a solid base for the bars.
- Melt Chocolate Topping: Place chocolate chips and 1 tablespoon of butter into a microwave-safe bowl. Microwave in 30-second bursts, stirring thoroughly between each interval, until the chocolate and butter melt together into a smooth, glossy mixture.
- Spread Chocolate over Bars: Pour the melted chocolate evenly over the peanut butter base in the pan. Use a spatula to spread it out into an even layer across the surface. Then, place the pan in the refrigerator and chill for 1 hour to set the chocolate layer.
- Slice and Chill: After chilling, carefully lift the bars out of the pan by pulling up on the parchment paper lining. Transfer to a cutting board and slice into 12 squares using a sharp knife. Return the bars to the refrigerator and chill for at least another hour before serving to ensure the layers are fully set.
Notes
- Use creamy peanut butter for the smoothest texture. Chunky peanut butter can alter the consistency.
- Ensure the butter is softened before mixing for easier blending.
- Microwave times may vary, so stir frequently when melting the chocolate to prevent burning.
- Line the pan with parchment paper for easy removal and clean cutting.
- Store leftover bars in an airtight container in the refrigerator for up to one week.


