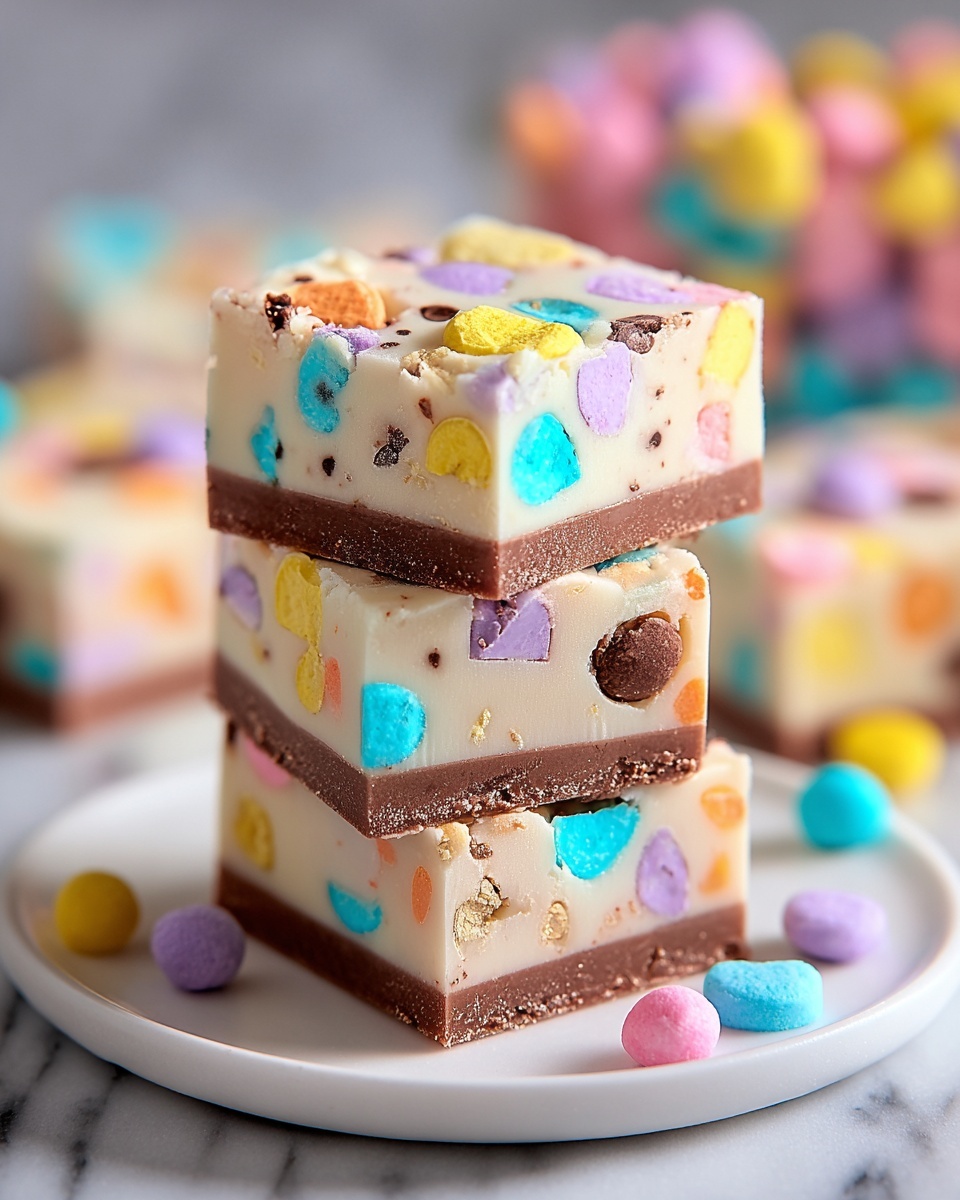
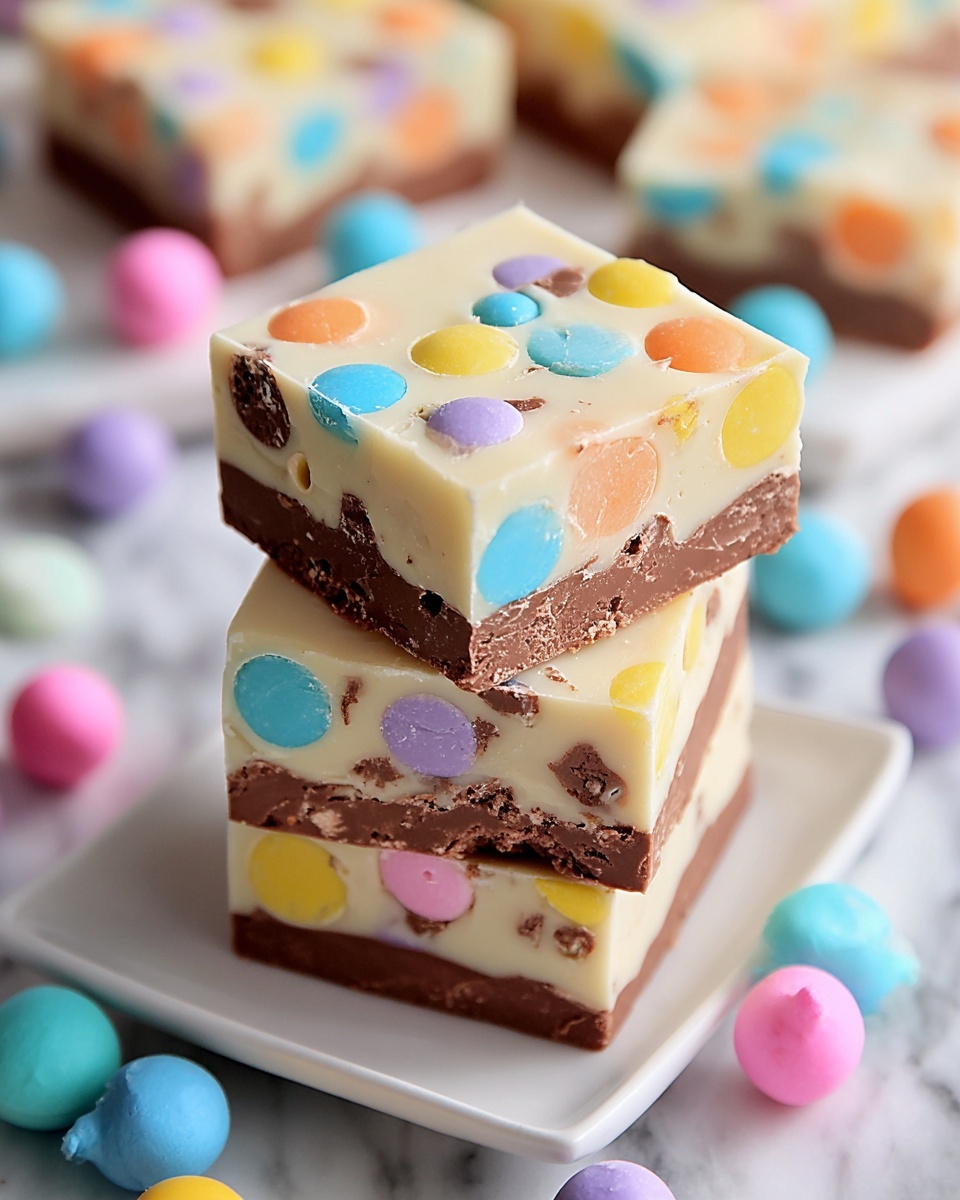
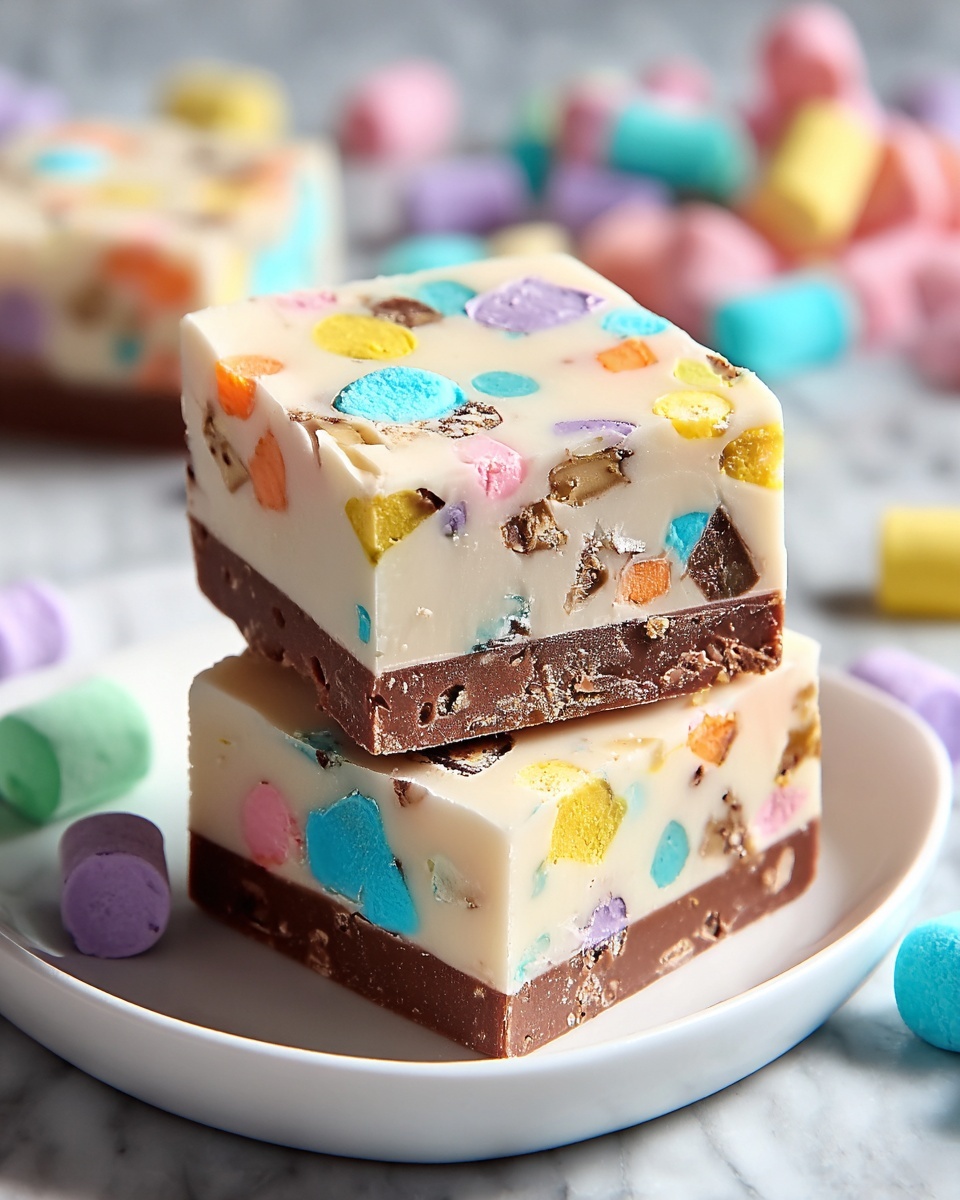
Get ready to make a delightful treat that captures the joyful spirit of spring with every bite. This Easter Candy Fudge Recipe combines creamy white chocolate, sweetened condensed milk, and colorful Easter candies to create a rich, festive fudge that’s as beautiful to look at as it is delicious to enjoy. Whether you’re preparing for an Easter gathering or simply craving a cheerful, sweet snack, this fudge is irresistibly smooth with crunchy surprises baked right in. Trust me, once you try this Easter Candy Fudge Recipe, it’s going to become your go-to for seasonal celebrations and beyond!
Ingredients You’ll Need
The magic of this Easter Candy Fudge Recipe lies in its simple yet vibrant ingredients. Each component plays a key role in the fudge’s creamy texture, sweet flavor, and playful look, making the whole experience wonderfully satisfying.
- White chocolate chips: These provide the creamy, melt-in-your-mouth base that’s essential for smooth fudge.
- Sweetened condensed milk: Adds luscious sweetness and creates the perfect fudgy consistency.
- Butter: Enhances richness and ensures the fudge sets just right.
- Easter M&M’s: Bring a burst of color and a satisfying crunch to each bite.
- Easter shimmery Whopper eggs: These add a unique texture and sparkly appearance that screams festive fun.
- Easter sprinkles: Tiny pops of pastel color that make the fudge look whimsical and inviting.
How to Make Easter Candy Fudge Recipe
Step 1: Prepare Your Pan
Start by lining an 8×8-inch baking pan with parchment paper or lightly greasing it. This will ensure your fudgy masterpiece comes out easily once set and helps keep those colorful edges perfect.
Step 2: Melt the Chocolate Mixture
In a medium saucepan over low heat, combine the white chocolate chips, sweetened condensed milk, and butter. Stir continuously until the mixture is melted completely and achieves a smooth, velvety texture. This gentle heating is key to avoiding any graininess in your fudge.
Step 3: Fold in the Easter Candy
Remove the saucepan from the heat and carefully fold in most of your Easter M&M’s, Whopper eggs, and sprinkles, keeping a small handful of each to sprinkle on top later. Gently folding preserves the shape of the candies without melting them, adding delightful bursts of color and crunch.
Step 4: Spread the Mixture
Pour the fudge mixture into your prepared pan, spreading it evenly with a spatula. This even layer will help the fudge set smoothly and lets every piece have a good distribution of those festive candies.
Step 5: Add the Final Touches
Sprinkle the reserved candies and sprinkles over the top, pressing them lightly into the fudge. This step transforms your dessert into an eye-catching centerpiece that invites smiles before the very first bite.
Step 6: Chill to Set
Refrigerate the fudge for at least two hours or until it’s firm to the touch. Patience here is rewarded with fudge that holds its shape perfectly when sliced.
Step 7: Cut and Serve
Once your Easter Candy Fudge Recipe has set, slice it into 36 delightful squares and serve. These pieces are just the right size for sharing, gifting, or indulging in comforting sweetness anytime.
How to Serve Easter Candy Fudge Recipe
Garnishes
This fudge is festive enough on its own, but if you want to elevate it further, sprinkle a few extra Easter candies or edible glitter on each square just before serving. They add that special touch of whimsy and texture that guests will love.
Side Dishes
Pair your Easter Candy Fudge with light, fresh sides like a bright fruit salad or lemon sorbet to balance the fudge’s richness. A cup of hot tea or coffee also complements the sweet, creamy flavors beautifully.
Creative Ways to Present
For a memorable presentation, arrange the fudge squares in a pastel-colored box or on a tiered dessert tray surrounded by fresh spring flowers. Wrapping individual pieces in clear cellophane with colorful ribbon makes them ideal for gifting or party favors.
Make Ahead and Storage
Storing Leftovers
Store any leftover fudge in an airtight container in the refrigerator for up to two weeks. This keeps it fresh and preserves that perfect chewy texture you love.
Freezing
If you want to keep your Easter Candy Fudge Recipe longer, freeze it in a sealed container for up to three months. Thaw in the refrigerator before slicing and serving for the best texture.
Reheating
Fudge is best enjoyed cold or at room temperature, so avoid reheating. If it’s too hard from refrigeration, let it sit out for a few minutes to soften slightly before enjoying.
FAQs
Can I substitute another type of chocolate for the white chocolate chips?
Absolutely! Milk or semi-sweet chocolate chips work great too, though they will change the color and flavor profile. Just be sure to melt them gently as you would with the white chocolate to keep the texture smooth.
Do I have to use Easter-themed candies?
Not at all! While Easter candies add festive charm, you can customize with any colorful or seasonal candies you love. Think pastel-colored nuts, chocolate-covered fruits, or even your favorite M&M’s year-round.
How long does it take for the fudge to set properly?
It needs at least two hours in the fridge to firm up well, but leaving it overnight is even better for the easiest slicing. Just make sure it’s covered to avoid absorbing fridge odors.
Can I make this fudge dairy-free or vegan?
This recipe relies on butter and sweetened condensed milk, which are dairy products. However, you could experiment using vegan butter and sweetened condensed coconut milk alternatives to create a dairy-free version, though the texture may vary slightly.
What’s the best way to cut fudge without it crumbling?
Use a sharp knife warmed under hot water, then wiped dry for each cut. This helps the blade glide through the fudge smoothly, preventing any cracking or crumbling edges.
Final Thoughts
This Easter Candy Fudge Recipe is such a fun and delicious way to celebrate the season with friends and family. It’s simple to make, visually stunning, and packed with joyful bursts of candy. I promise once you try it, this fudge will become a cherished part of your holiday traditions. So grab your ingredients and dive into a batch of cheerful sweetness today!
Print
Easter Candy Fudge Recipe
- Prep Time: 10 minutes
- Cook Time: 5 minutes
- Total Time: 2 hours 15 minutes
- Yield: 36 pieces
- Category: Dessert
- Method: Stovetop
- Cuisine: American
Description
This Easter Candy Fudge is a festive, colorful treat perfect for celebrating the holiday. Made with creamy white chocolate, sweetened condensed milk, and festive Easter-themed candies, this no-bake fudge is easy to prepare and delightfully rich. It’s a fun and sweet addition to your Easter dessert spread, with a smooth texture and crunchy candy pieces throughout.
Ingredients
Main Ingredients
- 3 cups white chocolate chips
- 1 (14 oz) can sweetened condensed milk
- 4 tablespoons butter
Add-ins and Toppings
- 2 cups Easter M&M’s
- 2 cups Easter shimmery Whopper eggs
- 2 cups Easter sprinkles
Instructions
- Prepare the Pan: Line an 8×8-inch baking pan with parchment paper or lightly grease it to prevent sticking and make removal easier.
- Melt Ingredients: In a medium saucepan over low heat, combine white chocolate chips, sweetened condensed milk, and butter. Stir constantly until the mixture is melted completely and smooth, ensuring even texture without burning.
- Fold in Candies: Remove the saucepan from heat. Gently fold in the Easter M&M’s, Whopper eggs, and sprinkles, reserving a small handful of each to sprinkle on top for decoration.
- Pour and Spread: Pour the fudge mixture into the prepared pan and spread it evenly to distribute the mixture smoothly across the pan.
- Add Toppings: Sprinkle the reserved candies and sprinkles on top, pressing them lightly into the fudge to help them adhere as it sets.
- Chill to Set: Refrigerate the fudge for at least 2 hours or until firm to allow it to fully solidify for clean cutting.
- Cut and Serve: Once set, cut the fudge into 36 squares and serve as a delightful holiday treat.
Notes
- Be sure to stir continuously while melting to prevent the chocolate from burning or grainy texture.
- For easier removal, allow the parchment paper overhang on the sides so you can lift the fudge from the pan.
- Store leftovers in an airtight container in the refrigerator for up to one week.
- You can substitute any seasonal candy you prefer to customize the fudge.
- For a smoother cut, warm the knife slightly before slicing.


