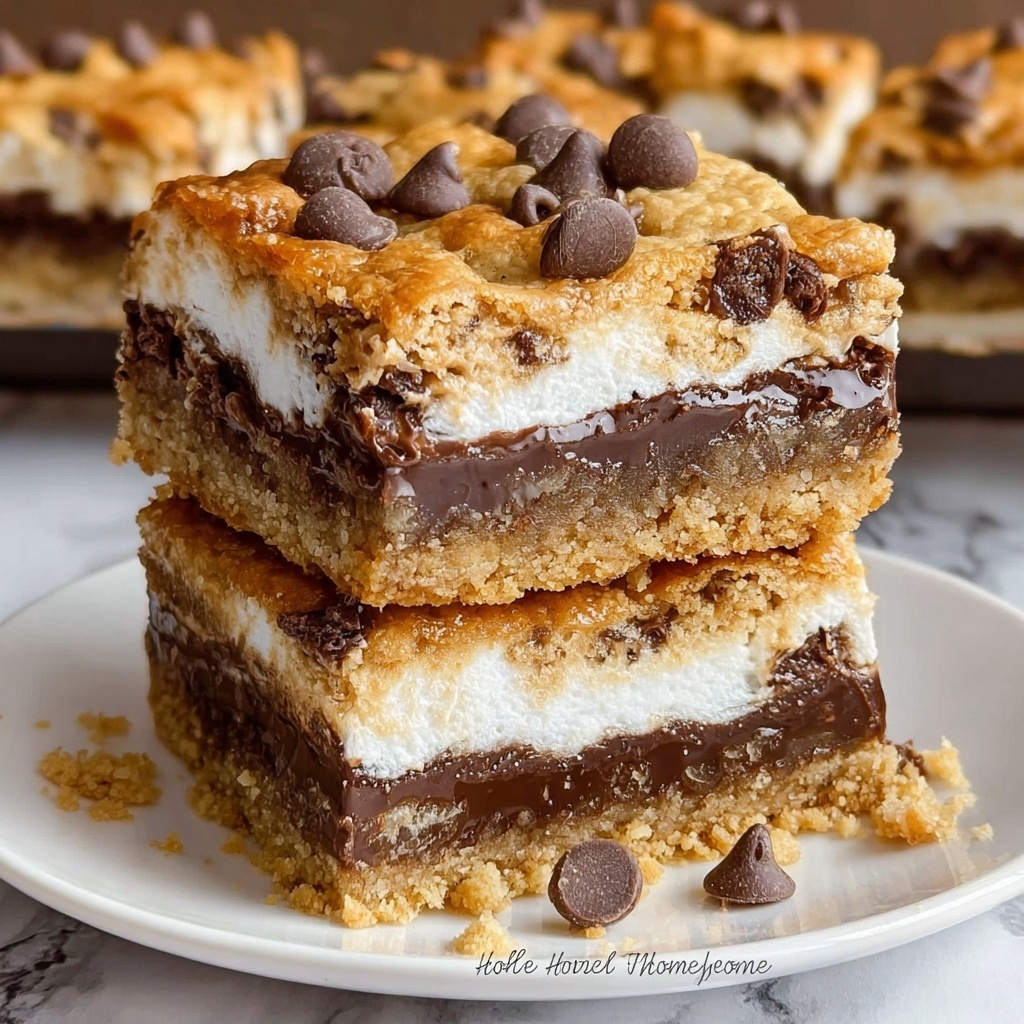
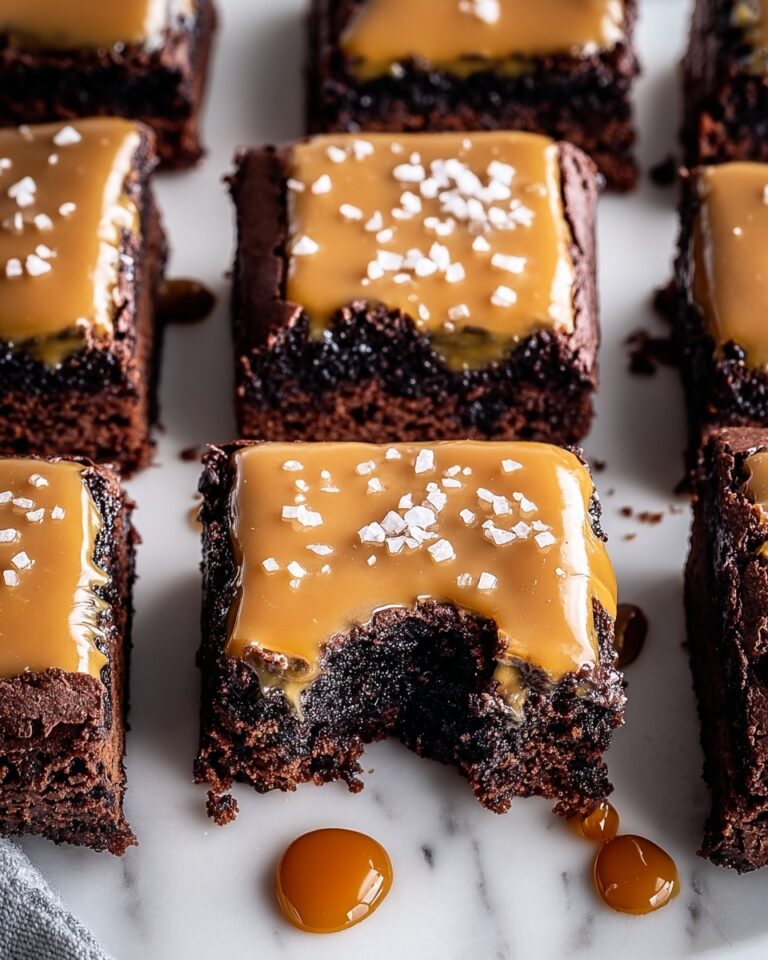
If you are craving a nostalgic treat that brings campfire magic into your kitchen, this S’mores Cookie Bars Recipe is just the ticket. These bars combine the irresistible crunch of graham cracker crumbs with gooey marshmallow fluff and rich chocolate, all baked into a chewy, buttery cookie base. Every bite delivers layers of texture and flavor that remind you of toasty nights around the fire, but with the convenience of a simple oven recipe. Whether you’re making them for a family dessert or a potluck favorite, this recipe promises smiles and satisfied sweet tooths.
Ingredients You’ll Need
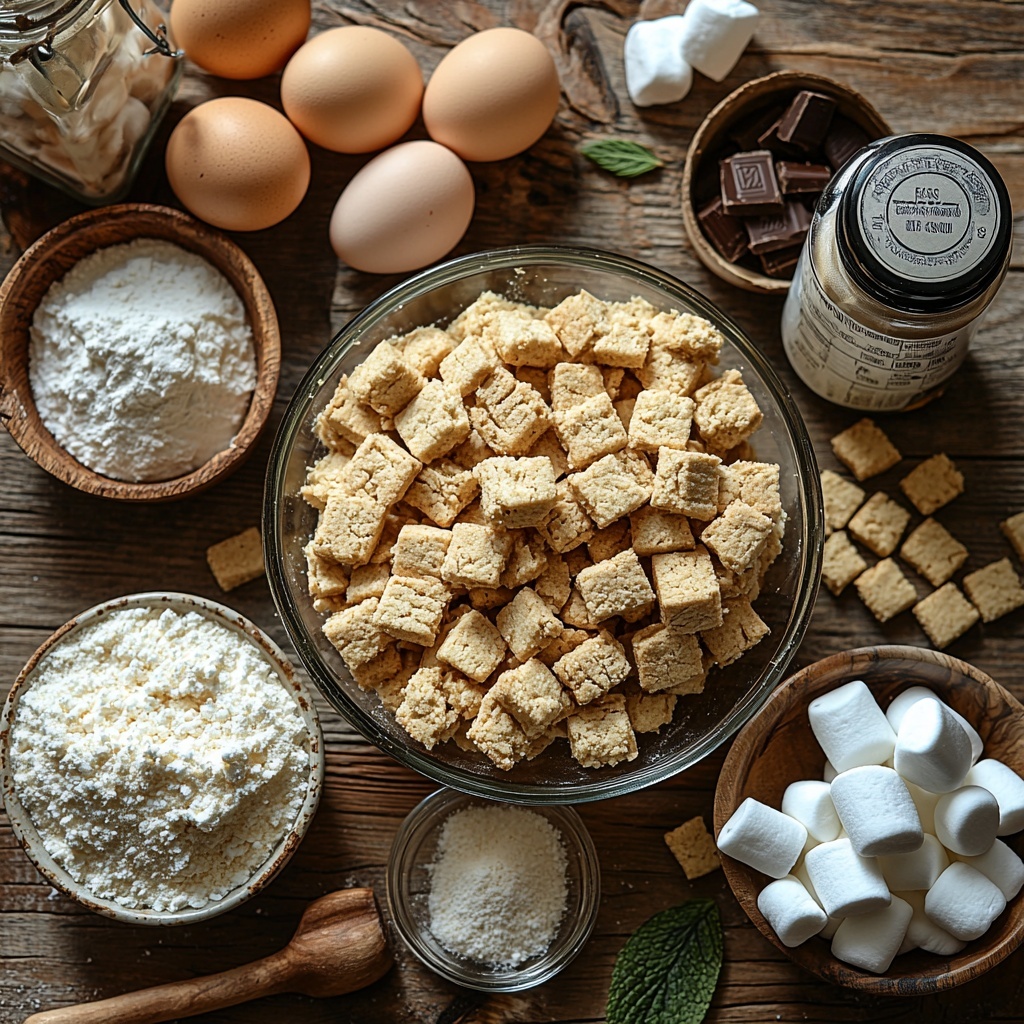
Getting these bars just right starts with simple yet essential ingredients, each playing a crucial role. From the buttery richness of the softened butter to the tender crumb provided by graham crackers and flour, every component works harmoniously to recreate that classic s’mores taste in a more portable form.
- Graham cracker crumbs (1 1/2 cups): Adds authentic s’mores flavor and a crispy texture base for the bars.
- All-purpose flour (1 cup): Provides structure and a tender crumb to the cookie dough.
- Unsalted butter, softened (3/4 cup): Brings rich, moist softness and helps bind the ingredients together.
- Brown sugar (1/2 cup): Adds moisture and a deep caramel note that complements the marshmallow.
- Granulated sugar (1/4 cup): Balances sweetness and contributes to a perfect cookie chew.
- Large eggs (2): Help bind ingredients and add richness.
- Vanilla extract (1 teaspoon): Enhances the overall flavor with warm, inviting notes.
- Baking soda (1/2 teaspoon): Ensures the bars rise slightly and stay tender.
- Salt (1/4 teaspoon): Balances sweetness and intensifies flavor.
- Marshmallow fluff (1 1/4 cups): The signature gooey layer that brings that s’mores magic inside.
- Milk chocolate chips or chopped bars (1 1/2 cups): Melts into pockets of chocolatey goodness throughout the bars.
- Mini marshmallows (1/2 cup, optional): A delightful toasty topping when baked, adding extra marshmallow texture.
How to Make S’mores Cookie Bars Recipe
Step 1: Preheat and Prepare Your Pan
Start by preheating your oven to 350°F (175°C). This temperature is perfect for baking these bars to a golden and chewy finish. Line a 9×13-inch baking dish with parchment paper, making sure to leave some overhang on the sides — this makes it much easier to lift out the whole slab once baked. A lined pan ensures nothing sticks and cleanup is a breeze.
Step 2: Cream the Butters and Sugars
In a large mixing bowl, beat together the softened butter, brown sugar, and granulated sugar until the mixture becomes light and fluffy. This step is key for creating a tender, buttery cookie base. The creamed sugars trap air, helping the bars rise and giving them a wonderfully delicate texture.
Step 3: Add Eggs and Vanilla
Next, add the two eggs and vanilla extract into the creamed sugar and butter mixture. Beat until smooth and fully combined. These bring richness and aid in binding the dough, while the vanilla infuses a lovely aromatic sweetness that elevates the entire dessert.
Step 4: Combine Dry Ingredients
In a separate bowl, whisk together the graham cracker crumbs, flour, baking soda, and salt. This ensures all dry ingredients are evenly distributed before adding to wet elements, preventing clumps and promoting an even texture.
Step 5: Make the Dough
Gradually incorporate the dry mix into the wet mixture, stirring until a dough forms. Don’t over-mix here; just enough to combine will keep the bars tender and chewy. The dough should be soft but sturdy enough to press into the pan.
Step 6: Press Base Dough
Press about two-thirds of the dough evenly into the bottom of your prepared baking dish. This forms the base layer that will hold all the gooey and chocolatey goodness. Press firmly but gently, ensuring an even thickness.
Step 7: Add the Marshmallow Layer
Spread the marshmallow fluff gently over the cookie dough base. This creates the iconic gooey middle layer that brings the s’mores experience indoors, mimicking those melty marshmallows roasted over a fire.
Step 8: Chocolate Layer
Sprinkle the milk chocolate chips or chopped chocolate bar pieces evenly over the marshmallow fluff. When baked, these melt into decadent pockets of chocolate that perfectly complement the sweetness of the marshmallow.
Step 9: Add Remaining Dough
Flatten the remaining dough pieces slightly and patch them over the chocolate layer. It’s perfectly fine if some marshmallow peeks through; it adds to the rustic, homemade charm of the bars.
Step 10: Top with Mini Marshmallows and Extra Chocolate
For an irresistible finishing touch, sprinkle mini marshmallows and a few extra chocolate chips on top. These will toast nicely in the oven, adding a delightful texture and appearance.
Step 11: Bake to Perfection
Bake the assembled bars for 25 to 30 minutes or until the top is golden brown and the edges are set. This timing ensures the bars hold together without losing their gooey center and rich flavors.
Step 12: Cool and Slice
Allow the bars to cool completely in the pan before using the parchment to lift them out. Cooling lets the layers set and makes slicing into neat squares much easier. Enjoy your effort with a tall glass of milk or a warm cup of coffee.
How to Serve S’mores Cookie Bars Recipe
Garnishes
These bars are perfect on their own but can be jazzed up beautifully with a sprinkle of extra mini marshmallows, a drizzle of melted chocolate, or a light dusting of powdered sugar. Adding a pinch of crushed graham crackers on top can recreate the crunch you love from campfires.
Side Dishes
Serve these bars alongside fresh fruit like strawberries or bananas to cut through the sweetness. A scoop of vanilla ice cream also pairs wonderfully, transforming the bars into an indulgent dessert perfect for sharing.
Creative Ways to Present
Cut the bars into bite-size pieces and serve them on a platter for parties, or stack them high for a fun dessert tower. They also make great portable treats for picnics or lunchboxes. For a festive twist, try placing them on skewers with marshmallows and strawberries in between.
Make Ahead and Storage
Storing Leftovers
Once cooled, store your s’mores cookie bars in an airtight container at room temperature for up to 3 days. This keeps them soft and chewy, preserving the marshmallow gooeyness.
Freezing
These bars freeze beautifully! Wrap individual squares tightly in plastic wrap, then place them in a freezer-safe bag or container. Freeze for up to 3 months, making it easy to enjoy this treat anytime you crave it.
Reheating
For that freshly baked feel, reheat frozen or stored bars in the microwave for 15 to 20 seconds or warm in a low oven until soft and gooey again. Be careful not to overheat or the marshmallow layer may get too firm.
FAQs
Can I use regular marshmallows instead of marshmallow fluff?
You can substitute regular marshmallows by melting them gently before spreading, but marshmallow fluff offers a smoother, spreadable consistency that is easier to work with for this recipe.
Is it possible to make this recipe gluten-free?
Yes! Just replace the all-purpose flour and graham cracker crumbs with gluten-free versions. Make sure your baking soda and other ingredients are gluten-free as well.
How do I prevent the marshmallow from burning on top?
Keep an eye on the bars as they bake. If you notice the marshmallows browning too quickly, tent the pan loosely with foil for the remaining bake time.
Can I use dark chocolate or white chocolate instead?
Absolutely! Dark chocolate adds a richer contrast to the sweetness, while white chocolate creates an even sweeter profile. Feel free to mix and match.
How long do these bars stay fresh?
Stored properly in an airtight container, the bars stay fresh and chewy for about 3 days at room temperature, but they’re so delicious they rarely last that long!
Final Thoughts
This S’mores Cookie Bars Recipe is a delightful way to capture the fun and flavor of camping in a simple, crowd-pleasing dessert. The combination of crunchy graham cracker, melty chocolate, and ooey-gooey marshmallow within a buttery cookie base is simply irresistible. I can’t wait for you to make these and share the smiles they bring — they’re sure to become a beloved favorite in your recipe collection.
Print
S’mores Cookie Bars Recipe
- Prep Time: 15 minutes
- Cook Time: 30 minutes
- Total Time: 45 minutes
- Yield: 16 bars
- Category: Dessert
- Method: Baking
- Cuisine: American
Description
Delicious and nostalgic S’mores Cookie Bars combining the flavors of graham crackers, marshmallow fluff, and rich milk chocolate chips baked into chewy, gooey bars perfect for sharing.
Ingredients
Dry Ingredients
- 1 1/2 cups graham cracker crumbs
- 1 cup all-purpose flour
- 1/2 teaspoon baking soda
- 1/4 teaspoon salt
Wet Ingredients
- 3/4 cup unsalted butter, softened
- 1/2 cup brown sugar
- 1/4 cup granulated sugar
- 2 large eggs
- 1 teaspoon vanilla extract
Filling and Topping
- 1 1/4 cups marshmallow fluff
- 1 1/2 cups milk chocolate chips or chopped bars
- 1/2 cup mini marshmallows (optional for topping)
Instructions
- Preheat Oven: Preheat your oven to 350°F (175°C). Line a 9×13-inch baking dish with parchment paper, leaving some overhang for easy removal after baking.
- Cream Butter and Sugars: In a large bowl, cream together the softened butter, brown sugar, and granulated sugar until the mixture is light and fluffy, which helps create a tender texture.
- Add Eggs and Vanilla: Beat in the eggs and vanilla extract until the mixture is smooth and well combined, ensuring even flavor distribution.
- Mix Dry Ingredients: In a separate bowl, whisk together graham cracker crumbs, all-purpose flour, baking soda, and salt to evenly distribute leavening and seasoning.
- Combine Wet and Dry Mixtures: Gradually add the dry ingredients to the wet mixture, mixing gently until a soft dough forms without overworking it.
- Press Dough into Pan: Press about two-thirds of the dough evenly into the bottom of the prepared baking dish, creating a firm base layer for the bars.
- Spread Marshmallow Fluff: Gently spread the marshmallow fluff over the pressed dough layer, ensuring it covers the surface but does not mix into the dough.
- Add Chocolate Layer: Sprinkle the milk chocolate chips or chopped chocolate bars evenly over the marshmallow fluff layer, adding rich sweetness.
- Top with Remaining Dough: Flatten the remaining dough pieces slightly and patch them over the chocolate and marshmallow layers. It’s okay if some marshmallow peeks through for a rustic look.
- Optional Toppings: Sprinkle mini marshmallows and extra chocolate chips on top for added texture and flavor.
- Bake Bars: Bake in the preheated oven for 25 to 30 minutes or until the edges are golden brown and set, ensuring the bars hold together well.
- Cool and Slice: Allow the bars to cool completely in the pan before lifting them out using the parchment overhang and slicing into 16 squares for serving.
Notes
- Make sure the butter is softened to room temperature to cream properly with sugars.
- Using parchment paper makes removal and slicing easier.
- You can substitute milk chocolate with dark or semi-sweet chocolate if preferred.
- Mini marshmallows on top add a toasted effect when baked but can be omitted if desired.
- Store bars in an airtight container at room temperature for up to 3 days or refrigerate for longer freshness.
