There is something truly magical about the Irresistibly Crunchy Fried Chicken Katsu with Panko at Home Recipe that makes it an absolute favorite in my kitchen. The way the crisp, golden panko coating shatters delightfully with every bite, enveloping tender, juicy chicken beneath, is pure comfort food bliss. Perfectly seasoned and fried to perfection, this dish brings restaurant-quality Japanese flavors right to your own dining table with simple ingredients and an easy-to-follow process that anyone can master.
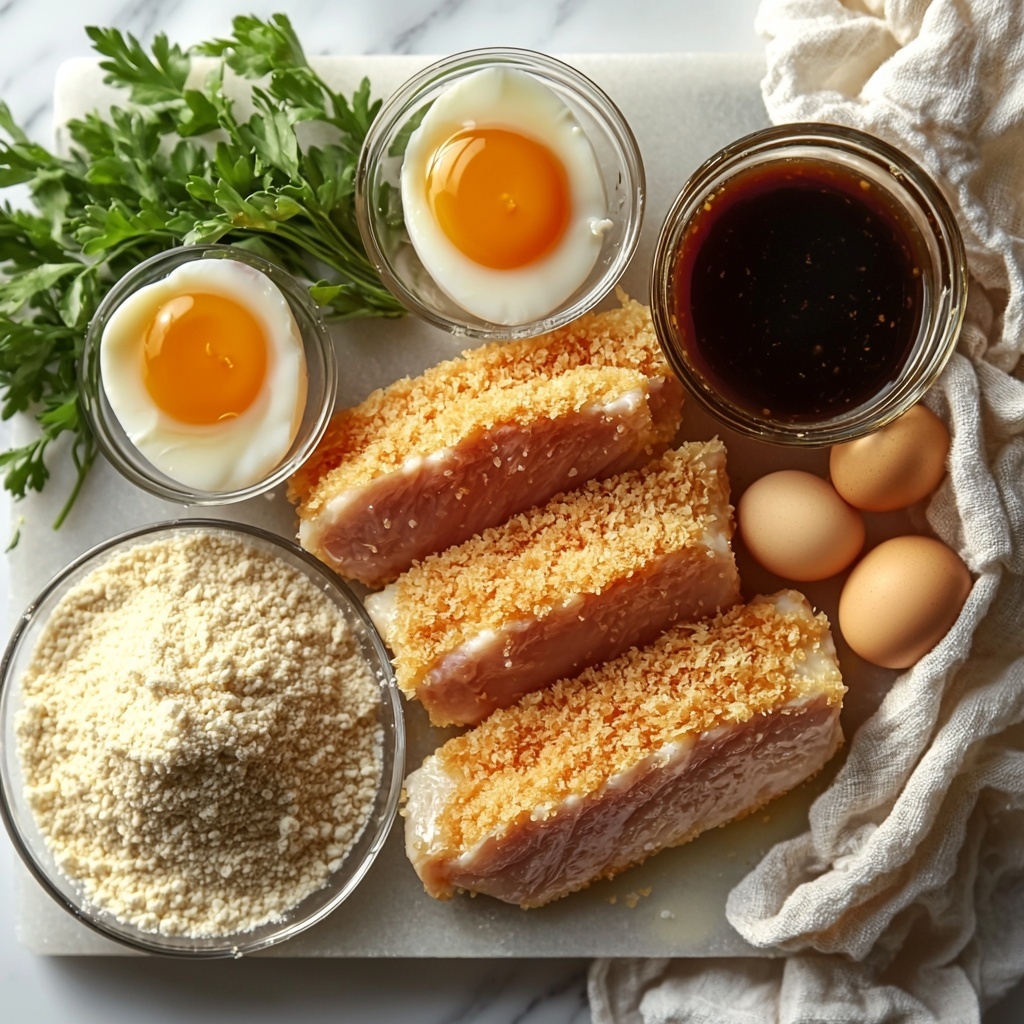
Ingredients You’ll Need
The beauty of this recipe lies in how uncomplicated the ingredients are, yet how each one is essential in crafting the rich taste, exceptional crunch, and gorgeous color of the chicken katsu. From the all-purpose flour that helps the coating stick to the panko breadcrumbs responsible for that iconic crunch, each element plays its unique role.
- Chicken Breasts or Thighs (2 pieces, pounded to ½ inch thickness): Using evenly pounded chicken ensures quick, even cooking and juicy meat inside.
- Salt (to taste): Simple seasoning to enhance the natural flavor of the chicken.
- Black Pepper (to taste): Adds a subtle kick to complement the crispy coating.
- All-Purpose Flour (1 cup): Serves as the first layer to help the egg and panko adhere perfectly.
- Eggs (2, beaten): Acts as the glue binding the panko breadcrumbs to the chicken.
- Panko Breadcrumbs (1 cup): The star of the show, these Japanese-style breadcrumbs give the katsu its signature light, airy crunch.
- Vegetable Oil (enough for frying): A neutral oil that achieves the ideal golden, crispy crust without overpowering flavors.
- Tonkatsu Sauce (to taste): The sweet and tangy sauce that elevates the entire dish with a burst of umami.
How to Make Irresistibly Crunchy Fried Chicken Katsu with Panko at Home Recipe
Step 1: Prepare the Chicken
Begin by pounding your chicken to about half an inch thick. This not only tenderizes the meat but ensures it cooks evenly and quickly, maintaining a juicy center surrounded by crispy coating. Season both sides generously with salt and black pepper to bring out the flavors before moving on to the breading process.
Step 2: Set Up Your Breading Station
Organize three shallow bowls: one with all-purpose flour, one with the beaten eggs, and the third filled with panko breadcrumbs. This setup makes the coating process smooth and mess-free, making sure every piece of chicken gets that irresistible crunchy finish.
Step 3: Coat the Chicken
Dredge each piece of chicken first in the flour, shaking off the excess. Then, dip it into the beaten eggs to allow the breadcrumbs to stick properly. Finally, press the chicken into the panko breadcrumbs, covering every inch, for that legendary crunchy texture. Don’t rush this step—make sure the breadcrumbs stick well for the best results.
Step 4: Fry to Golden Perfection
Heat enough vegetable oil in a pan over medium heat. Once the oil shimmers, carefully place the breaded chicken pieces inside. Fry until the coating turns a beautiful golden brown, usually about 3 to 4 minutes per side. Keep the heat steady to avoid burning and to cook the chicken through without drying it out. Use a wire rack or paper towels to drain excess oil once done.
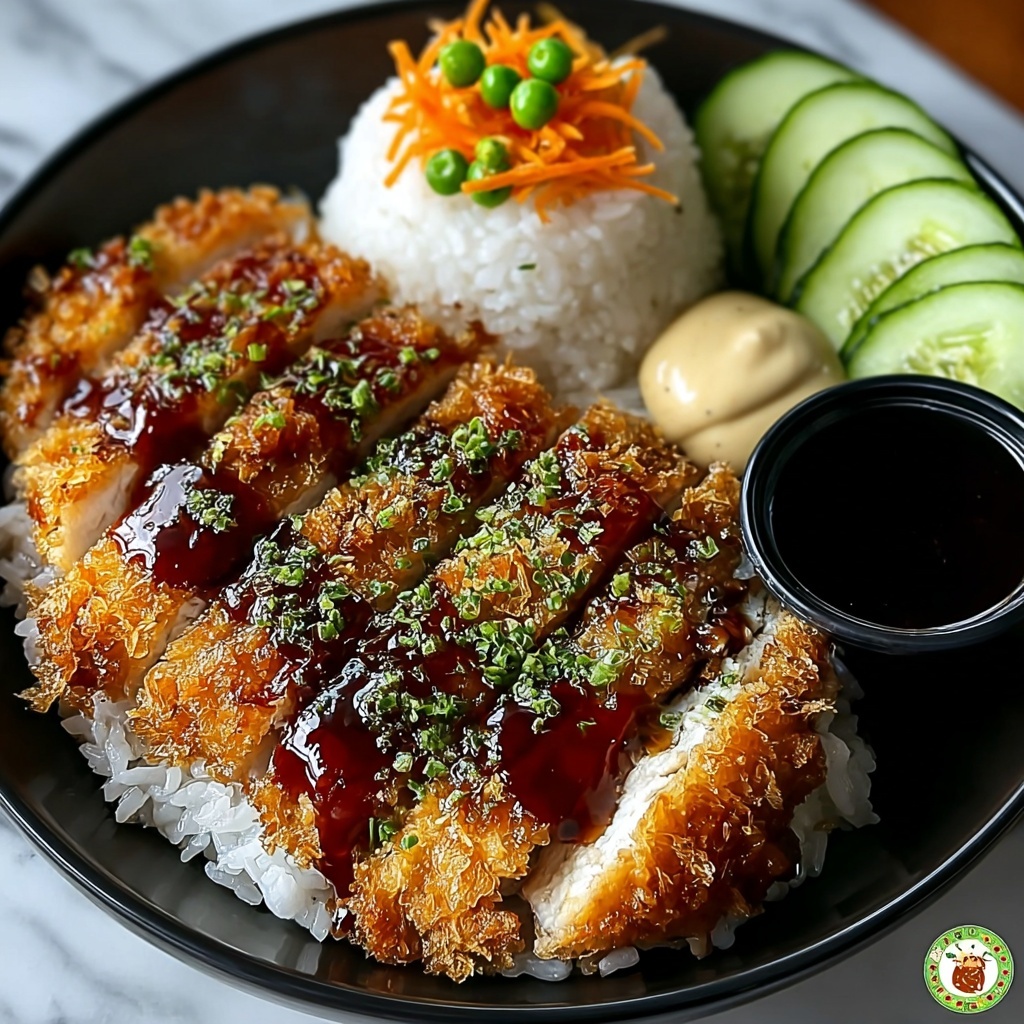
How to Serve Irresistibly Crunchy Fried Chicken Katsu with Panko at Home Recipe
Garnishes
Simple garnishes can elevate this dish splendidly. Sprinkle some finely shredded cabbage or a handful of chopped scallions on top for freshness. A wedge of lemon on the side adds a zesty brightness that pairs beautifully with the rich fried chicken. Also, a drizzle of extra tonkatsu sauce over the top amps up the flavor and looks so inviting.
Side Dishes
Chicken katsu shines brightest when paired with classic sides like steamed white rice or fluffy Japanese short-grain rice to soak up every bit of tonkatsu sauce. For added texture and taste, a bowl of miso soup or a fresh cucumber salad with sesame dressing makes the meal feel balanced and satisfying.
Creative Ways to Present
Why not switch things up with a katsu sandwich? Place sliced chicken katsu between soft milk bread with shredded cabbage and tonkatsu sauce for a sleeper-hit lunch idea. Or try serving smaller katsu strips atop a vibrant rice bowl with pickled vegetables and a soft-boiled egg for a more contemporary take that’s sure to impress.
Make Ahead and Storage
Storing Leftovers
If you find yourself with leftovers from this Irresistibly Crunchy Fried Chicken Katsu with Panko at Home Recipe, store them in an airtight container in the refrigerator. The chicken will keep well for up to three days, allowing you to enjoy the satisfying crunch even as a quick snack or meal addition later.
Freezing
For longer storage, place the cooked katsu pieces in a single-layer on a baking sheet to freeze individually first, then transfer to a freezer-safe bag. This method prevents sticking and retains the crispy texture. Frozen chicken katsu can be stored for up to one month, making it perfect to prep ahead for busy nights.
Reheating
To revive that incredible crunch after refrigeration or freezing, avoid microwaving whenever possible. Instead, reheat chicken katsu in a preheated oven at 375°F (190°C) for about 10 minutes. This brings back a crisp outer layer while warming the meat thoroughly without turning soggy.
FAQs
Can I use chicken thighs instead of chicken breasts?
Absolutely! Chicken thighs work wonderfully in this recipe, offering a bit more juiciness and flavor. Just be sure to pound them to even thickness for consistent cooking and enjoy that same irresistibly crunchy experience.
What type of oil is best for frying chicken katsu?
Vegetable oil, canola oil, or any neutral-flavored oil with a high smoke point are ideal choices. They ensure the chicken crisps up nicely without adding strong or unwanted flavors.
How do I make sure the panko coating sticks well?
Following the flour-egg-panko order meticulously is the secret. Make sure to shake off excess flour, fully coat with beaten egg, and firmly press the panko onto the chicken. This builds layers that hold tight during frying.
Is tonkatsu sauce necessary, or can I substitute something else?
While tonkatsu sauce perfectly complements chicken katsu with its tangy sweetness, you can experiment with alternatives like barbecue sauce, Worcestershire sauce, or a homemade mix of ketchup and soy sauce as a creative twist.
Can this recipe be made gluten-free?
Yes! Swap the all-purpose flour with gluten-free flour and choose gluten-free panko breadcrumbs. Just ensure your tonkatsu sauce is also gluten-free or prepare a homemade version to maintain the flavor integrity.
Final Thoughts
There’s nothing quite like pulling off a perfect batch of the Irresistibly Crunchy Fried Chicken Katsu with Panko at Home Recipe to impress your loved ones or simply treat yourself to crispy, juicy happiness. This recipe’s harmony of textures and flavors is a celebration of comfort cooking that you can master any day of the week. So what are you waiting for? Get your aprons on and savor every crunchy bite!
Print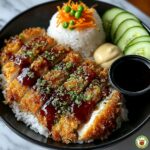
Irresistibly Crunchy Fried Chicken Katsu with Panko at Home Recipe
- Prep Time: 10 minutes
- Cook Time: 15 minutes
- Total Time: 25 minutes
- Yield: 4 servings (4 pieces)
- Category: Main Course
- Method: Frying
- Cuisine: Japanese
Description
This Irresistibly Crunchy Fried Chicken Katsu recipe brings the perfect crispy texture to tender chicken breasts or thighs coated in panko breadcrumbs. Ideal for a comforting meal, served with traditional tonkatsu sauce, it’s a wonderfully easy homemade take on a popular Japanese classic.
Ingredients
Chicken and Seasoning
- 2 pieces Chicken Breasts or Thighs (pounded to ½ inch thickness)
- Salt, to taste
- Black Pepper, to taste
Breading
- 1 cup All-Purpose Flour
- 2 Eggs (beaten)
- 1 cup Panko Breadcrumbs
For Frying and Serving
- Enough Vegetable Oil (for frying)
- Tonkatsu Sauce, to taste
Instructions
- Prepare the Chicken: Season the pounded chicken pieces evenly with salt and black pepper on both sides for a balanced flavor base before breading.
- Set Up Breading Stations: Place the all-purpose flour in one shallow dish, the beaten eggs in another, and the panko breadcrumbs in a third. This setup allows for efficient and even coating of the chicken.
- Bread the Chicken: Dredge each chicken piece first in the flour, shaking off any excess, then dip into the beaten eggs ensuring full coverage, and finally coat thoroughly with panko breadcrumbs. Press gently to help the breadcrumbs adhere well.
- Heat the Oil: Pour enough vegetable oil into a deep skillet or frying pan to reach about ½ inch depth. Heat it over medium-high heat until it reaches approximately 350°F (175°C) or until a breadcrumb dropped into the oil sizzles immediately.
- Fry the Chicken: Carefully place the breaded chicken pieces into the hot oil. Fry for about 6-7 minutes on each side or until they become golden brown and crispy, and the internal temperature reaches 165°F (74°C). Adjust heat as necessary to prevent burning.
- Drain and Serve: Remove the cooked chicken katsu from the oil and place on paper towels to drain excess oil. Serve hot with tonkatsu sauce drizzled or on the side for dipping.
Notes
- For extra crispiness, double coat the chicken by repeating the egg and panko steps.
- Use a meat thermometer to ensure the chicken is fully cooked inside.
- Serve with steamed rice and shredded cabbage for a traditional Japanese experience.
- Can substitute chicken thighs for juicier results, but cook times may vary slightly.
