
“`html
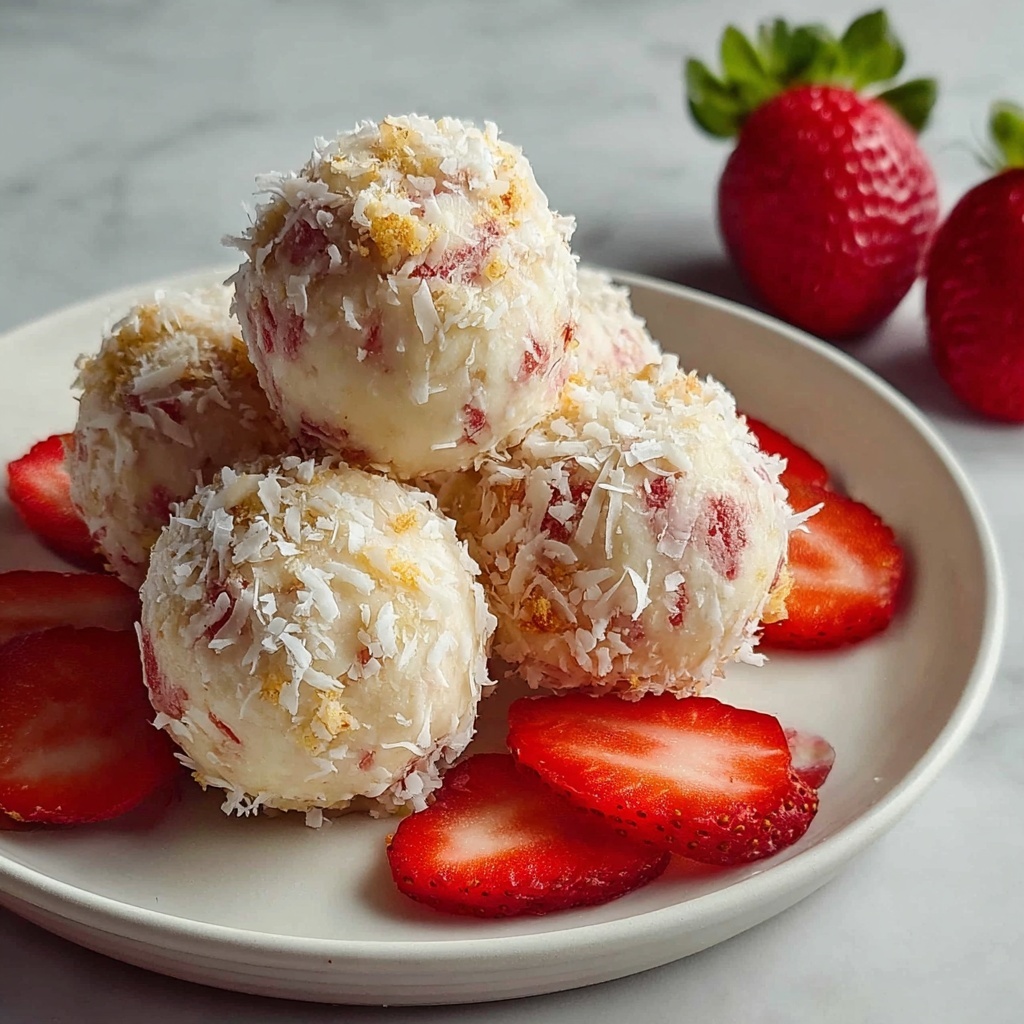
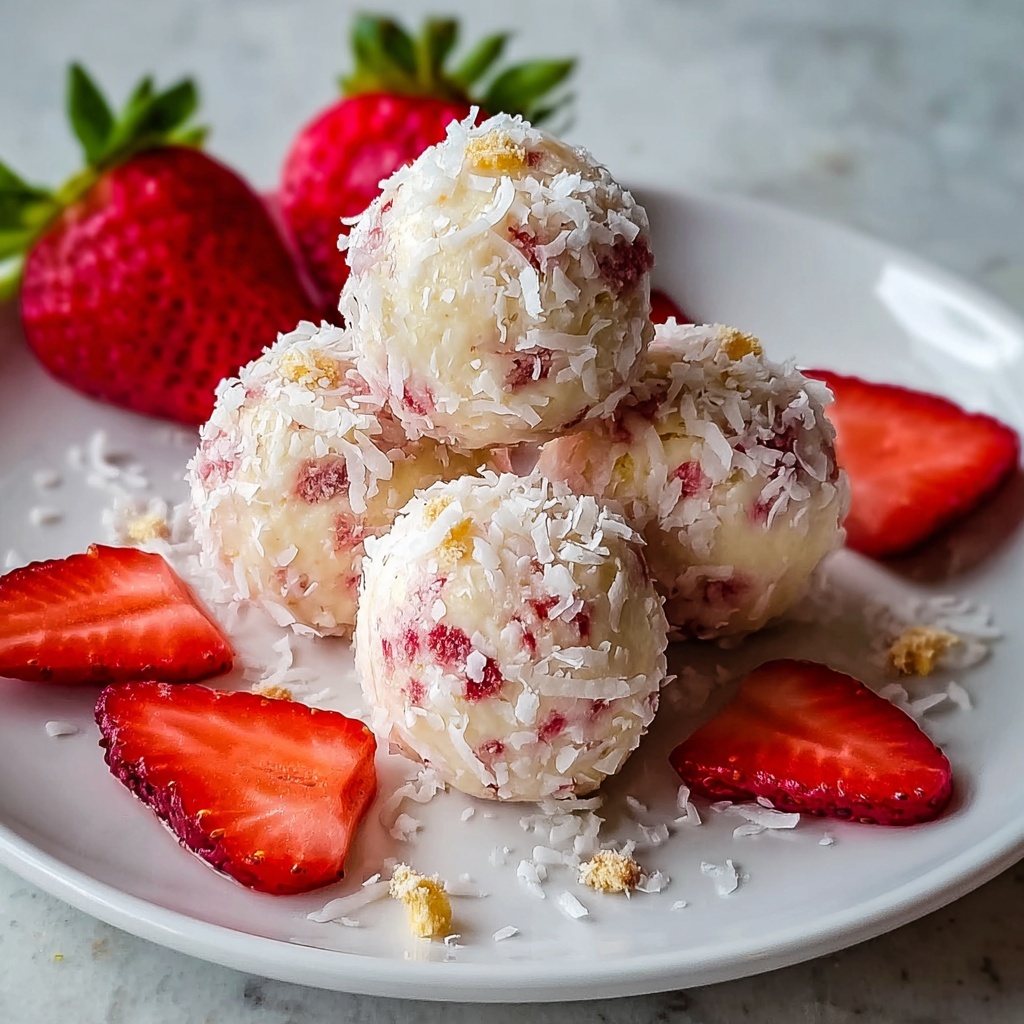
There is something truly delightful about a sweet treat that feels indulgent yet keeps your health goals in mind. This Healthy No-Bake Strawberry Cheesecake Protein Bites Recipe is exactly that kind of magic in bite-sized form. Combining the fresh brightness of strawberries with smooth, creamy cheesecake flavor and a protein-packed base, these bites offer a perfect balance of texture and nutrition without any oven time required. Whether you’re craving a snack, a post-workout refuel, or a guilt-free dessert, these no-bake bites hit the spot with vibrant color, luscious flavor, and a satisfying chew that’ll have you coming back for more.
Ingredients You’ll Need
What makes this recipe so special is how straightforward yet thoughtfully chosen the ingredients are. Each one works together to create a complex profile of taste and texture—from the wholesome oats that give structure, to the fresh strawberries that bring a pop of natural sweetness and color.
- Quick oats or rolled oats (1 cup): Finely ground for a smooth but substantial base that holds everything together.
- Almond flour (1/4 cup): Adds subtle nuttiness and tenderness while boosting healthy fats and protein.
- Vanilla or unflavored whey/plant protein powder (2 scoops for base, 1 1/2 scoops for cheesecake layer): Powers the bites with muscle-friendly protein and tasty vanilla notes.
- Coconut sugar or sweetener of choice (2 tbsp): Provides natural sweetness with a gentle caramel undertone.
- Fine sea salt (1/4 tsp for base, pinch for cheesecake): Enhances flavors and balances sweetness perfectly.
- Plain Greek yogurt (3 tbsp for base, 1/3 cup for cheesecake): Gives creaminess and tang while delivering probiotics and extra protein.
- Unsweetened almond milk (2 tbsp plus extras): Lightens the base mixture, helping it hold together just right.
- Pure vanilla extract (1 tsp for base, 1/2 tsp for cheesecake): Infuses a warm, sweet aroma that complements the strawberries wonderfully.
- Fresh strawberries (1 cup diced plus extras for garnish): The star ingredient—brilliantly bright, juicy, and bursting with flavor.
- Reduced-fat or dairy-free cream cheese (4 oz): Provides that classic cheesecake richness while keeping the bite light and satisfying.
- Honey, maple syrup, or agave syrup (1–2 tbsp): Sweetens the cheesecake layer naturally — adjust to your taste preference.
- Lemon juice (1 tsp): Adds a zesty kick that balances the creaminess and brightens the overall flavor.
- Optional coatings: Crushed freeze-dried strawberries, extra oat or almond flour, and even melted white chocolate for a fun finishing touch.
How to Make Healthy No-Bake Strawberry Cheesecake Protein Bites Recipe
Step 1: Prepare Your Ingredients and Tools
Before diving into mixing, line a baking sheet or shallow container with parchment paper. This will give your bites a cool resting place to chill and firm up later. Also, if your oats are whole rolled oats, give them a quick blitz in a food processor to create a fine, flour-like consistency—this is key to achieving the right texture.
Step 2: Make the Base Mixture
Combine your dry ingredients—ground oats, almond flour, protein powder, coconut sugar, and salt—in a medium bowl. Whisk them together for an even mix that will distribute sweetness and flavor throughout. Then add the Greek yogurt, almond milk, and vanilla extract. Stir until you have a thick, sticky dough. If it feels crumbly or dry, slowly add a teaspoon of almond milk at a time. If too wet, sprinkle in a bit more oat flour or protein powder until it holds when pressed between your fingers. Pop this mix in the fridge for about 10–15 minutes to firm up.
Step 3: Prepare the Strawberry Cheesecake Layer
While the base chills, soften your cream cheese and beat it in a separate bowl until super smooth and creamy. Mix in Greek yogurt, your chosen sweetener, lemon juice, vanilla extract, and salt until velvety. Next comes the vanilla protein powder, which will thicken the mixture to a creamy, scoopable frosting texture. Stir in gently diced fresh strawberries, folding carefully so they don’t get mashed—this adds bursts of fresh fruit flavor and beautiful flecks of pink throughout.
Step 4: Combine and Shape Your Bites
Now you get to choose your adventure: either swirl the cheesecake mixture through the base for a marbled effect or make filled “truffle” style bites. For swirled, fold about half the cheesecake mixture gently into the base dough so you see pretty streaks of pink and white. For filled bites, scoop small mounds of cheesecake, freeze them briefly to firm, then wrap the base dough around each mound and roll into smooth balls. For either option, roll your bites between your palms to shape perfect spheres.
Step 5: Add the Final Touches
Get creative with coatings! Roll some bites in crushed freeze-dried strawberries for a vibrant, eye-catching pink crust that’s bursting with flavor. Others can be coated in extra oat or almond flour for a classic look. If you’re feeling fancy, drizzle melted white chocolate or yogurt chips over the top and press a small piece of fresh strawberry on each bite. This finishes them off with a lovely decorative flair.
Step 6: Chill and Set
Arrange the finished bites on the parchment-lined tray, making sure they don’t touch. Refrigerate for at least 1–2 hours so the flavors meld and the texture firms up beautifully. For a more fudgy bite, pop them in the freezer for about 30–45 minutes before serving.
How to Serve Healthy No-Bake Strawberry Cheesecake Protein Bites Recipe
Garnishes
Fresh strawberry slices, a light dusting of crushed freeze-dried strawberries, or a drizzle of white chocolate work wonders to brighten up presentation and add extra bursts of flavor. These simple touches turn your bites into little edible jewels.
Side Dishes
Complement these protein bites with a fresh fruit salad, a handful of nuts, or even a cup of herbal tea to create a balanced snack plate. For a brunch spread, pair them with Greek yogurt or cottage cheese to amplify the cheesecake theme.
Creative Ways to Present
Pack them in a pretty mason jar layered with extra diced strawberries and a sprinkle of crushed nuts for a grab-and-go snack. Alternatively, place a few on a decorative plate with edible flowers or mint leaves to impress guests or brighten up a cozy afternoon treat.
Make Ahead and Storage
Storing Leftovers
Once prepared, keep these Healthy No-Bake Strawberry Cheesecake Protein Bites Recipe bites in an airtight container in the refrigerator. They’ll stay fresh and flavorful for up to 4–5 days, making them perfect for meal prep or quick snacks throughout the week.
Freezing
If you want to enjoy them later, freeze the bites in a single layer until firm, then transfer to a freezer-safe bag or container. They keep beautifully for about 2 months without losing texture or flavor.
Reheating
Since these bites are best served chilled, simply allow frozen bites to thaw at room temperature for 5–10 minutes before enjoying. This softens them perfectly and brings out the luscious cheesecake vibe without any actual reheating needed.
FAQs
Can I use frozen strawberries instead of fresh?
It’s best to use fresh strawberries for their texture and flavor, but if you only have frozen, make sure to thaw and drain excess liquid well to avoid a watery cheesecake layer.
What if I don’t have protein powder on hand?
The protein powder adds great nutrition and flavor, but you can omit it or substitute with finely ground nuts or seeds—just keep an eye on the texture when mixing.
Can these bites be made vegan?
Absolutely! Use plant-based protein powder, dairy-free yogurt and cream cheese alternatives, and maple syrup or agave as sweeteners to easily veganize this recipe.
How do I prevent the bites from being too sticky?
Lightly oil your hands or dust them with oat flour when rolling. Also, chilling the base dough helps it become less sticky and easier to shape.
Are these bites suitable for meal replacement?
Thanks to their protein content and balanced ingredients, these bites can work well as a nutritious snack or light meal replacement, especially post-workout or on busy days.
Final Thoughts
If you love a snack that satisfies your sweet tooth without derailing your nutrition goals, you absolutely have to try this Healthy No-Bake Strawberry Cheesecake Protein Bites Recipe. It’s a wonderful way to enjoy all the luscious flavors of classic cheesecake and fresh strawberries with none of the fuss or guilt. Once you make them, keep them ready in your fridge and enjoy a bite whenever that little craving hits—you’ll wonder how you ever lived without these little bursts of healthy happiness!
“`
Print
Healthy No-Bake Strawberry Cheesecake Protein Bites Recipe
- Prep Time: 0h 20m
- Cook Time: 0h 0m
- Total Time: 0h 20m
- Yield: Makes about 16–20 bites
- Category: Snack
- Method: No-Cook
- Cuisine: American
- Diet: Low Fat
Description
These Healthy No-Bake Strawberry Cheesecake Protein Bites are a delicious and nutritious snack that combines the creaminess of cheesecake with the freshness of strawberries. Perfectly portioned and packed with protein, they require no baking and are simple to prepare, making them ideal for a quick energy boost or dessert.
Ingredients
For the base:
- 1 cup (90 g) quick oats or rolled oats, finely ground
- 1/4 cup (30 g) almond flour or finely ground almonds
- 2 scoops (about 60 g) vanilla or unflavored whey/plant protein powder
- 2 tbsp (24 g) coconut sugar, light brown sugar, or granulated sweetener of choice
- 1/4 tsp fine sea salt
- 3 tbsp (45 g) plain Greek yogurt (or thick dairy-free yogurt)
- 2 tbsp (30 ml) unsweetened almond milk (or milk of choice), plus 1–3 extra if needed
- 1 tsp pure vanilla extract
For the strawberry cheesecake layer:
- 1 cup (140 g) finely diced fresh strawberries (plus extra for garnish if desired)
- 4 oz (115 g) reduced-fat cream cheese or dairy-free cream cheese, softened to room temperature
- 1/3 cup (80 g) plain or vanilla Greek yogurt (or thick dairy-free yogurt)
- 1 –2 tbsp (15–30 ml) honey, maple syrup, or agave syrup, to taste
- 1 1/2 scoops (about 45 g) vanilla protein powder
- 1 tsp lemon juice
- 1/2 tsp pure vanilla extract
- Pinch of fine sea salt
For rolling or topping (optional):
- 3 –4 tbsp (15–20 g) finely crushed freeze-dried strawberries
- 2 –3 tbsp (15–20 g) finely ground oats, almond flour, or coconut flour
- Extra diced fresh strawberries, for pressing on top
- A drizzle of melted white chocolate or yogurt chips, for decoration (optional)
Instructions
- Prepare tools and pan: Line a small baking sheet or flat container with parchment paper for chilling the bites.
- Grind oats: If your oats are whole rolled oats, pulse them in a food processor or blender until you get a fine, flour-like texture.
- Make the base mixture: In a medium bowl, combine ground oats, almond flour, vanilla or unflavored protein powder, coconut sugar (or sweetener), and salt. Whisk to evenly distribute the dry ingredients. Add Greek yogurt, almond milk, and vanilla extract. Stir with a spoon or spatula until a thick, slightly sticky dough forms. If it seems too dry or crumbly, add extra almond milk 1 teaspoon at a time; if too wet, add 1–2 tbsp more oat flour or protein powder until it holds together when pressed.
- Chill the base briefly: Place the base mixture in the refrigerator for about 10–15 minutes while you prepare the cheesecake layer. This helps it firm up and makes rolling easier later.
- Prepare the strawberry cheesecake mixture: In a separate medium bowl, add the softened cream cheese. Beat with a spoon, spatula, or hand mixer until smooth and creamy. Add Greek yogurt, honey or maple syrup, lemon juice, vanilla extract, and salt. Mix until smooth and well combined. Add vanilla protein powder and mix again. The mixture should be thick, like a soft frosting or thick dip. If it is runny, add 1–2 tbsp extra protein powder; if it becomes too thick and chalky, add 1–2 tsp yogurt or a splash of milk. Gently fold in the finely diced strawberries so they are evenly distributed without smashing them completely.
- Combine base and cheesecake components (Option 1 – Swirled bites): Take the base mixture out of the fridge. Add about half of the strawberry cheesecake mixture to the base and gently fold to create a marbled effect; avoid overmixing so you can still see streaks of white and pink. Reserve the remaining cheesecake mixture for filling the centers or spooning on top.
- Combine base and cheesecake components (Option 2 – Filled “truffle” style bites): Keep the base and cheesecake mixtures separate. You will wrap the base mixture around small dollops of the cheesecake mixture to create a filled center.
- Portion the cheesecake filling (for filled bites): If making filled bites, line a plate with parchment. Using a teaspoon, scoop small mounds (about 1/2 tsp to 1 tsp each) of the cheesecake mixture onto the plate. You want roughly 16–20 little mounds. Place the plate in the freezer for 15–20 minutes to firm up the centers so they are easier to wrap.
- Shape the base balls: Scoop about 1 1/2 to 2 tbsp of the base mixture for each bite. Roll between your palms to form a ball. If it sticks too much, very lightly oil your hands or dust them with oat flour. If you made swirled bites (Option 1), you can fully shape them at this step and skip to chilling and coating. If you are planning to fill them, flatten each ball into a disc about 2–2.5 inches (5–6 cm) in diameter and set aside on a parchment-lined tray.
- Fill the bites (for truffle style): Remove the cheesecake mounds from the freezer; they should be firm but not rock-hard. Place one cheesecake mound in the center of a flattened disc of base mixture. Carefully fold the edges of the base up and around the filling, pinching to seal completely. Roll gently between your palms to form a smooth ball, ensuring no filling is exposed. Repeat until all the base mixture and centers are used. If you have some leftover cheesecake mixture, you can serve it as a dip, spoon a tiny bit on top of each bite, or enjoy it on the side with fruit.
- Prepare coatings or toppings: Place crushed freeze-dried strawberries in a shallow bowl. In another bowl, place a few tablespoons of finely ground oats, almond flour, or coconut flour. If using, melt a small amount of white chocolate or yogurt chips in the microwave in 15–20 second bursts, stirring between each, until smooth. Allow to cool slightly before drizzling.
- Coat the bites: Roll some bites in crushed freeze-dried strawberries for a vibrant pink coating. Roll others in the oat or almond flour mixture for a more neutral, “classic cheesecake” look. You can leave a few plain or mix coatings for variety. If desired, lightly drizzle with melted white chocolate or yogurt chips and top with a small piece of fresh strawberry for extra flair.
- Chill to set: Arrange all finished bites on the parchment-lined tray, ensuring they do not touch. Refrigerate for at least 1–2 hours to allow the flavors to meld and the texture to firm up. For a slightly firmer, more “fudgy” bite, you can freeze them for 30–45 minutes.
- Serve: Serve chilled, straight from the fridge. If stored in the freezer, let sit at room temperature for 5–10 minutes before eating so they soften slightly and taste more cheesecake-like.
- Storage: Store in an airtight container in the refrigerator for up to 4–5 days. For longer storage, freeze in a single layer until solid, then transfer to a freezer-safe bag or container. They will keep well for about 2 months when frozen.
Notes
- Use finely ground oats if you want a smoother texture in the base.
- Adjust the sweetness in both the base and cheesecake layers to your preference by adding more or less sweetener.
- For dairy-free versions, substitute cream cheese and yogurt with plant-based alternatives.
- Keep the strawberry pieces diced finely to avoid crushing and keep a pleasant texture in the cheesecake layer.
- If the base mixture feels sticky, lightly dust your hands or rolling surface with oat flour to prevent sticking.
- Store bites in an airtight container, and allow frozen bites to soften slightly before serving for best flavor.
- Optionally, decorate with melted white chocolate or yogurt chips for a festive touch.
- Freezing the cheesecake mounds before assembling filled bites makes wrapping easier.


