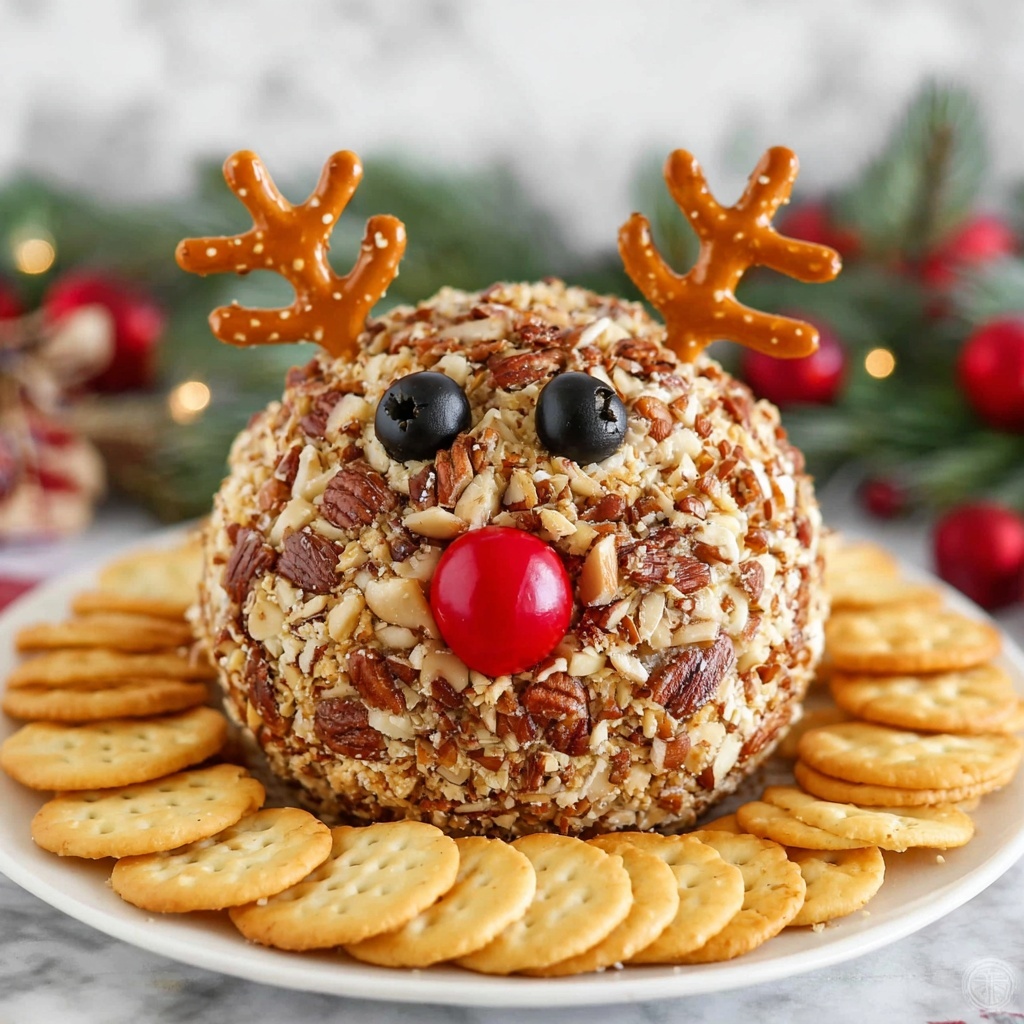
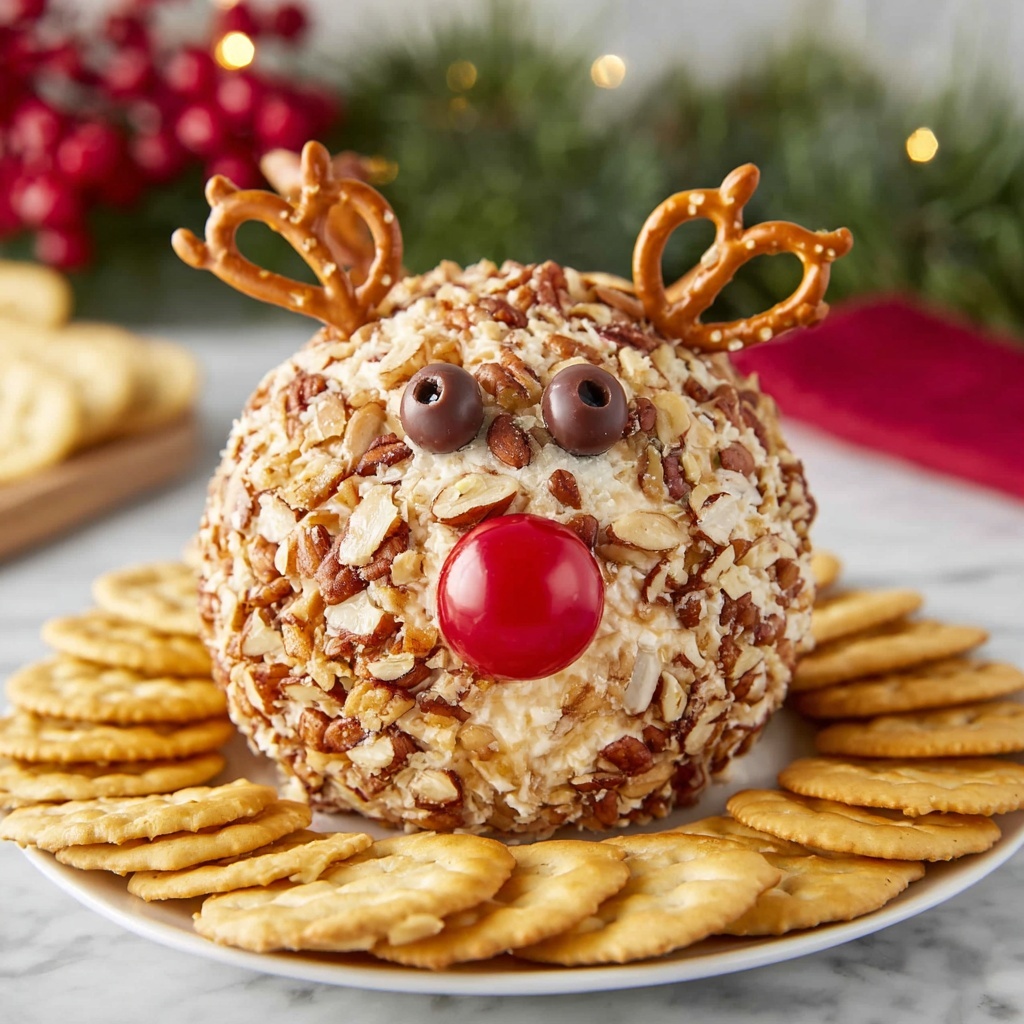
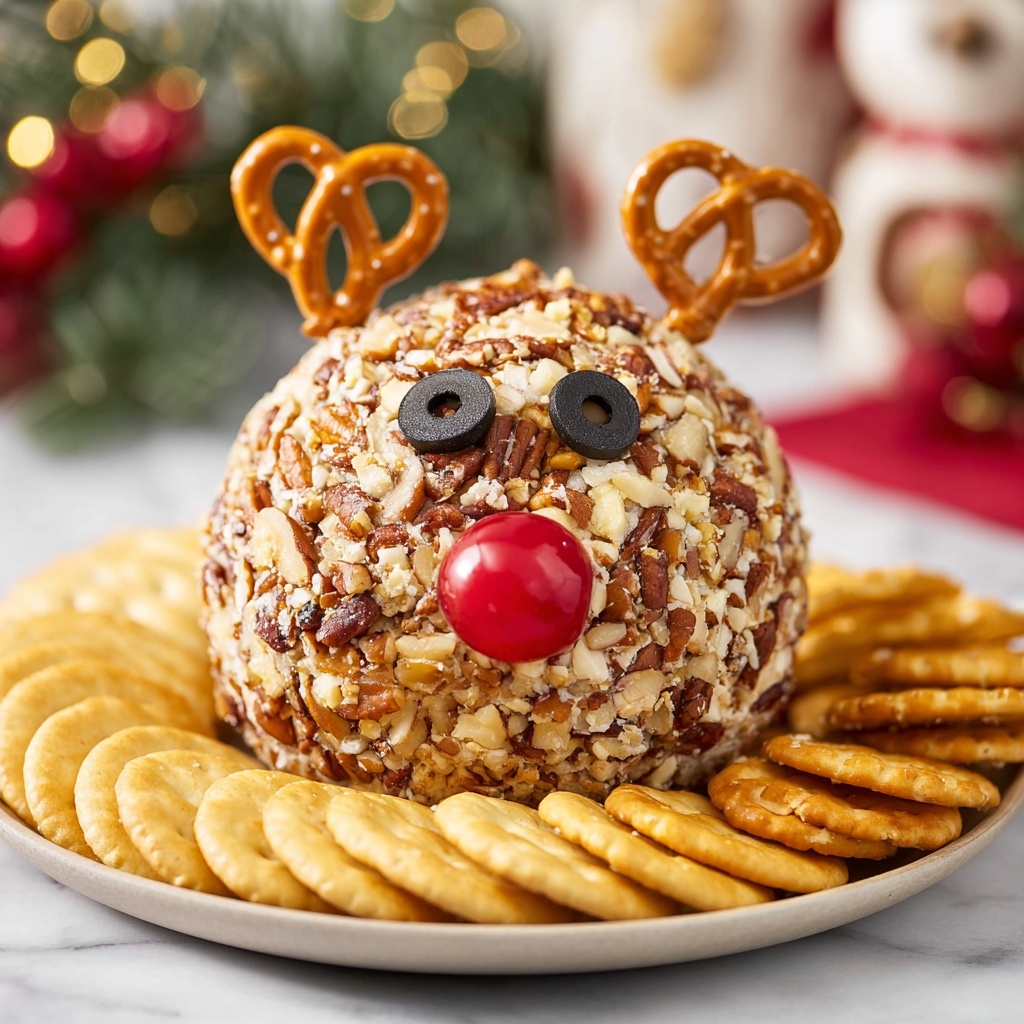
There is nothing quite like the charm and festive fun of the Rudolph Christmas Cheese Ball Recipe to kick off your holiday celebrations. This playful and delicious appetizer combines creamy, tangy cheese with a nutty, crunchy exterior and is cleverly shaped to resemble Rudolph, the most famous reindeer of them all. Whether you’re hosting a party or bringing a dish to a holiday gathering, this cheese ball will instantly become a crowd-pleasing favorite, perfectly blending flavor and Christmas spirit in every bite.
Ingredients You’ll Need
Gathering simple yet essential ingredients is the first step to making this delightful Rudolph Christmas Cheese Ball Recipe. Each component plays a vital role, from the creamy base that provides richness to the crunchy pecans that add texture, and the fun decorative elements that bring Rudolph to life.
- Cream Cheese (16 ounces, room temperature): The smooth base that makes the cheese ball creamy and easy to mold.
- Shredded Cheddar Cheese (2 ½ cups): Adds sharp flavor and a lovely orange color to the mixture.
- Chopped Pecans (1 cup): Provides a rustic crunch and nutty taste to coat the cheese ball.
- Ranch Seasoning Mix (1 ounce): Infuses the mixture with a zesty, savory flavor.
- Black Olives (2): Perfect for creating Rudolph’s eyes with a little whimsy.
- Cherry Tomato (1): The bright red nose that brings Rudolph’s face to life.
- Pretzels (2 regular size): Crafted into antlers, adding both crunch and character.
- Ritz Crackers (optional): An ideal vehicle for serving and enjoying the cheese ball.
How to Make Rudolph Christmas Cheese Ball Recipe
Step 1: Blend the Cheeses and Seasoning
In a medium mixing bowl, combine the room temperature cream cheese, ranch seasoning mix, and shredded cheddar cheese. Mix thoroughly until the ingredients meld into a creamy, flavorful base. This mixture is the heart of your Rudolph Christmas Cheese Ball Recipe, so make sure all elements are evenly combined for the best taste.
Step 2: Shape Into a Ball
With or without gloves, roll the cheese mixture into a compact ball. This step requires a bit of patience but shaping a firm, even ball ensures that the cheese ball will hold its structure during chilling and serving. Wrapping it tightly will help maintain form.
Step 3: Chill Until Firm
Wrap your cheese ball in plastic wrap and refrigerate for approximately four hours. Chilling allows the mixture to firm up, making it easier to handle and coat with pecans in the next step. Patience here pays off with a perfectly set cheese ball ready for decoration.
Step 4: Prepare the Pecan Coating
While your cheese ball is chilling, place the chopped pecans in a small bowl and break up any larger pieces. This helps create a uniform, textured crust on your Rudolph Christmas Cheese Ball Recipe that looks inviting and adds a satisfying crunch.
Step 5: Coat the Cheese Ball with Pecans
Once chilled, gently press the chopped pecans all over the surface of the cheese ball, leaving the flat bottom uncoated so it can sit properly. The pecans stick better if you press firmly but carefully. Don’t worry if a few pecans fall off; keep pressing until the cheese ball is well covered and festive-looking.
Step 6: Craft the Pretzel Antlers
Break regular-sized pretzels in half and remove the inner sections from the best pieces to resemble antlers. If you prefer simplicity, use whole pretzels for each antler. These crunchy, charming antlers are what bring Rudolph’s playful image to your cheese ball creation.
Step 7: Attach the Antlers
Insert one pretzel antler on the top left side and another on the top right side of the cheese ball. Position them so they stand upright, adding immediate character to your Rudolph Christmas Cheese Ball Recipe.
Step 8: Position the Toothpicks for Facial Features
Push toothpicks into the cheese ball where you want the eyes and nose, leaving the pointy parts slightly visible for easy attachment of the olive halves and cherry tomato. This step requires a gentle touch to plan Rudolph’s face thoughtfully.
Step 9: Add the Eyes Using Olive Halves
Cut the black olives in half and pick the flatter side without holes to serve as eyes. Carefully attach them to the toothpicks by the thickest edge without breaking. These little details bring a lifelike and whimsical expression to Rudolph.
Step 10: Create Rudolph’s Nose with the Cherry Tomato
Attach the cherry tomato to a toothpick and gently push it into the front center of the cheese ball. Nestle it close so the nose looks natural and prominently bright—just like that iconic red nose we all love.
Step 11: Serve and Enjoy
Place your completed Rudolph Christmas Cheese Ball Recipe on a festive platter surrounded by your favorite crackers, such as Ritz or water crackers. This appetizer invites everyone to gather around, dip in, and enjoy the festive fun and flavor!
How to Serve Rudolph Christmas Cheese Ball Recipe
Garnishes
Adding fresh garnishes like sprigs of rosemary or evergreen twigs around the platter enhances the Christmas theme while giving a hint of herbal freshness that complements the richness of the cheese. These garnishes also make your presentation look carefully curated and extra festive.
Side Dishes
Pair your Rudolph cheese ball with an array of crackers, sliced baguette, or crisp vegetable sticks such as celery and carrots. These sides add contrasting textures and allow guests to customize each bite, balancing the creamy cheese with crunchy, fresh accompaniments.
Creative Ways to Present
Consider placing the Rudolph cheese ball on a wooden cutting board, surrounded by small bowls of additional nuts, olives, and dried fruits. Another fun idea is to nestle the cheese ball in a wreath-shaped tray of fresh herbs and cranberries. These touches make your Rudolph Christmas Cheese Ball Recipe the star centerpiece at any holiday table.
Make Ahead and Storage
Storing Leftovers
Wrap any leftover Rudolph Christmas Cheese Ball Recipe tightly in plastic wrap or place it in an airtight container. Store in the refrigerator for up to 3 to 4 days. This ensures freshness and maintains the cheese’s creamy texture without absorbing odors from the fridge.
Freezing
This cheese ball recipe doesn’t freeze particularly well because the texture of cream cheese and shredded cheddar can change. For best flavor and consistency, it’s recommended to enjoy the Rudolph Christmas Cheese Ball Recipe fresh or refrigerated rather than frozen.
Reheating
Since this dish is meant to be served cold or at room temperature, reheating is not necessary and not advised. Instead, remove the cheese ball from the fridge about 15-20 minutes before serving to let it soften slightly for easier spreading and enhanced flavor.
FAQs
Can I use other nuts besides pecans?
Absolutely! Walnuts, almonds, or even crushed pretzels can make great coatings. Just choose something with a texture and flavor that complements the cheese for your perfect Rudolph Christmas Cheese Ball Recipe.
Is it necessary to use ranch seasoning mix?
The ranch seasoning adds a special tang and depth to the cheese ball, but you can substitute it with your favorite dry seasoning mix if you want to get creative with flavors. Just keep the balance of savory and creamy in mind.
How far in advance can I prepare this cheese ball?
You can prepare the Rudolph Christmas Cheese Ball Recipe up to 2 days in advance. Just keep it properly wrapped and refrigerated until you’re ready to decorate and serve.
What can I use if I don’t have pretzels for antlers?
Feel free to get creative with snack sticks, breadsticks, or even carrot sticks cut into antler shapes. The goal is a fun, festive look that fits your personal style.
Can I make this recipe dairy-free or vegan?
It would take some experimentation, but using vegan cream cheese and cheddar alternatives might work. Keep in mind that texture and flavor will differ, but the festive presentation can still shine.
Final Thoughts
Making the Rudolph Christmas Cheese Ball Recipe is one of those joyful holiday traditions that bring both smiles and delicious bites to the table. It’s wonderfully simple, visually charming, and packed with festive flavor—the perfect appetizer to share with friends and family. I can’t wait for you to try it and watch Rudolph become the star of your holiday spread!
Print
Rudolph Christmas Cheese Ball Recipe
- Prep Time: 15 minutes
- Cook Time: 0 minutes
- Total Time: 4 hours 15 minutes
- Yield: 10 servings
- Category: Appetizer
- Method: No-Cook
- Cuisine: American
Description
Create a festive Rudolph Christmas Cheese Ball that’s perfect for holiday gatherings. This fun and easy no-bake appetizer combines creamy cream cheese, sharp cheddar, and tangy ranch seasoning, all rolled in crunchy chopped pecans. Decorated with pretzel antlers, olive eyes, and a cherry tomato nose, this cheese ball is as adorable as it is delicious. Serve with crackers for a crowd-pleasing party treat.
Ingredients
Cheese Ball Base
- 16 Ounces Cream Cheese (room temperature)
- 2 ½ Cups Shredded Cheddar Cheese
- 1 ounce Ranch Seasoning Mix
Coating
- 1 Cup Chopped Pecans
Decorations
- 2 Black Olives
- 1 Cherry Tomato
- 2 Regular Pretzels (not mini)
Optional Serving
- Ritz Crackers or your favorite crackers
Instructions
- Mix Ingredients: In a medium mixing bowl, combine the room temperature cream cheese, ranch seasoning mix, and shredded cheddar cheese. Mix thoroughly until well blended.
- Form Ball: Using gloves if preferred, roll the cheese mixture into a compact ball shape.
- Chill Cheese Ball: Wrap the formed ball tightly in plastic wrap and refrigerate for about 4 hours or until firm enough to handle.
- Prepare Nuts: Place the chopped pecans into a small cereal bowl, breaking up any larger pieces to ensure even coating.
- Coat Cheese Ball: With gloves if desired, scoop pecans into your hand and press them firmly onto the chilled cheese ball, covering all sides except the flat bottom so the ball can sit properly.
- Make Antlers: Break two regular-sized pretzels in half, removing the small center pieces from the best sections to resemble antlers. Alternatively, use whole pretzels if you prefer.
- Attach Antlers: Insert one pretzel antler into the top left side of the cheese ball and the other into the top right side.
- Insert Toothpicks: Push toothpicks into the front of the cheese ball for eyes and nose, leaving the pointed ends slightly exposed for attaching decorations.
- Add Eyes: Cut both black olives in half; use the halves without large holes as eyes. Carefully attach each olive half onto the toothpicks by pressing the thickest inside edge onto the toothpick.
- Add Nose: Attach the cherry tomato to a toothpick and gently insert it into the cheese ball where the nose should be, nestling it closely for a natural look.
- Serve: Place the completed Rudolph cheese ball on a platter and serve alongside your favorite crackers such as Ritz. Enjoy the festive and delicious appetizer!
Notes
- The cheese ball will firm up after chilling but should still be pliable enough to shape and coat.
- Optional gloves help keep hands clean during shaping and decorating.
- You can substitute pecans with other nuts like walnuts or almonds based on preference or availability.
- To make cleanup easier, shape the cheese ball on parchment paper before chilling.
- For a stronger ranch flavor, add a bit more ranch seasoning as desired.
- Be gentle when adding olive eyes to avoid breaking them.

