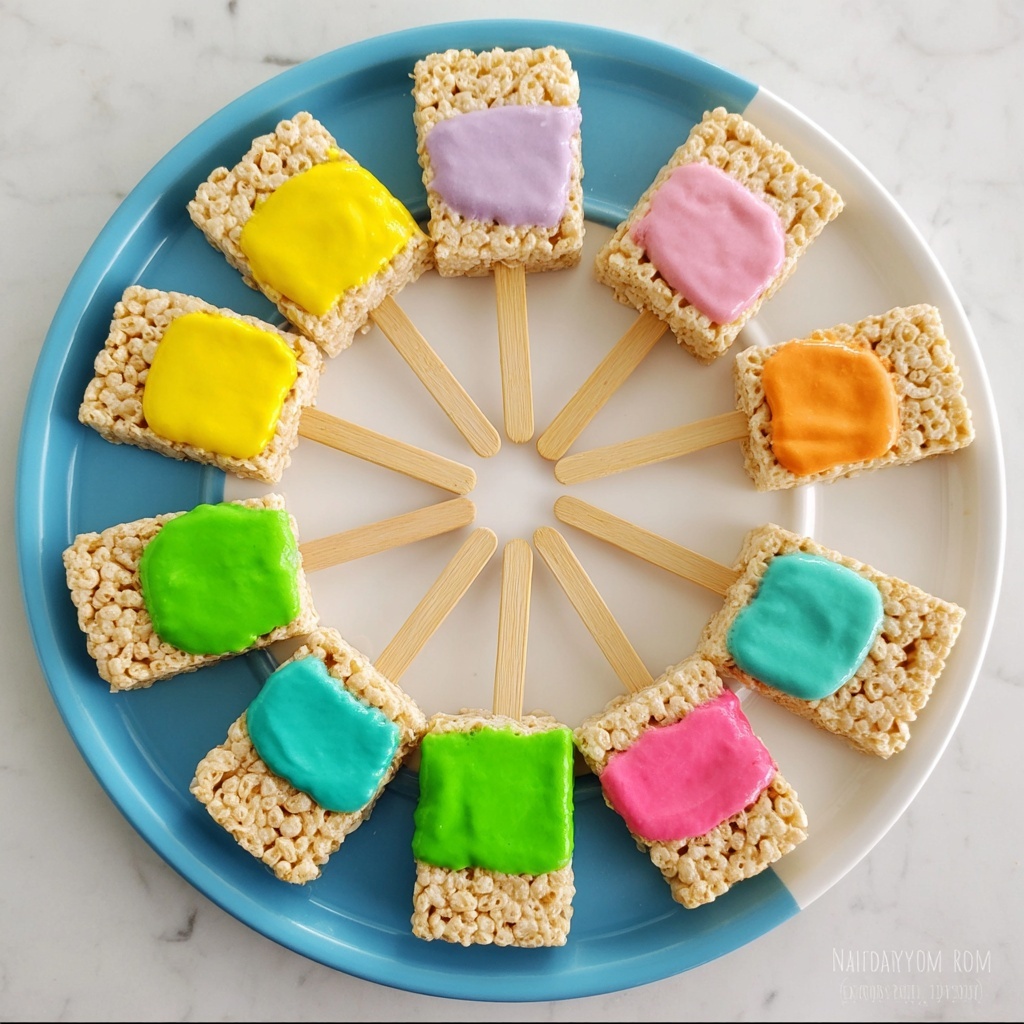
If you’re on the hunt for a fun, vibrant, and utterly delicious treat to wow your friends or brighten up a party, the Paint Brush Rice Krispie Treats Recipe is your new best friend in the kitchen. This recipe takes the nostalgic, crispy sweetness of Rice Krispie treats and transforms them into colorful paintbrushes dipped in luscious dripping frosting. It’s ridiculously easy, wildly creative, and perfect for anyone looking to add a splash of whimsy and flavor to their snack table. Trust me, once you try this, there’s no going back to plain old treats again.
Ingredients You’ll Need
Getting started with the Paint Brush Rice Krispie Treats Recipe means gathering a handful of simple, everyday ingredients, each playing a crucial role in delivering that perfect combination of texture, taste, and vibrant color you’ll love. These essentials keep things straightforward but never boring.
- 12 Kellogg’s premade Rice Krispie Treats: These ready-to-go treats save time and provide the perfect base with their classic marshmallow crunch.
- 3 cups Powdered Sugar: This is the sweet foundation of the frosting, giving it that smooth texture ideal for dipping and spreading.
- 1/2 cup Butter: Adds richness and creaminess to the frosting, helping it stick beautifully to the treats.
- 2 tablespoons Milk: Balances the frosting’s thickness to create that perfect drip effect.
- 1 teaspoon Vanilla: Adds a warm, comforting aroma and depth of flavor to the frosting.
- Food Coloring: The star of the show — this brings the paintbrush effect to life with colorful frosting shades.
- Wooden Popsicle Sticks: These turn your Rice Krispie treats into easy-to-hold paintbrushes, making the dipping and eating process a breeze.
How to Make Paint Brush Rice Krispie Treats Recipe
Step 1: Insert the Popsicle Sticks
Begin by firmly pressing one wooden popsicle stick into the bottom center of each premade Rice Krispie treat. This transforms your classic snack into a playful paintbrush shape, setting the stage for all the colorful fun ahead. Make sure the stick is inserted deep enough to hold but not poke through the other side.
Step 2: Prepare the Frosting Base
In a large bowl, combine the powdered sugar, butter, milk, and vanilla. Mix these ingredients together until smooth and creamy. This simple frosting is the secret that will give you that luscious drip and brilliant paint effect on your treats. The texture should be thick but spreadable—adjust with a little more milk if needed.
Step 3: Divide and Conquer with Colors
Once your frosting base is ready, divide it evenly into 4 or 5 small bowls. This step is where the magic of the Paint Brush Rice Krispie Treats Recipe truly begins, allowing you to experiment with multiple vibrant colors.
Step 4: Add the Food Coloring
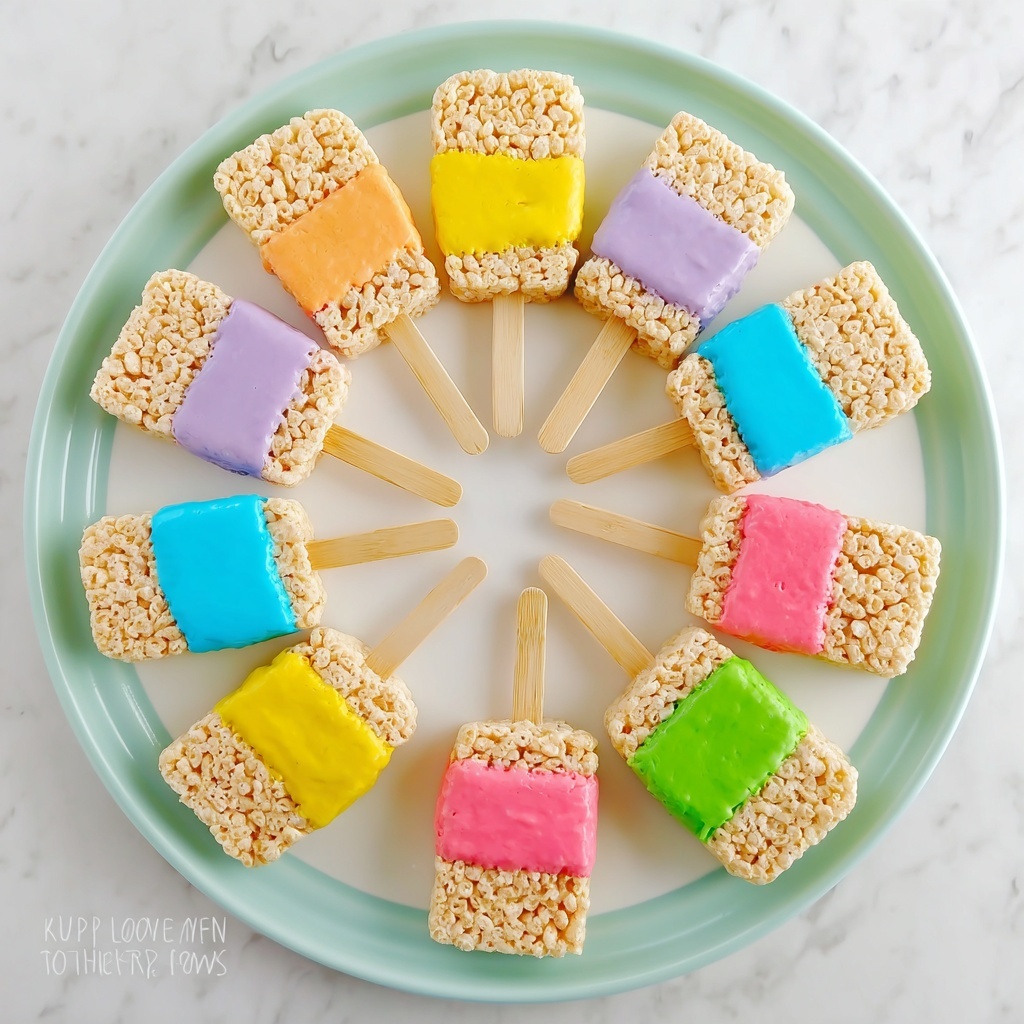
Add a few drops of different food coloring to each bowl of frosting and stir well until you reach rich, opaque hues. Don’t be shy here; brighter colors make for much more visually stunning paintbrush treats, perfectly capturing that dripping paint look. This is where your creativity shines!
Step 5: Dip and Decorate
Finally, dip your Rice Krispie treats (with sticks) into the colored frosting. Tilt and use a small spatula or spoon to spread the frosting around the top and sides in a way that mimics real dripping paint. This step brings the treats to life with their signature look. Let excess frosting drip off for the best effect and place the painted treats on parchment paper to set slightly before serving.
How to Serve Paint Brush Rice Krispie Treats Recipe

Garnishes
For an added burst of fun, consider sprinkling edible glitter or colorful sprinkles on the wet frosting right after dipping. This adds texture and sparkle, making your paintbrush treats look even more festive and eye-catching. Fresh fruit or edible flowers can also beautifully frame a serving platter, enhancing the colorful vibe.
Side Dishes
Serve these playful treats alongside simple sides like fresh fruit kabobs or a light yogurt dip to balance their sweetness. If you want to keep the artsy theme going, consider mini sandwiches cut into painting palettes or cookie “canvases” decorated with royal icing.
Creative Ways to Present
Present your Paint Brush Rice Krispie Treats Recipe in a sturdy container filled with colorful shredded paper or edible jelly beans to hold them upright. Another charming option is to arrange them on a tray around a small cup of sprinkles, so guests can add their own “paint” before enjoying their treat—interactive and delicious!
Make Ahead and Storage
Storing Leftovers
If you have any leftovers (though that rarely happens!), store your decorated treats in an airtight container at room temperature. They will stay fresh for up to 3 days, though frosting may soften slightly, so handle with care.
Freezing
These treats can be frozen, but it’s best to do so before dipping and coloring. Wrap each plain Rice Krispie treat tightly in plastic wrap and place them in an airtight container. When you’re ready, thaw completely and then proceed with the frosting steps to maintain the best texture and appearance.
Reheating
Since these treats are best served chilled or at room temperature, reheating is not recommended. If you want a softer texture, simply let them sit out for 15–20 minutes before enjoying.
FAQs
Can I use homemade Rice Krispie treats instead of premade ones?
Absolutely! Homemade Rice Krispie treats work wonderfully and give you more control over sweetness and texture—just make sure they’re fully cooled and firm before inserting sticks.
What type of food coloring works best for this recipe?
Gel food coloring is ideal because it provides vibrant color without thinning out your frosting too much, keeping that perfect drip consistency.
How do I prevent the frosting from dripping off completely?
To keep the frosting dripping but still sticking to the treat, ensure your frosting isn’t too thin; adjust powdered sugar and milk accordingly to find that perfect spreadable yet thick consistency.
Can I make this recipe vegan?
Yes! Substitute butter with a vegan margarine and choose premade vegan Rice Krispie treats or make your own with vegan marshmallows. Just ensure your vanilla and food coloring are vegan-friendly as well.
Is it okay to use different shapes instead of rectangular Rice Krispie treats?
Definitely! Feel free to cut your treats into different shapes with cookie cutters before inserting sticks for a unique twist on the Paint Brush Rice Krispie Treats Recipe.
Final Thoughts
I can’t recommend the Paint Brush Rice Krispie Treats Recipe enough if you’re looking for a fast, fun, and visually stunning treat that brings joy to any gathering. It’s a wonderful way to engage kids and adults alike, sparking creativity and smiles in every colorful bite. So next time you want to brighten your dessert table, give this recipe a try—you’ll wonder how you ever enjoyed Rice Krispie treats any other way!
Print
Paint Brush Rice Krispie Treats Recipe
- Prep Time: 5 minutes
- Cook Time: 0 minutes
- Total Time: 5 minutes
- Yield: 12 treats
- Category: Dessert
- Method: No-Cook
- Cuisine: American
Description
These whimsical Paint Brush Rice Krispie Treats are a fun and creative twist on a classic dessert. Made by inserting popsicle sticks into premade Rice Krispie Treats and decorating them with colorful, homemade frosting that mimics dripping paint, they are perfect for parties, kids’ snacks, or artistic-themed events.
Ingredients
Rice Krispie Treats
- 12 Kellogg’s premade Rice Krispie Treats
- Wooden Popsicle Sticks (12 pieces)
Frosting
- 3 cups Powdered Sugar
- 1/2 cup Butter (unsalted, softened)
- 2 tablespoons Milk
- 1 teaspoon Vanilla Extract
- Food Coloring (various colors)
Instructions
- Insert sticks: Press one wooden popsicle stick firmly into the bottom center of each Rice Krispie Treat to create a handle for dipping and decoration.
- Make frosting: In a large mixing bowl, combine the powdered sugar, softened butter, milk, and vanilla extract. Stir until smooth and creamy, forming a thick frosting.
- Divide frosting: Separate the frosting evenly into 4 or 5 small bowls depending on how many colors you want to use.
- Add color: Add a few drops of different food coloring to each bowl and mix well until the desired shades are achieved.
- Decorate treats: Dip each Rice Krispie Treat into the colored frosting, then use a spatula or spoon to spread the frosting around the treat to create a dripping paint effect. Allow the frosting to set slightly before serving.
Notes
- For easier dipping, chill the frosting slightly to thicken before applying.
- Use gel food coloring for more vibrant colors without thinning the frosting.
- Store the decorated treats in an airtight container at room temperature for up to 2 days.
- Feel free to use homemade Rice Krispie Treats if preferred.
- These treats are best enjoyed fresh to maintain the crisp texture.

