
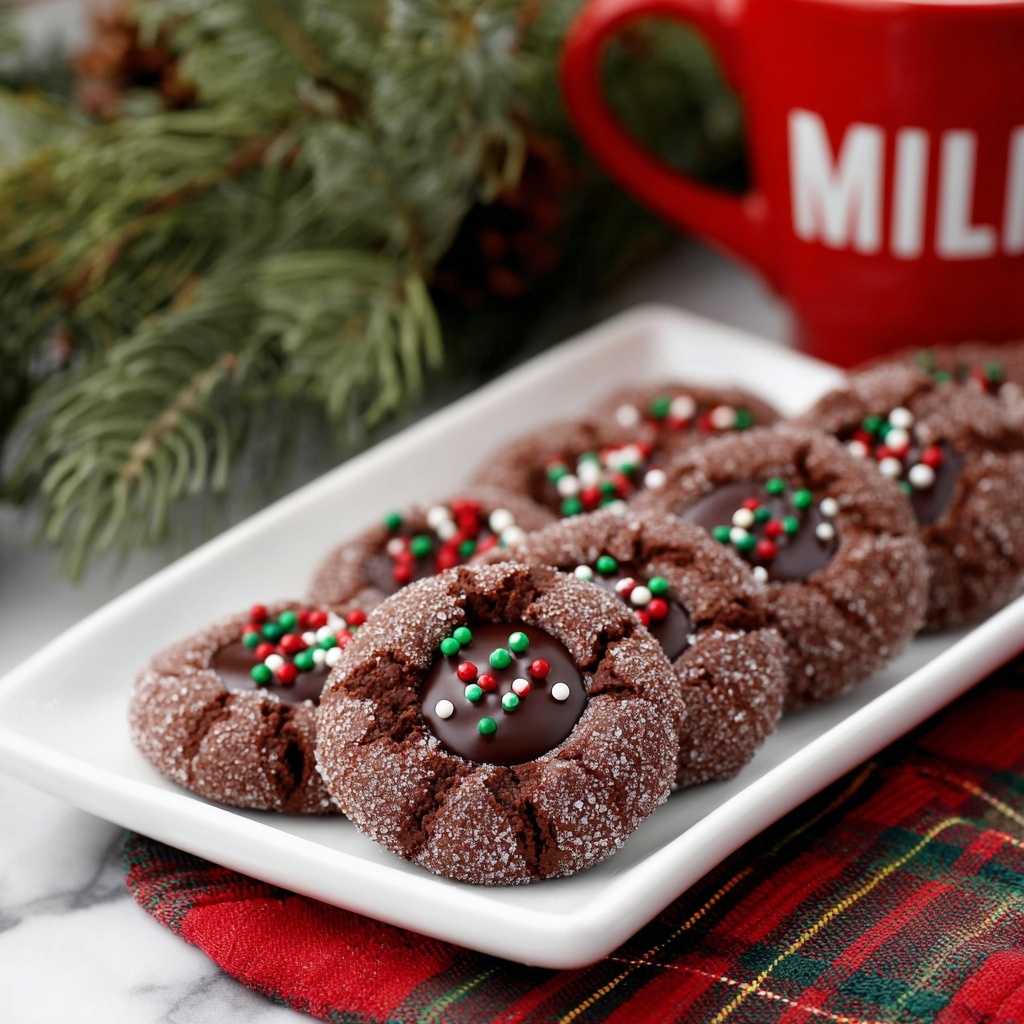
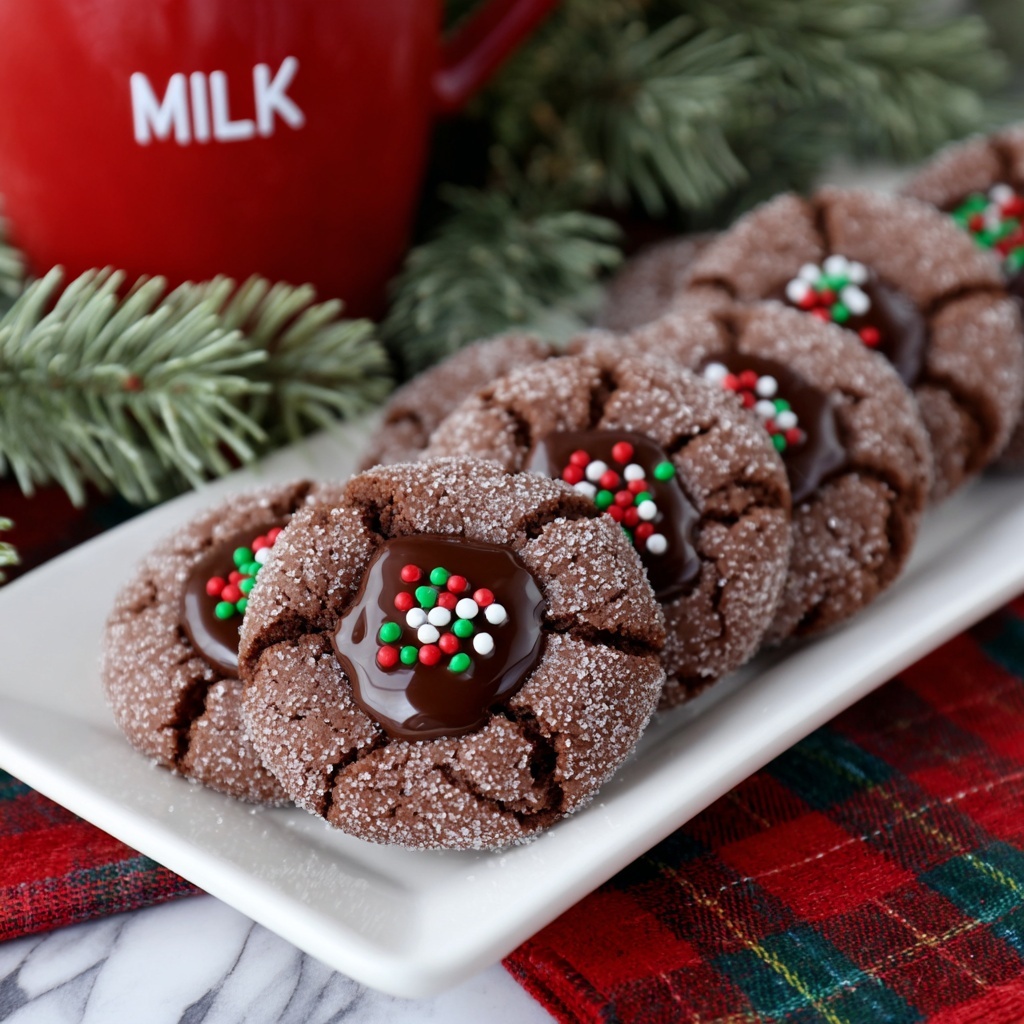
If you’re craving a cookie that perfectly balances rich chocolate flavor with a delightful surprise in every bite, then I have a treat for you: the Chocolate Thumbprint Cookies Recipe. These cookies come with a tender, cocoa-infused dough rolled in sugar for a sparkling crunch, and a luscious chocolate filling nestled right in the center. They’re nostalgic, festive, and utterly irresistible — whether you’re baking for family gatherings, gift baskets, or just because. Trust me, once you try this Chocolate Thumbprint Cookies Recipe, it’ll become one of your all-time favorites to bake and share.
Ingredients You’ll Need
This Chocolate Thumbprint Cookies Recipe uses simple pantry staples that come together effortlessly to create that perfect chocolate cookie experience. Each ingredient plays a vital role in texture, flavor, or appearance, ensuring a cookie that’s both tender and visually festive.
- 1 Cup unsalted butter (softened): Provides a creamy richness and tender crumb to the cookie dough.
- 1 Cup sugar: Sweetens the dough while contributing to the cookie’s texture when creamed with butter.
- 1 large egg: Binds the ingredients together and adds moisture for a soft interior.
- 2 tsp pure vanilla extract: Adds warmth and enhances the chocolate flavor beautifully.
- 2 Cups flour: The base of the dough, it provides structure and a soft chewiness.
- 1/2 Cup dark chocolate cocoa powder: Delivers that deep, intense chocolate taste and dark color.
- 1 1/2 tsp kosher salt: Balances sweetness and intensifies the chocolate notes.
- 2 Cups sugar (to roll the cookie dough in): Coats the dough balls for a sparkling, sweet crunch outside.
- 1 Cup Christmas sprinkles (optional): Adds festive color and a bit of crunch if you want to dress things up.
- 1 Cup semi-sweet chocolate chips: For melting into a luscious filling inside each thumbprint.
- 1/2 Cup heavy whipping cream: Combined with chocolate chips to make a silky ganache filling.
How to Make Chocolate Thumbprint Cookies Recipe
Step 1: Prepare Your Oven and Cookie Sheets
Start by preheating your oven to 350 degrees Fahrenheit and lining two cookie sheets with parchment paper. This ensures your cookies will bake evenly without sticking or browning too much on the bottom.
Step 2: Cream Butter and Sugar
Using a large bowl, beat together the softened butter and 1 cup of sugar until the mixture becomes light and fluffy—this usually takes a few minutes and is key for that tender texture that melts in your mouth.
Step 3: Mix in Egg and Vanilla
Add the large egg and pure vanilla extract to the creamed mixture and beat until everything is combined smoothly. This step adds moisture and flavor depth, making your cookies sing with warmth.
Step 4: Combine Dry Ingredients
In a separate medium bowl, whisk together the flour, dark cocoa powder, and kosher salt. This dry mix is what delivers that rich chocolate punch and the perfect balance of salty-sweet.
Step 5: Incorporate Dry Ingredients Gradually
Slowly beat the dry ingredients into the wet mixture until just combined. Over-mixing can lead to tough cookies, so stop as soon as everything forms a consistent dough.
Step 6: Prepare Sugar for Rolling
Pour the remaining 2 cups of sugar into a small bowl. This sugar will coat the cookie dough balls, creating a sparkling outer crunch that contrasts the soft interior.
Step 7: Shape the Dough
Using a small ice cream scooper or spoon, scoop a portion of dough into your hand and roll it into a smooth ball. The uniform size ensures even baking and a beautiful presentation.
Step 8: Coat in Sugar
Roll each dough ball generously in the sugar bowl so it’s completely covered. This step adds that extra sweetness and a slightly crisp texture to the outside of the cookie.
Step 9: Make Thumbprint Indents
Place your sugar-coated dough balls onto the prepared cookie sheets, spacing them evenly. Use a tablespoon or your thumb to gently press an indent into the center of each ball. This well will hold the luscious chocolate filling.
Step 10: Bake the Cookies
Bake the cookies for 8 minutes at 350 degrees until they’re set around the edges but still soft in the center. It’s a quick bake that keeps them tender and full of chocolatey goodness.
Step 11: Cool Completely
Allow the cookies to cool on the baking sheet for a few minutes, then transfer them to a wire rack to cool completely. The cooling prevents the cookies from breaking when adding the filling.
Step 12: Prepare the Chocolate Filling and Fill Thumbprints
Heat the heavy whipping cream gently until warm but not boiling, then pour it over the semi-sweet chocolate chips in a heat-safe bowl. Let it sit for a minute, then stir until smooth and glossy. Spoon this ganache into the indents of each cookie and let it set at room temperature. This gives you that silky, melt-in-your-mouth chocolate center that makes this Chocolate Thumbprint Cookies Recipe truly special.
How to Serve Chocolate Thumbprint Cookies Recipe
Garnishes
For a festive touch, consider topping the chocolate ganache with Christmas sprinkles or chopped nuts. Sprinkles add vibrant colors that brighten the cookies, making them perfect for holiday celebrations or gifting. Nuts add a delightful crunch and extra flavor dimension.
Side Dishes
These cookies pair wonderfully with a cold glass of milk, a cup of freshly brewed coffee, or a warm mug of hot chocolate. The richness of the cookies balances beautifully with these beverages, turning snack time into a cozy indulgence.
Creative Ways to Present
Try arranging the cookies on a festive platter or packaging them in clear cellophane bags tied with ribbons for gifts. You can even create a cookie tower by stacking them with small dabbs of ganache or frosting between layers. Presentation adds flair and makes sharing these beauties even more special.
Make Ahead and Storage
Storing Leftovers
Store leftover cookies in an airtight container at room temperature for up to one week. Make sure the ganache is fully set before storing to avoid sticky messes. This keeps the cookies soft on the inside and maintains their shiny, crunchy exterior.
Freezing
If you want to save some for later, you can freeze the baked cookies without the ganache filling for up to three months. Place them between layers of parchment paper in an airtight container or freezer bag. When ready to serve, thaw at room temperature and then add fresh ganache.
Reheating
To revive the cookies, gently warm them in a microwave for 10-15 seconds or in a low oven (about 300 degrees) for a few minutes. This softens the cookie and slightly melts the ganache for an extra gooey, decadent treat.
FAQs
Can I use milk chocolate instead of semi-sweet chocolate chips?
Absolutely! Milk chocolate will create a sweeter and creamier ganache. Just keep in mind it might be less intense than with semi-sweet, but still delicious.
What if I don’t have cocoa powder on hand?
Cocoa powder is essential for that rich chocolate flavor and color in this recipe, so it’s best not to skip it. If absolutely necessary, you can try substituting with melted chocolate, but adjust the flour amount accordingly.
How can I make these cookies vegan?
You can try substituting the butter with vegan margarine or coconut oil and use a flax egg instead of a regular egg. Make sure to use vegan chocolate chips and dairy-free cream alternatives for the ganache. The texture might vary slightly but still tasty.
Why do I need to roll the dough balls in sugar before baking?
Rolling in sugar creates a sweet, slightly crunchy exterior that contrasts beautifully with the soft cookie inside. It also makes the cookies visually appealing with a sparkling finish.
Can I make these cookies gluten-free?
Yes! Use a trusted gluten-free all-purpose flour blend, and make sure the baking powder and other ingredients are gluten-free certified. The texture may differ a bit, but the flavor will remain indulgent.
Final Thoughts
There is nothing quite like pulling a tray of freshly baked Chocolate Thumbprint Cookies Recipe out of the oven to fill your kitchen with that warm, chocolaty aroma. Whether you’re baking these for yourself, friends, or holiday gatherings, they have a way of bringing smiles and sweet warmth to any occasion. So go ahead and dive into this recipe — I promise these cookies will become a beloved staple in your treat rotation.
Print
Chocolate Thumbprint Cookies Recipe
- Prep Time: 10 minutes
- Cook Time: 8 minutes
- Total Time: 18 minutes
- Yield: 24 cookies
- Category: Dessert
- Method: Baking
- Cuisine: American
Description
These Chocolate Thumbprint Cookies are a delightful treat featuring a rich cocoa-flavored dough rolled in sugar, baked to perfection, and filled with a luscious semi-sweet chocolate ganache. Perfect for holiday gatherings or any festive occasion, they combine a tender, buttery cookie with a creamy chocolate center and optional colorful Christmas sprinkles for a festive touch.
Ingredients
Cookie Dough
- 1 Cup unsalted butter (softened)
- 1 Cup sugar
- 1 large egg
- 2 tsp pure vanilla extract
- 2 Cup flour
- 1/2 Cup dark chocolate cocoa powder
- 1 1/2 tsp kosher salt
- 2 Cup sugar (to roll the cookie dough in)
- 1 Cup Christmas Sprinkles (optional)
Filling
- 1 Cup semi-sweet chocolate chips
- 1/2 Cup heavy whipping cream
Instructions
- Preheat Oven: Preheat your oven to 350°F (175°C) and line two cookie sheets with parchment paper to prevent sticking and ensure even baking.
- Mix Butter and Sugar: In a large bowl, beat the unsalted softened butter and 1 cup sugar together until the mixture becomes light and fluffy, incorporating air for a tender texture.
- Add Egg and Vanilla: Beat in the egg and pure vanilla extract until fully combined to infuse richness and flavor into the dough.
- Combine Dry Ingredients: In a separate medium bowl, whisk together the flour, dark chocolate cocoa powder, and kosher salt evenly distributing all dry components.
- Incorporate Dry into Wet: Gradually add the dry mixture into the wet ingredients, beating gently until the cookie dough forms a cohesive and uniform consistency.
- Prepare Rolling Sugar: Pour the additional 2 cups of sugar into a small bowl to use for rolling the cookie dough balls later.
- Scoop Dough Balls: Using a small ice cream scooper or spoon, portion out the cookie dough into your hand and roll each portion into a smooth ball.
- Roll in Sugar: Roll each cookie dough ball thoroughly in the sugar bowl, coating the entire surface evenly for a sparkling, sweet crust.
- Make Thumbprint Indents: Place the sugar-coated balls onto the prepared cookie sheets spaced apart, and press a tablespoon into the center of each ball to create an indent for the filling.
- Bake Cookies: Bake the cookies in the preheated oven for 8 minutes until set. The cookies should be soft but firm enough to hold their shape.
- Cool Completely: Remove the cookies from the oven and allow them to cool completely on the cookie sheets to prevent breaking when filling.
- Prepare Chocolate Filling: In a small saucepan or microwave-safe bowl, gently heat the heavy whipping cream until warm (not boiling). Pour the warm cream over the semi-sweet chocolate chips and let sit for 2 minutes. Stir until smooth and glossy to create a ganache.
- Fill Cookies: Spoon or pipe the prepared chocolate ganache into the thumbprint indents of each cooled cookie. Optionally, sprinkle Christmas sprinkles on top of the ganache before it sets for a festive finish.
Notes
- Make sure the butter is softened but not melted for the best cookie texture.
- Do not overbake the cookies, as they can become dry; remove when edges are set but centers are still soft.
- For extra festive cookies, use colored sugars or sprinkles of your choice.
- Let cookies cool completely before filling to ensure the ganache does not melt or spread.
- Ganache can be refrigerated to firm up if needed before filling.


