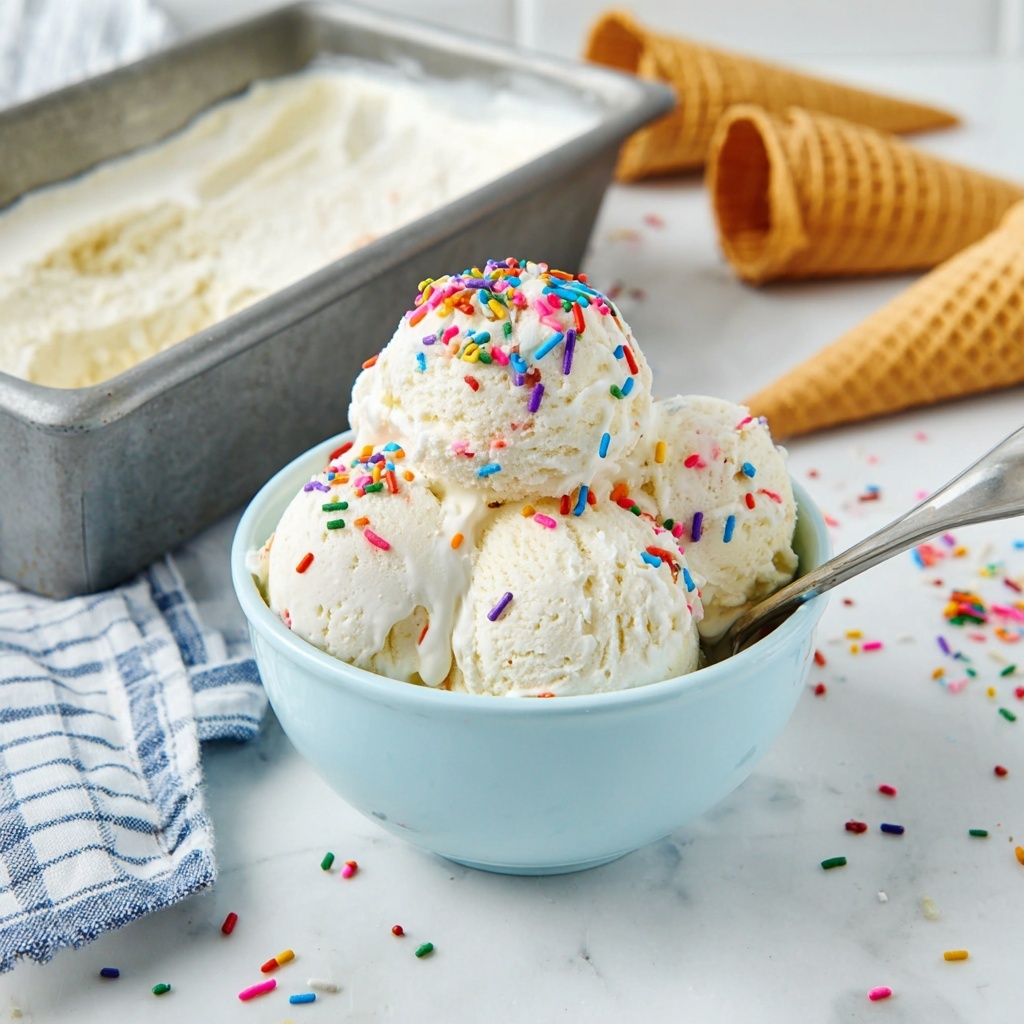
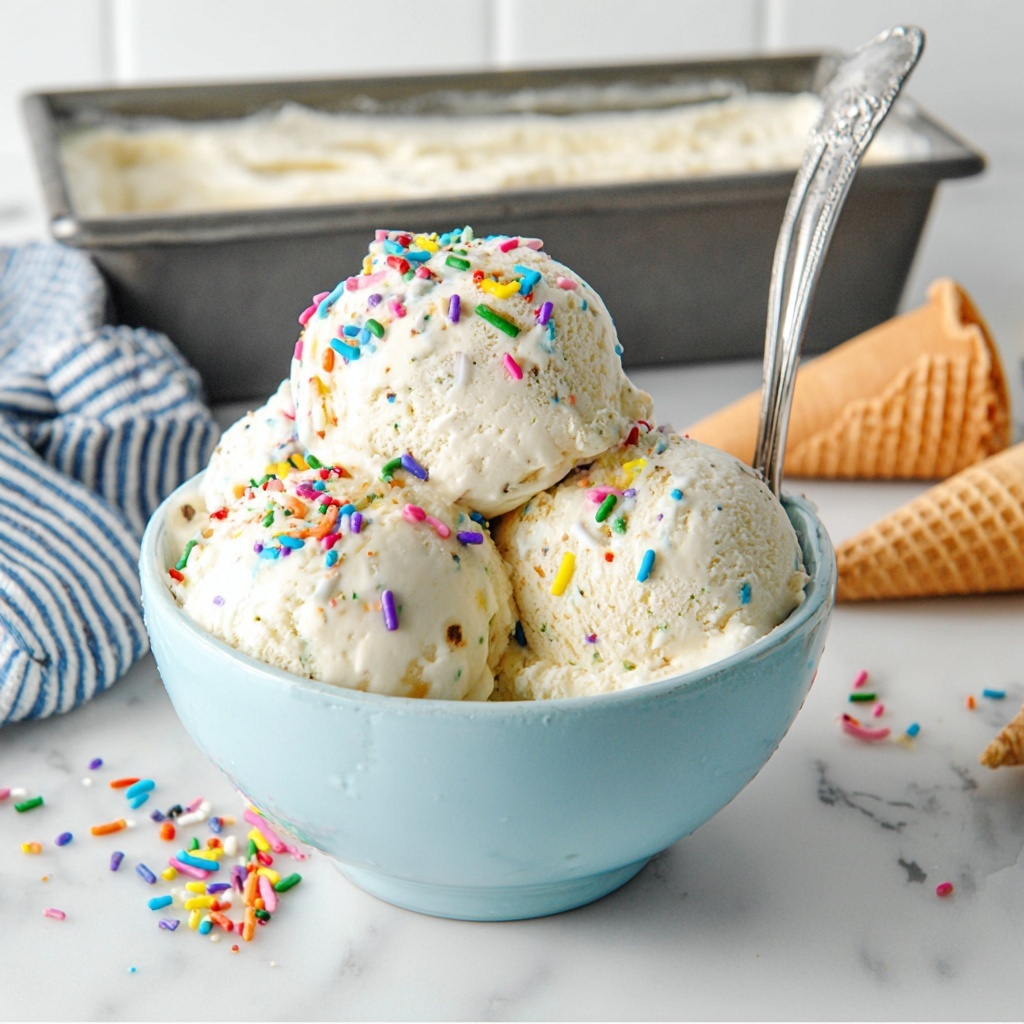
If you’ve ever dreamed of creamy, dreamy ice cream that you can whip up in a snap without an ice cream maker, this No Churn Vanilla Ice Cream Recipe is just the ticket. It’s incredibly simple, made with just a handful of everyday ingredients, yet the results are nothing short of magical. Silky, sweet, and perfectly vanilla-flavored, this ice cream is a classic treat that feels homemade and utterly irresistible every single time.
Ingredients You’ll Need
Getting your ingredients right is the first step to making this delightful No Churn Vanilla Ice Cream Recipe shine. Each ingredient plays a crucial role — from the richness of the heavy cream to the signature sweetness brought by sweetened condensed milk, plus that subtle hint of vanilla that makes this ice cream truly special.
- 2 cups heavy cream (cold): The backbone of your ice cream’s creamy, smooth texture, whipping up into fluffy peaks that give your ice cream body.
- 14 ounces sweetened condensed milk: Adds luscious sweetness and creaminess, ensuring your ice cream is perfectly balanced without needing extra sugar.
- 1 teaspoon vanilla extract: The star flavor, delivering that warm, fragrant vanilla note that makes this recipe a timeless favorite.
- Pinch of sea salt: Enhances all the flavors, cutting through the sweetness for a well-rounded taste experience.
- Sprinkles and ice cream cones (for serving): Optional fun additions that make enjoying this ice cream extra special, especially for kids and celebrations.
How to Make No Churn Vanilla Ice Cream Recipe
Step 1: Chill Your Loaf Pan
Start by placing a loaf pan into the freezer to chill while you prepare the ice cream mixture. This step helps the ice cream set quickly and evenly once poured in, keeping the texture perfect.
Step 2: Whip the Heavy Cream
Pour the cold heavy cream into a large mixing bowl and use an electric mixer to whip it until stiff peaks form. This is the moment your ice cream gains that luscious airiness and soft body that you crave in every bite.
Step 3: Fold in Sweetened Condensed Milk, Vanilla, and Sea Salt
Gently fold the sweetened condensed milk, vanilla extract, and a pinch of sea salt into the whipped cream. The key here is to fold carefully to maintain the fluffy texture of the cream — this ensures your No Churn Vanilla Ice Cream Recipe stays light and creamy without deflating.
Step 4: Transfer to Chilled Loaf Pan
Remove your chilled loaf pan from the freezer and pour in the vanilla ice cream mixture. Smooth the top gently for an even freeze and a beautiful final presentation.
Step 5: Freeze Until Set
Place the pan in the freezer on a level surface and let it chill for 6 to 8 hours, or until the ice cream is completely firm. Once set, your ice cream is ready to scoop, serve, and satisfy.
How to Serve No Churn Vanilla Ice Cream Recipe

Garnishes
There’s something joyful about adding a colorful sprinkle or two on top of this classic ice cream. Fresh berries, chopped nuts, or even a drizzle of chocolate syrup are fantastic ways to elevate the simple vanilla flavor and bring in exciting textures.
Side Dishes
This No Churn Vanilla Ice Cream Recipe pairs beautifully with warm desserts like apple crisps, brownies, or a freshly baked chocolate chip cookie. The contrast between hot and cold takes dessert time up a notch and creates a comforting flavor combination.
Creative Ways to Present
For an eye-catching presentation, try serving scoops of this ice cream in waffle cones or hollowed-out fruit like pineapple boats or cantaloupe halves. Layering it in a parfait with crushed cookies and whipped cream is another fantastic way to surprise your guests with both taste and style.
Make Ahead and Storage
Storing Leftovers
If you happen to have any leftovers (which is rare!), cover the ice cream tightly with plastic wrap or an airtight lid to keep it from absorbing freezer odors. Stored properly, it maintains its creamy texture and flavor for up to two weeks.
Freezing
This No Churn Vanilla Ice Cream Recipe freezes beautifully without the typical ice crystals you might expect. Just ensure you freeze it on a flat surface and keep it sealed airtight so it stays smooth and creamy every time you enjoy it later.
Reheating
Since it’s ice cream, there’s no reheating involved — but if it gets too hard in the freezer, just let it sit at room temperature for 5-10 minutes before scooping. This softens it to the perfect consistency for serving, without melting it too much.
FAQs
Can I use a different type of milk instead of sweetened condensed milk?
Sweetened condensed milk is key for the creamy texture and perfect sweetness in this No Churn Vanilla Ice Cream Recipe. Regular milk won’t provide the same results, but you could try experimenting with evaporated milk plus sugar if necessary, though the texture may vary.
Is it possible to add mix-ins like chocolate chips or fruit?
Absolutely! Once you’ve folded in the sweetened condensed milk and vanilla into your whipped cream, gently fold in chopped chocolate chips, fresh fruit, or nuts before freezing for fun variations on this classic.
Can I make this vegan or dairy-free?
This recipe relies heavily on dairy products for its creamy texture, but you can explore coconut cream and sweetened condensed coconut milk as substitutes. Keep in mind, the texture and flavor might be slightly different but still delicious!
How long can I keep this ice cream in the freezer?
This No Churn Vanilla Ice Cream Recipe is best enjoyed within two weeks of freezing for optimal flavor and creamy texture, although it can safely last up to a month if stored properly in an airtight container.
Do I need an ice cream maker?
No ice cream maker is needed at all, which is part of the beauty of this No Churn Vanilla Ice Cream Recipe. The whipped cream creates the airiness, so all you need is a freezer and a little patience.
Final Thoughts
Making your own ice cream at home has never been this easy or satisfying. I encourage you to dive in and try this No Churn Vanilla Ice Cream Recipe — it’s a simple, fun way to treat yourself and your loved ones to a homemade dessert that tastes like it took hours, but really didn’t. Once you taste how rich and creamy it is, I guarantee it will become a beloved staple in your dessert routine!
Print
No Churn Vanilla Ice Cream Recipe
- Prep Time: 15 minutes
- Cook Time: 0 minutes
- Total Time: 6 hours 15 minutes
- Yield: 6 servings
- Category: Dessert
- Method: No-Cook
- Cuisine: American
Description
This no-churn vanilla ice cream recipe is an easy and delicious way to make creamy homemade ice cream without the need for an ice cream maker. Using just a few simple ingredients, including heavy cream and sweetened condensed milk, this frozen dessert comes together quickly and freezes to a perfect scoopable texture. Ideal for a sweet treat on a hot day, it’s customizable with sprinkles and perfect for serving in cones or bowls.
Ingredients
Ice Cream Base
- 2 cups heavy cream (cold)
- 14 ounces sweetened condensed milk
- 1 teaspoon vanilla extract
- Pinch of sea salt
For Serving
- Sprinkles (optional)
- Ice cream cones (optional)
Instructions
- Chill the Pan: Place a loaf pan into the freezer to chill thoroughly, ensuring a cold surface to help the ice cream set properly.
- Whip the Cream: In a large mixing bowl, use an electric mixer to beat the cold heavy cream until stiff peaks form. This creates the fluffy texture needed to make the ice cream creamy and airy.
- Combine Ingredients: Gently fold the sweetened condensed milk, vanilla extract, and a pinch of sea salt into the whipped cream. Be careful to fold gently so you keep the mixture light and airy.
- Pour Mixture into Pan: Remove the chilled loaf pan from the freezer and pour the combined ice cream mixture into it, smoothing the top if needed.
- Freeze: Place the loaf pan back into the freezer and chill the mixture for 6 to 8 hours in a level spot, or until the ice cream is fully set and scoopable.
- Serve: Once set, scoop the ice cream into cones or bowls, add sprinkles if desired, and enjoy your homemade no-churn vanilla ice cream.
Notes
- For best results, make sure the heavy cream is very cold before whipping.
- You can add mix-ins such as chocolate chips or crushed cookies when folding in the condensed milk.
- Store leftover ice cream covered in the freezer and consume within a week for optimal freshness.
- If the ice cream is too hard after freezing, let it sit at room temperature for a few minutes before scooping.


