
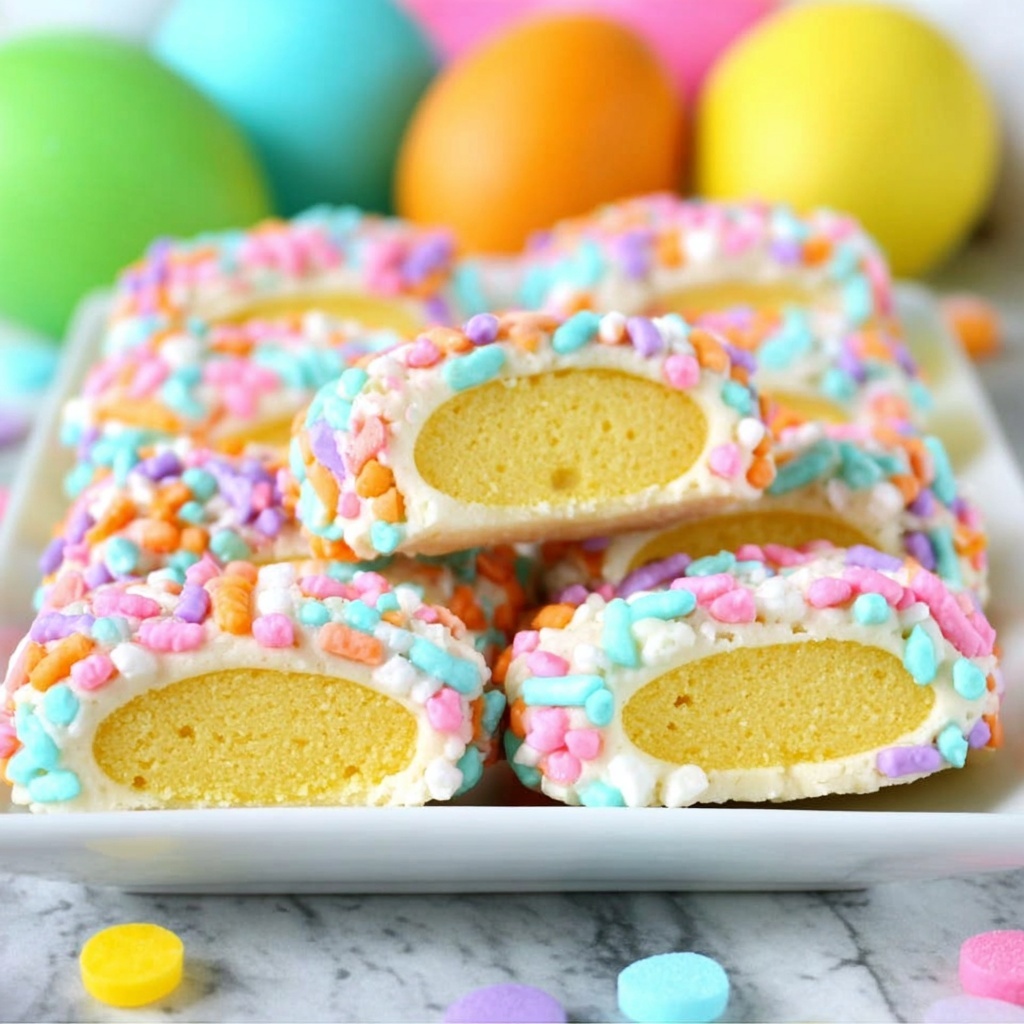
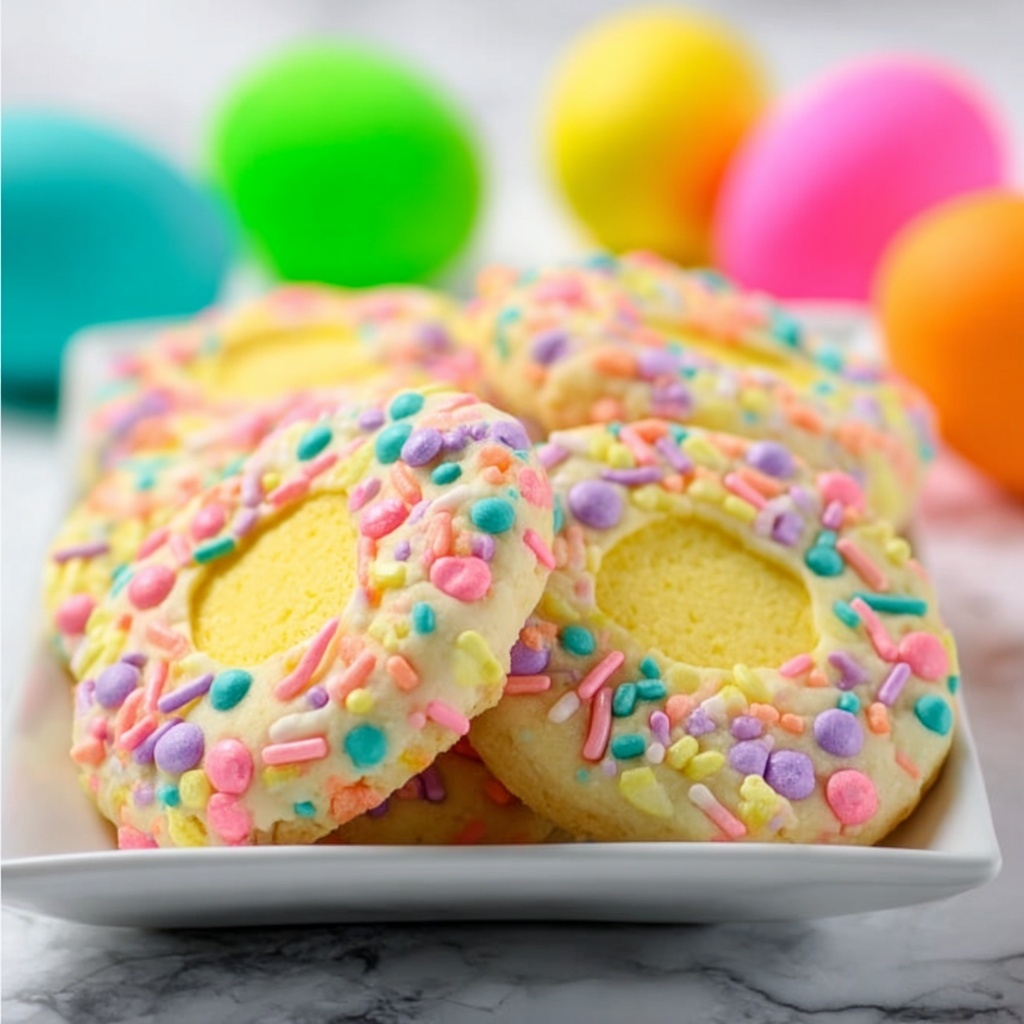
If you’ve been searching for a delightfully sweet and festive treat to brighten up your spring celebrations, this Easter Thumbprint Cookies Recipe is an absolute must-try. Picture buttery, tender cookies rolled in cheerful Easter sprinkles, each boasting a colorful dollop of melted candy nestled right in the center. These cookies bring together a perfect balance of crunch, sweetness, and vibrant hues that not only taste divine but also add an irresistible charm to your holiday spread. Whether you’re baking for family, friends, or simply to satisfy that cookie craving, these little bites will make your Easter extra special and utterly memorable.
Ingredients You’ll Need
Getting the perfect Easter Thumbprint Cookies Recipe means using simple yet essential ingredients that combine to create sublime texture, flavor, and festive color. Each component plays a unique role, making the cookies soft, sweet, and adorably decorated.
- 1 1/4 Cup flour: Provides the foundation for the cookie dough’s tender crumb.
- 1/4 tsp kosher salt: Enhances all the other flavors and balances sweetness.
- 1/2 Cup unsalted butter: Adds richness and buttery softness to the cookies.
- 1/2 Cup powdered sugar: Gives a smooth, sweet texture that blends effortlessly.
- 1 tsp pure vanilla extract: Infuses the dough with warm, comforting aroma.
- 2 tbsp heavy whipping cream: Keeps the dough moist and tender.
- 2 Cup Easter sprinkles: Brings festive color and a slight crunch to the cookie edges.
- Candy melts (Yellow and pink): Perfect for filling the thumbprints with vibrant, smooth centers.
How to Make Easter Thumbprint Cookies Recipe
Step 1: Prepare Your Baking Space
Begin by preheating your oven to 350 degrees Fahrenheit. Line two cookie sheets with parchment paper or a silicone baking mat; this ensures your cookies won’t stick and bake evenly, making cleanup a breeze.
Step 2: Cream the Wet Ingredients
Using a standing mixer, beat together the unsalted butter, powdered sugar, pure vanilla extract, and heavy whipping cream until everything is combined and fluffy. This mixture forms the luscious base that keeps your cookies soft.
Step 3: Mix in the Dry Ingredients
Gradually add the flour and kosher salt to your wet mixture, continuing to beat until a smooth dough forms. This step is essential for achieving the right balance between tender and sturdy cookie texture.
Step 4: Shape the Dough
With a small cookie scoop, portion out the dough and roll it between your hands to form neat little balls. This consistent sizing helps your cookies bake evenly every time.
Step 5: Coat in Easter Sprinkles
Roll each dough ball generously in the colorful Easter sprinkles to coat the outside. This not only adds visual appeal but provides a fun, festive crunch with every bite.
Step 6: Create the Thumbprints
Press your thumb or the back of a spoon gently into the center of each sprinkle-coated dough ball, making a small indentation for the candy melt filling later on.
Step 7: Bake to Perfection
Place the cookies in your preheated oven and bake for 7 to 10 minutes, until the bottoms are just lightly golden. The baking time is key to maintaining a tender, melt-in-your-mouth texture.
Step 8: Cool and Melt Candy
While the cookies cool on a rack, melt your yellow and pink candy melts separately. Pour about 1 cup of each color into piping bags and microwave for 45 seconds or until smooth and ready for filling.
Step 9: Fill the Thumbprints
Cut a small tip off each piping bag and carefully fill the thumbprint indentations with the melted candy melts. Take your time to make each center perfectly colorful and glossy.
Step 10: Set and Enjoy
Allow the candy centers to harden completely before diving in. The result? A beautifully festive Easter cookie that’s as fun to look at as it is to eat.
How to Serve Easter Thumbprint Cookies Recipe
Garnishes
Elevate your Easter Thumbprint Cookies Recipe with a few simple garnishes. Sprinkle a touch of edible glitter or crushed freeze-dried raspberries over the candy centers once set for an extra pop of sparkle and flavor. These tiny details make your cookies look professionally made and add subtle flavor twists.
Side Dishes
These cookies pair wonderfully with a fresh cup of tea, a creamy latte, or even chilled milk. For a brunch spread, serve alongside fruit salad or pastel-colored macarons to build an inviting and cohesive Easter dessert table that guests will rave about.
Creative Ways to Present
Display your Easter Thumbprint Cookies Recipe on a tiered cake stand surrounded by fresh spring flowers like tulips or daffodils for a charming centerpiece. Alternatively, arrange them in pastel-colored treat boxes tied with ribbon for adorable edible gifts that friends and family will cherish.
Make Ahead and Storage
Storing Leftovers
To keep your cookies fresh, store them in an airtight container at room temperature. They will stay deliciously soft for up to 4 days, making it easy to bake in advance and enjoy throughout your celebrations.
Freezing
You can freeze baked Easter Thumbprint Cookies by placing them in a single layer on a baking sheet first, then transferring them to freezer-safe bags or containers once solid. This method preserves flavor and texture for up to 2 months, perfect if you want to prep early.
Reheating
If you prefer your cookies slightly warm, reheat gently in a 300-degree oven for about 3 to 5 minutes. Avoid microwaving, as it can soften the candy centers too much and change the cookie’s texture.
FAQs
Can I use different candy melt colors?
Absolutely! One of the joys of this Easter Thumbprint Cookies Recipe is customizing your candy melt colors to match any occasion or personal preference. Experiment with blues, greens, or even multi-color blends for a fun twist.
What if I don’t have a standing mixer?
No worries at all. You can easily mix the dough by hand using a sturdy wooden spoon or a hand mixer, just make sure to cream the butter and sugar thoroughly for the best texture.
Can these cookies be made gluten-free?
Yes, by substituting the all-purpose flour with a gluten-free flour blend designed for baking, you can enjoy these festive cookies without gluten. Just keep an eye on the baking time as it may vary slightly.
Why do the cookies need heavy whipping cream?
The heavy whipping cream adds moistness and richness to the dough, preventing the cookies from becoming dry and crumbly. It’s a small ingredient with a big impact on the final texture.
How long do the cookies need to cool before filling?
It’s best to let the cookies cool completely on a wire rack before filling with melted candy. This prevents the chocolate from melting or running off the cookie, helping maintain those perfect, colorful centers.
Final Thoughts
There’s something truly special about making and sharing this Easter Thumbprint Cookies Recipe. It’s not just about the sweet, festive flavors but the joy of creating something colorful and heartwarming for the people you care about. Once you try these cookies, they’ll undoubtedly become a favorite part of your seasonal celebrations—so grab your ingredients, roll up your sleeves, and start baking your way into a wonderfully happy Easter!
Print
Easter Thumbprint Cookies Recipe
- Prep Time: 10 minutes
- Cook Time: 10 minutes
- Total Time: 20 minutes
- Yield: 22 cookies
- Category: Dessert
- Method: Baking
- Cuisine: American
Description
Celebrate Easter with these delightful Easter Thumbprint Cookies, featuring a buttery, tender dough rolled in colorful sprinkles and filled with vibrant melted candy melts. These festive treats are perfect for holiday gatherings and sure to brighten any cookie platter with their cheerful colors and sweet, creamy centers.
Ingredients
Dry Ingredients
- 1 1/4 cup all-purpose flour
- 1/4 tsp kosher salt
Wet Ingredients
- 1/2 cup unsalted butter
- 1/2 cup powdered sugar
- 1 tsp pure vanilla extract
- 2 tbsp heavy whipping cream
Decorations and Fillings
- 2 cup Easter sprinkles
- Candy melts (yellow and pink), for filling
Instructions
- Preheat Oven: Preheat your oven to 350°F (175°C) and line two cookie sheets with parchment paper or silicone baking mats to prevent sticking.
- Cream Wet Ingredients: In a standing mixer, beat the unsalted butter, powdered sugar, vanilla extract, and heavy whipping cream together until the mixture is smooth and well combined.
- Incorporate Dry Ingredients: Gradually add the all-purpose flour and kosher salt into the wet mixture, beating until a cohesive dough forms without overmixing.
- Shape Dough Balls: Using a small cookie scoop, portion out the dough and roll each scoop into a smooth ball with your hands.
- Coat with Sprinkles: Roll each dough ball generously in the Easter sprinkles to coat the exterior, then place them spaced apart on the prepared cookie sheets.
- Create Thumbprint Indents: Gently press your thumb or the back of a spoon into the center of each dough ball to create a deep indentation for filling.
- Bake: Place the cookie sheets in the oven and bake the cookies for 7 to 10 minutes, or until the bottoms are lightly golden but the tops remain pale and soft.
- Cool and Melt Candy Melts: Allow the cookies to cool on the sheet while melting the candy melts in a microwave-safe container. Heat them in 45-second intervals until fully melted and smooth.
- Fill Cookies: Pour about 1 cup of the melted candy melts into separate piping bags. Snip off a small tip and carefully fill each cookie’s thumbprint indent with the melted candy melts, alternating colors as desired.
- Set and Serve: Let the candy melts harden on the cookies at room temperature. Once set, your Easter Thumbprint Cookies are ready to enjoy or gift!
Notes
- Use room temperature butter for easier mixing and better texture.
- If you don’t have a standing mixer, a hand mixer or vigorous hand mixing will work.
- Press the thumbprint deeply to hold enough filling without overflow during baking.
- Decorate the cookies further with extra sprinkles or edible glitter for more festive appeal.
- Store cookies in an airtight container at room temperature for up to 5 days.


