There is something truly heartwarming and satisfying about baking a loaf of soda bread that comes together in no time and delivers a beautiful, rustic crust with a wonderfully tender crumb inside. If you’ve been curious about traditional Irish baking or just want a quick bread fix, the World’s Best No Yeast Bread – Irish Soda Bread Recipe is your golden ticket. This loaf requires no complicated yeast starters or long rising times, relying instead on simple, pantry-friendly ingredients like baking soda and buttermilk to create an irresistibly soft, flavorful bread that’s perfect for breakfast, lunch, or dinner.
Ingredients You’ll Need
What’s amazing about this recipe is how straightforward your ingredient list is. Each one plays a crucial role in creating the perfect texture and flavor – from the tang of the buttermilk to the bite of the wholemeal flour.
- White flour (2 cups): Provides structure and lightness to balance the density of the wholemeal flour.
- Wholemeal flour (1 3/4 cups): Adds a nutty depth and hearty texture that makes the bread wholesome and satisfying.
- Extra flour (2–3 tbsp): Used for dusting, ensuring the dough doesn’t stick during kneading.
- Baking soda (1 1/2 tsp): The magic leavening agent that reacts with the buttermilk to give rise without yeast.
- Salt (1 1/2 tsp): Enhances the natural flavors and balances the tang of the buttermilk.
- Buttermilk (2 cups, cold): Adds moisture, tang, and reacts with the baking soda to create the bread’s rise and tenderness.
How to Make World’s Best No Yeast Bread – Irish Soda Bread Recipe
Step 1: Preheat and Prepare
Start by getting your oven nice and hot at 220°C (430°F). This high heat helps create the classic crispy golden crust that everyone loves about soda bread. Don’t forget to line your baking tray with paper so the bread won’t stick and baking is even.
Step 2: Mix the Dry Ingredients
Whisk together your white and wholemeal flours with baking soda and salt. Combining these dry components ensures an even distribution of the raising agent and seasoning throughout the dough for consistent flavor and rise.
Step 3: Add the Buttermilk
Pour in the cold buttermilk and stir briefly. The dough will look loose and shaggy and become sticky, which is exactly what you want at this stage. Don’t overmix; this keeps the bread tender rather than tough.
Step 4: Knead Gently
Dust your workspace with some of the extra flour and scrape the dough out. Sprinkle a little more flour on top, then gently knead no more than eight times just to bring it together into a neat ball. Light kneading keeps the texture open and soft without toughening the bread.
Step 5: Shape the Dough
Place your dough ball on the lined tray and pat it down into a roughly 2.5cm (1 inch) thick disc. This shape helps the bread cook evenly and develop its traditional form.
Step 6: Score the Top
Use a serrated knife to cut a cross about 1cm deep into the dough’s surface. This step isn’t just for looks! It allows the heat to penetrate evenly and the bread to rise beautifully.
Step 7: Bake and Adjust Temperature
Bake for 20 minutes at the high temperature. Then turn the oven down to 200°C (390°F) and bake for an additional 20 minutes. Your bread is ready when the base sounds hollow when tapped – a sure sign of a perfectly cooked loaf.
Step 8: Cool Before Slicing
Patience is key here: transfer your bread to a wire rack and let it cool for at least 30 minutes before slicing. This rest time helps the interior crumb set and prevents it from becoming gummy.
How to Serve World’s Best No Yeast Bread – Irish Soda Bread Recipe
Garnishes
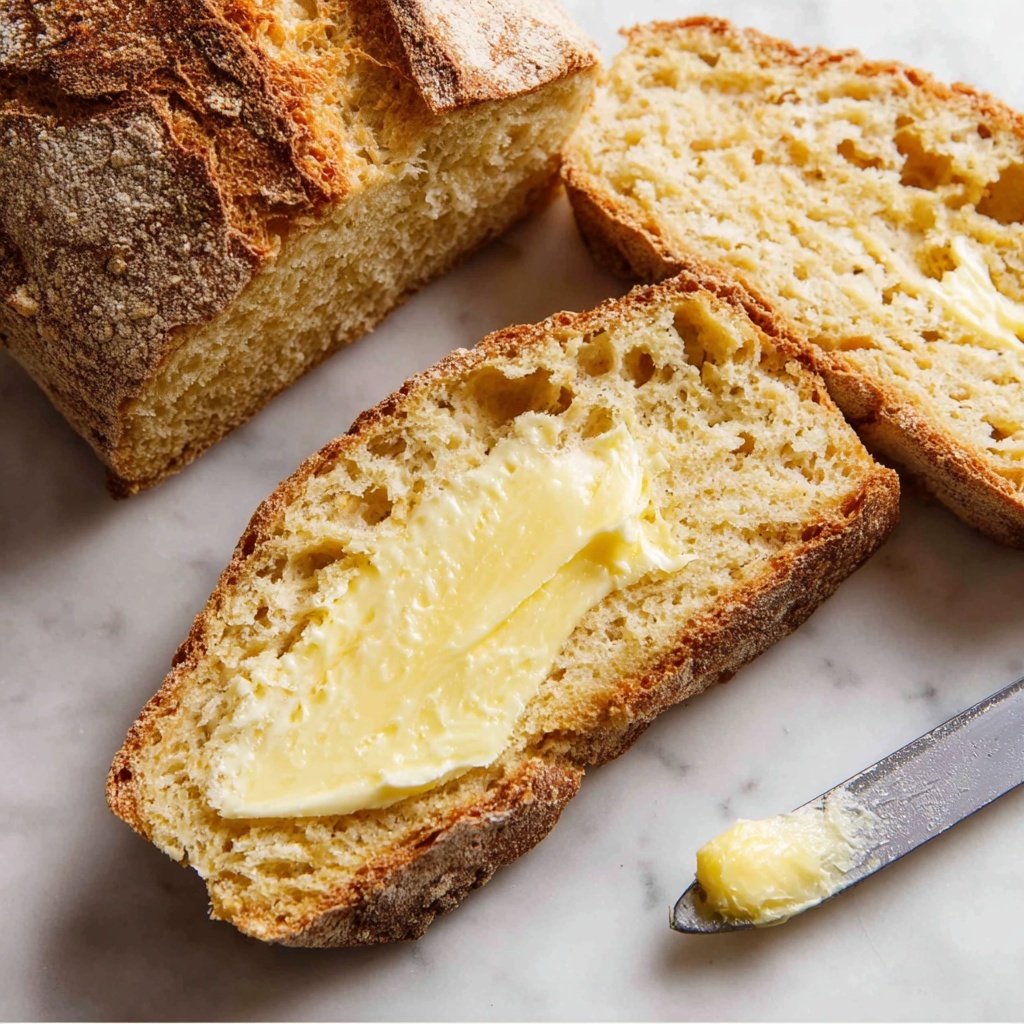
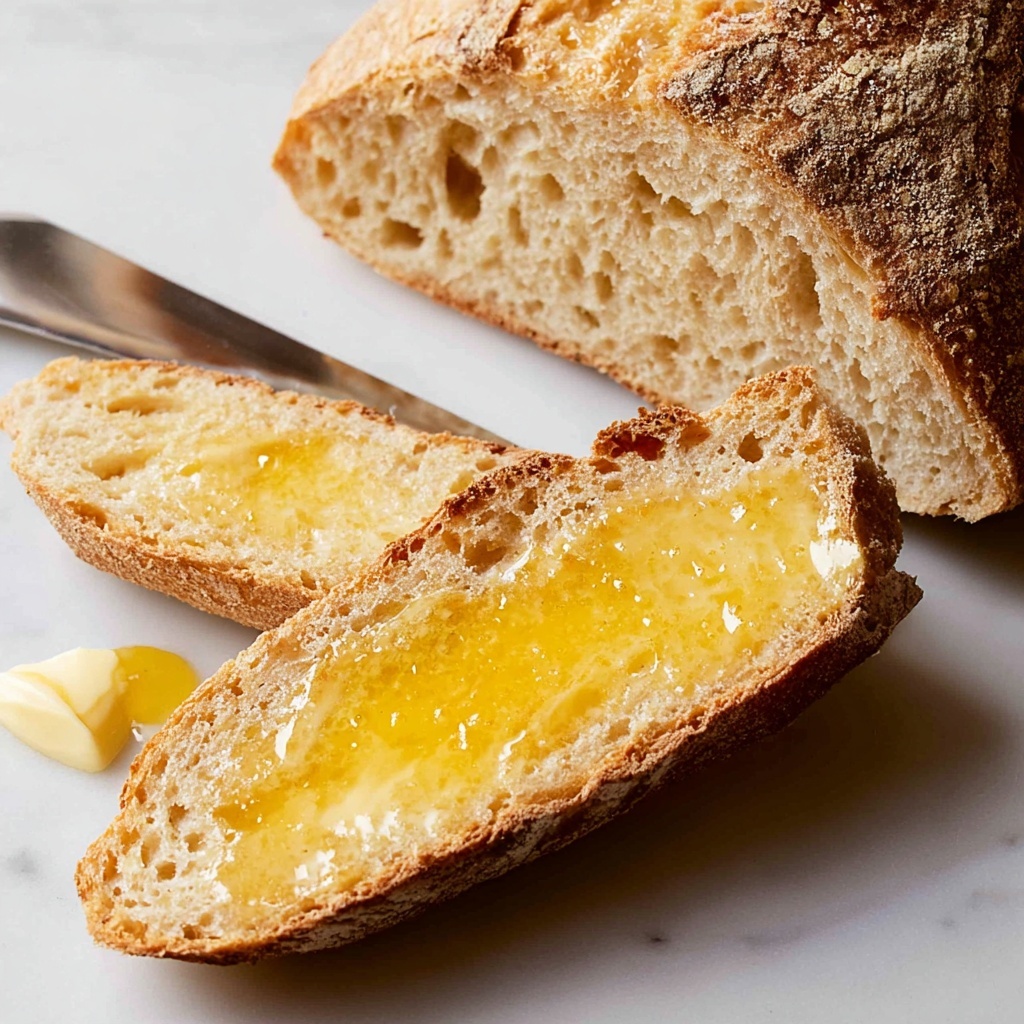
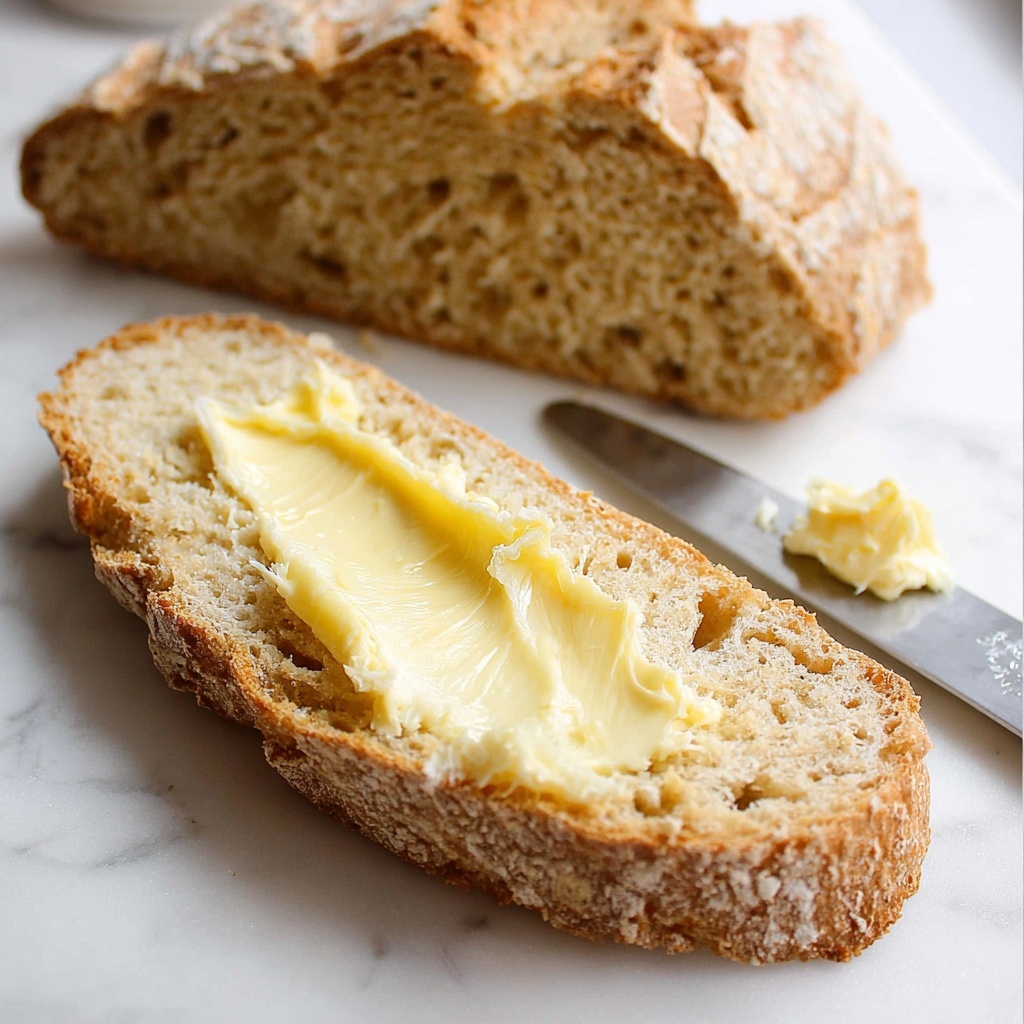
This bread is a dream canvas for plenty of toppings. A simple swipe of cultured butter or clotted cream lets the flavor shine, while a drizzle of honey or a sprinkle of sea salt can elevate it to a little slice of heaven.
Side Dishes
Irish soda bread pairs beautifully with hearty stews and soups thanks to its sturdy texture, perfect for dipping. Think classic beef stew, creamy chowders, or even a spicy vegetable curry. It’s also fantastic alongside eggs and smoked salmon for a cozy brunch.
Creative Ways to Present
Try slicing your soda bread thickly and toasting it for a crispy texture, then topping with smashed avocado and a pinch of chili flakes for a modern twist. Or, create a charming bread basket with small wedges accompanied by an assortment of cheeses and chutneys for entertaining guests.
Make Ahead and Storage
Storing Leftovers
Wrap any leftover bread tightly in plastic or foil and store it at room temperature. It will keep fresh for about two days but of course tastes best the day it’s baked.
Freezing
If you want to keep your soda bread longer, slice it first and freeze the pieces in an airtight container or bag. This way, you can toast individual slices as needed without wasting any.
Reheating
To bring your bread back to life, pop slices in a toaster or warm a whole loaf in a preheated oven at 180°C (350°F) for about 5 to 10 minutes. This revives the crust and softens the interior for that just-baked feel.
FAQs
Can I use self-raising flour instead of plain flour?
It’s best to stick with plain (all-purpose) flour because the leavening in self-raising flour can affect the reaction with baking soda, possibly altering the bread’s texture and rise.
What can I substitute for buttermilk?
If you don’t have buttermilk, you can make your own by adding 1 tablespoon of vinegar or lemon juice to 1 cup of milk and letting it sit for 5-10 minutes. This mimic’s buttermilk’s acidity, which is crucial for the soda bread’s rise.
Why is it important not to over-knead the dough?
Excess kneading develops gluten, which can make the soda bread tough and dense. Gentle kneading ensures the bread stays soft and crumbly, matching the lovely traditional texture.
Can I add raisins or seeds to this bread?
Absolutely! Adding raisins, caraway seeds, or even chopped nuts can give your soda bread a fun twist and extra flavor. Just fold them in gently with the dry ingredients before adding the buttermilk.
How do I know when the bread is fully baked?
The best way is to tap the base of the loaf; it should sound hollow. You can also check that the crust is a deep golden brown and the bread springs back lightly when pressed.
Final Thoughts
There’s a charming simplicity to the World’s Best No Yeast Bread – Irish Soda Bread Recipe that makes it perfect for both novice and seasoned bakers alike. It’s quick, forgiving, and utterly delicious in every bite. Give this recipe a try, and you may just discover a new favorite staple for your kitchen. It brings a slice of Irish tradition right into your home with every warm, crusty loaf.
Print
World’s Best No Yeast Bread – Irish Soda Bread Recipe
- Prep Time: 5 minutes
- Cook Time: 40 minutes
- Total Time: 45 minutes
- Yield: 12 servings
- Category: Bread
- Method: Baking
- Cuisine: Irish
- Diet: Vegetarian
Description
This traditional Irish Soda Bread recipe delivers a quick and easy no-yeast bread that’s crusty on the outside and tender inside. Made with a combination of white and wholemeal flours and leavened with baking soda and buttermilk, this bread requires minimal prep and no rising time, making it perfect for a comforting homemade loaf any day of the week.
Ingredients
Dry Ingredients
- 2 cups white flour (plain/all-purpose)
- 1 3/4 cups wholemeal flour (wholewheat)
- 1 1/2 tsp baking soda (bi-carb)
- 1 1/2 tsp salt
Other Ingredients
- 2 – 3 tbsp extra flour (for dusting)
- 2 cups buttermilk (fridge cold)
Instructions
- Preheat Oven: Preheat your oven to 220°C (430°F) or 200°C fan setting to ensure it’s hot enough for the soda bread to bake evenly and form a crust.
- Prepare Baking Tray: Line a baking tray with baking paper to prevent sticking and for easy cleanup after baking.
- Mix Dry Ingredients: In a large bowl, whisk together the white flour, wholemeal flour, baking soda, and salt until well combined to ensure even distribution of leavening.
- Add Buttermilk: Pour in the cold buttermilk and stir the mixture until it becomes difficult to stir further, forming a sticky dough.
- Flour Work Surface: Sprinkle 2 tablespoons of extra flour onto your work surface to prevent the dough from sticking during kneading. Scrape out the dough onto this floured surface and sprinkle more flour on top as needed.
- Knead Dough Gently: Knead the dough gently no more than 8 times just until it comes together into a ball. Over-kneading can make the bread tough.
- Shape the Dough: Transfer the dough ball to the lined baking tray and gently pat it into a disc about 2.5 cm (1 inch) thick to help it bake evenly.
- Score the Bread: Using a serrated knife, cut a cross 1 cm (0.3 inches) deep into the surface of the dough. This allows steam to escape and helps the bread rise properly.
- First Bake: Bake the bread for 20 minutes at 220°C (430°F), allowing the crust to form and the bread to start rising.
- Adjust Temperature and Finish Baking: Lower the oven temperature to 200°C (390°F) or 180°C fan and bake for another 20 minutes or until the base sounds hollow when tapped in the center, indicating the bread is fully baked.
- Cool Before Slicing: Transfer the baked bread to a wire rack and let it cool for at least 30 minutes before slicing to allow the crumb to set and prevent it from becoming gummy.
Notes
- Note 1: Wholemeal flour adds nuttiness and fiber to the bread but you can adjust the ratio to your preference.
- Note 2: Baking soda reacts with the acidity in the buttermilk to leaven the bread without yeast.
- Note 3: Using cold buttermilk slows the reaction slightly, giving better texture.
- Note 4: Avoid over-kneading to keep the bread tender and crumbly rather than chewy.


