
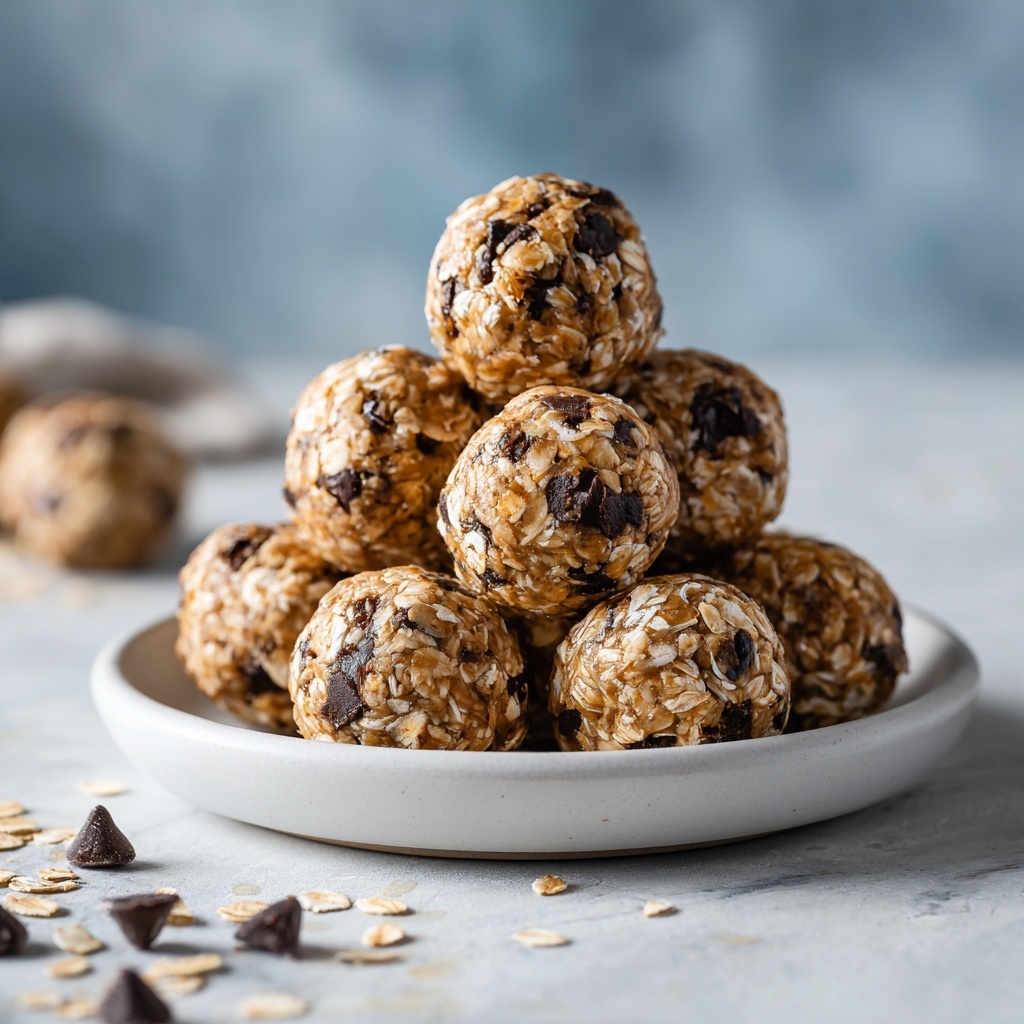
If you are on the hunt for a wholesome, delicious, and effortlessly quick snack, the No-Bake Snack Balls – 3 Ways Recipe is here to brighten your day. These little bites pack big flavors using simple, natural ingredients that come together without any oven time required. Imagine chewy, nutty, and subtly sweet balls energizing your snack time, perfect whether you’re at home, at work, or on the go. This recipe cleverly offers three tempting variations so you can enjoy a bit of variety, all while keeping things easy and fun in your kitchen.
Ingredients You’ll Need
This recipe thrives on simplicity and quality. Each ingredient plays a vital role in bringing together the perfect balance of taste, texture, and nutrition. From creamy nut butter that adds richness to the wholesome oats giving a pleasing chew, these essentials make crafting your snack balls a breeze.
- 1 ripe banana: Naturally sweet and moist, it binds the ingredients beautifully.
- 1 cup rolled oats: Provides a hearty texture and fiber for lasting energy.
- 2 tbsp nut butter (or seed butter): Creamy and satisfying, boosting both flavor and protein.
- 1 cup dates (pitted and soaked if needed): Offers natural sweetness and sticky texture to help the balls hold together.
- 1/4 cup cocoa powder: Delivers rich chocolate flavor in the cocoa variation.
- 1 cup shredded coconut: Adds a tropical touch and chewy texture for variety.
- 1/2 cup unsweetened applesauce: Keeps the mixture moist without extra sugar.
- 1 cup oat flour or ground oats: Helps lighten the mixture and absorb excess moisture.
- 1 scoop vanilla protein powder: Boosts the nutritional value with a gentle vanilla hint.
- Optional coatings: Crushed nuts, more coconut, cinnamon, or cocoa powder add extra flair and flavor.
How to Make No-Bake Snack Balls – 3 Ways Recipe
Step 1: Mix Your Base
For each variation you want to make, gather the ingredients specific to that flavor and toss them together in a mixing bowl. Use your hands or a sturdy spoon to combine everything until the mixture reaches a sticky, cohesive consistency. This initial step sets the stage for perfectly shaped snack balls that hold up well without baking.
Step 2: Roll into Balls
Once your mixture is well combined, scoop portions approximately the size of a tablespoon and roll them between your palms until they form smooth, 1-inch balls. It’s fun and hands-on, allowing you to feel the perfect firmness and texture as you go.
Step 3: Add Optional Coatings
This is where you can get creative! Roll your snack balls in crushed nuts for crunch, shredded coconut for a tropical vibe, a dusting of cinnamon for warmth, or cocoa powder for an intensified chocolate kick. These coatings not only add visual appeal but also enhance texture and flavor.
Step 4: Chill to Set
Place the rolled balls on a tray lined with parchment paper or a clean plate. Pop them into the refrigerator for about 30 minutes. Chilling helps the balls firm up, making them easier to handle and giving you that perfect bite.
Step 5: Store Properly
Once set, transfer your No-Bake Snack Balls – 3 Ways Recipe creations to an airtight container. Store them in the fridge to enjoy for up to 5 days, ensuring freshness and flavor every time you reach for a quick snack.
How to Serve No-Bake Snack Balls – 3 Ways Recipe
Garnishes
Elevate your snack balls with simple garnishes like a light drizzle of honey or a sprinkle of chia seeds. These touches add a subtle hint of sweetness or a delicate crunch, making the snack feel extra special without overwhelming the natural flavors.
Side Dishes
Pair your snack balls with a small bowl of Greek yogurt or fresh fruit slices to create a balanced mini-meal. This combo provides protein, fiber, and refreshing juiciness, turning your snack into a fulfilling treat that also supports your nutrition goals.
Creative Ways to Present
Make your snack balls party-ready by arranging them on a colorful platter with little paper cups or skewering them for grab-and-go fun. You can also tuck them into mason jars layered with yogurt and fruit for an adorable, portable breakfast or snack idea that delights both kids and adults.
Make Ahead and Storage
Storing Leftovers
If you have leftovers, no worries. The snack balls keep really well in an airtight container in the fridge for up to 5 days. This makes them perfect to prepare in advance for busy weeks or spontaneous snack cravings.
Freezing
To extend their shelf life, these no-bake balls freeze beautifully. Place them in a single layer on a tray to freeze initially, then transfer them to a freezer-safe bag or container. They’ll keep for up to 3 months, ready to thaw for a quick, healthy nibble whenever you need it.
Reheating
No reheating needed here! These snack balls are perfect cold or at room temperature, which makes them an ideal grab-and-go snack or lunchbox addition. However, if you prefer them slightly softer, simply leave them on the counter for 10 minutes to warm up naturally.
FAQs
Can I customize the flavors?
Absolutely! This No-Bake Snack Balls – 3 Ways Recipe is wonderfully versatile. You can swap nuts, try different nut butters, or add spices like cinnamon and nutmeg to tailor each batch to your taste.
Are these snack balls suitable for kids?
Yes, they make a fantastic, healthy snack option for kids. Just ensure that any nuts used are safe for your child’s age and dietary needs. These balls are soft, sweet, and naturally nutritious, often a hit with little ones.
Can I use a food processor?
Definitely! Using a food processor speeds up mixing, especially when softening dates or combining nuts smoothly. Just be careful not to over-process, as you want some texture left in the mix.
What if I don’t have protein powder?
No problem. The protein powder adds a nutrition boost and flavor, but your snack balls will still be wonderful without it. You can also substitute it with finely ground nuts or seeds to maintain protein content.
How sticky should the mixture be?
The mixture should be sticky enough to hold together when rolled but not overly wet. If it feels too dry, add a tablespoon of applesauce or nut butter. If too wet, add a touch more oat flour or rolled oats.
Final Thoughts
I can’t recommend enough giving the No-Bake Snack Balls – 3 Ways Recipe a go. It’s such a simple, flexible, and satisfying way to enjoy healthy snacking that feels indulgent without any fuss. Whether you’re new to no-bake treats or a seasoned snacker, these little balls will quickly become a beloved staple in your kitchen.
Print
No-Bake Snack Balls – 3 Ways Recipe
- Prep Time: 45 minutes
- Cook Time: 0 minutes
- Total Time: 45 minutes
- Yield: About 18 snack balls (6 of each flavor)
- Category: Snack
- Method: No-Cook
- Cuisine: American
- Diet: Vegetarian
Description
These No-Bake Snack Balls come in three delicious flavors and offer a quick, nutritious, and mess-free snack option perfect for anytime energy boosts. Made with wholesome ingredients like oats, bananas, nut butter, dates, and optional coatings, these snack balls are easy to prepare with no cooking required.
Ingredients
Base Ingredients
- 1 ripe banana
- 1 cup rolled oats
- 2 tbsp nut butter (or seed butter)
- 1 cup dates (pitted and soaked if needed)
- 1/4 cup cocoa powder
- 1 cup shredded coconut
- 1/2 cup unsweetened applesauce
- 1 cup oat flour or ground oats
- 1 scoop vanilla protein powder
Optional Coatings
- Crushed nuts
- More shredded coconut
- Cinnamon
- Cocoa powder
Instructions
- Combine Ingredients: For each flavor variation, mix all the specified ingredients in a bowl until the mixture becomes sticky and holds together well.
- Form Balls: Using your hands or a small scoop, roll the mixture into approximately 1-inch diameter balls to ensure uniform size for easy snacking.
- Add Coatings: If desired, roll the formed balls in coatings such as crushed nuts, extra shredded coconut, cinnamon, or cocoa powder to add texture and enhance flavor.
- Chill: Arrange the snack balls on a tray and refrigerate for at least 30 minutes to help them set firmly.
- Store: Keep the snack balls in an airtight container in the refrigerator where they will stay fresh for up to 5 days.
Notes
- Soaking dates before blending helps achieve a smoother, stickier texture.
- Feel free to customize the nut butter or coatings based on dietary preferences or allergies.
- The snack balls can be frozen for longer storage; thaw before eating.
- If mixture is too dry, add a splash of unsweetened applesauce or water to help bind.

