If you have ever dreamed of creating a stunning and delicious platter that everyone will admire, then you are going to love this Charcuterie Salami Styling – Build a Beautiful Board Recipe. It’s all about turning simple slices of salami into gorgeous shapes and artfully arranging them alongside complementary flavors and textures. This recipe not only elevates your snack game but also makes entertaining effortless with an impressive centerpiece that tastes as good as it looks. Whether it’s for a casual gathering or a fancy get-together, this technique will have your guests talking and reaching for seconds.
Ingredients You’ll Need
Though the art of building a beautiful charcuterie board can seem complex at first glance, the ingredients here are straightforward and each plays a crucial role in adding depth, color, and taste. From savory meats to crunchy nuts and fresh herbs, these components come together to create a balance of flavors and eye-catching visual appeal.
- Salami (20–30 thin slices, about 8 oz total): The centerpiece of your board, perfect for folding and shaping into flowers and folds.
- Prosciutto or Soppressata (10 slices, ~3 oz, optional): Adds a silky texture and delicate saltiness, ideal for loose ribbon folds.
- Small ramekin or wine glass: Essential for shaping your salami into elegant roses.
- Crackers: Provide a crunchy contrast and a sturdy base for toppings.
- Cheeses: Variety in texture and flavor is key, from creamy brie to sharp cheddar.
- Nuts: Offer a toasty crunch that complements softer elements on the board.
- Olives: Bring a briny pop that brightens the palate.
- Fresh fruit: Citrus, berries, or grapes add sweetness and vibrant color.
- Fresh herbs (rosemary, thyme): Used as garnishes to add both fragrance and a splash of greenery.
- Optional skewers or toothpicks: Useful for keeping small bites together or adding height to your arrangement.
How to Make Charcuterie Salami Styling – Build a Beautiful Board Recipe
Step 1: Create a Salami Rose
The star technique in this recipe is making a salami rose—a delicate and beautiful centerpiece. Begin by folding individual salami slices in half, then gently overlapping them along the rim of a small wine glass or ramekin. Add 2 to 3 layers of slices, then carefully flip the arrangement out of the glass to reveal a full, blossoming flower. This simple step instantly adds an elegant, organic shape to your board.
Step 2: Make a Quarter Fold
Next, the quarter fold is perfect for creating petal-like shapes. Take a salami slice and fold it twice to create a smaller, compact piece that resembles a petal. Group several of these into clusters to add volume and texture. These folds are ideal for lining sections of your board as clusters that look both tidy and decorative.
Step 3: Assemble a Salami River
This technique involves lining up your quarter folds in a gentle S-curve across your board. The flow of the salami river guides the eye and creates movement, encouraging guests to explore every inch of your board. It’s a playful and engaging way to transition between the various sections and ingredients.
Step 4: Craft a Fan Fold
For another visually appealing option, half-fold slices of salami and layer them so they fan out like palm leaves or feathers. This shape adds a lovely sense of dimension and softness to your board, balancing the sharper angles of the quarter folds.
Step 5: Create Ribbons with Prosciutto
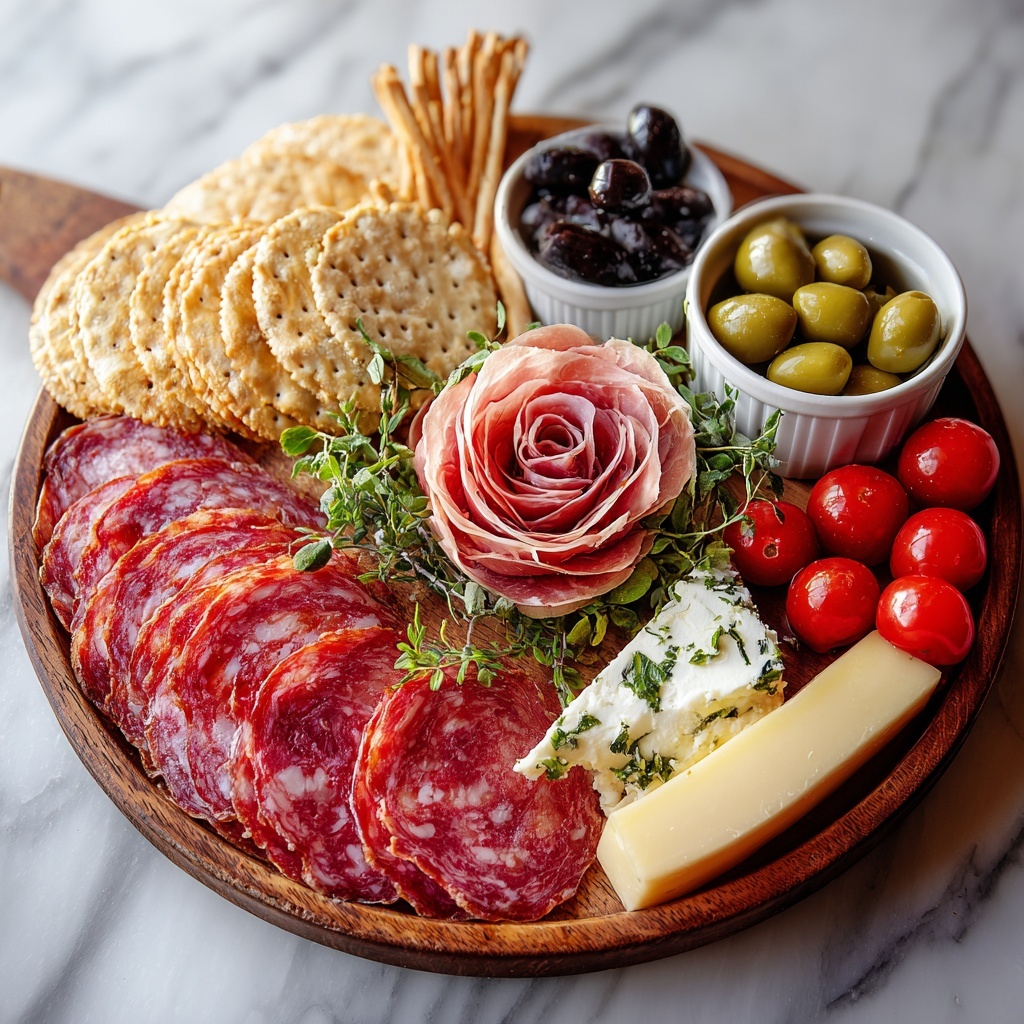
If you choose to include prosciutto or soppressata, fold these longer, thinner slices lengthwise and loosely drape them in ribbons around the board. Their silky texture and gentle folds contrast beautifully with the firmer salami shapes and add an extra layer of sophistication.
Step 6: Final Board Assembly
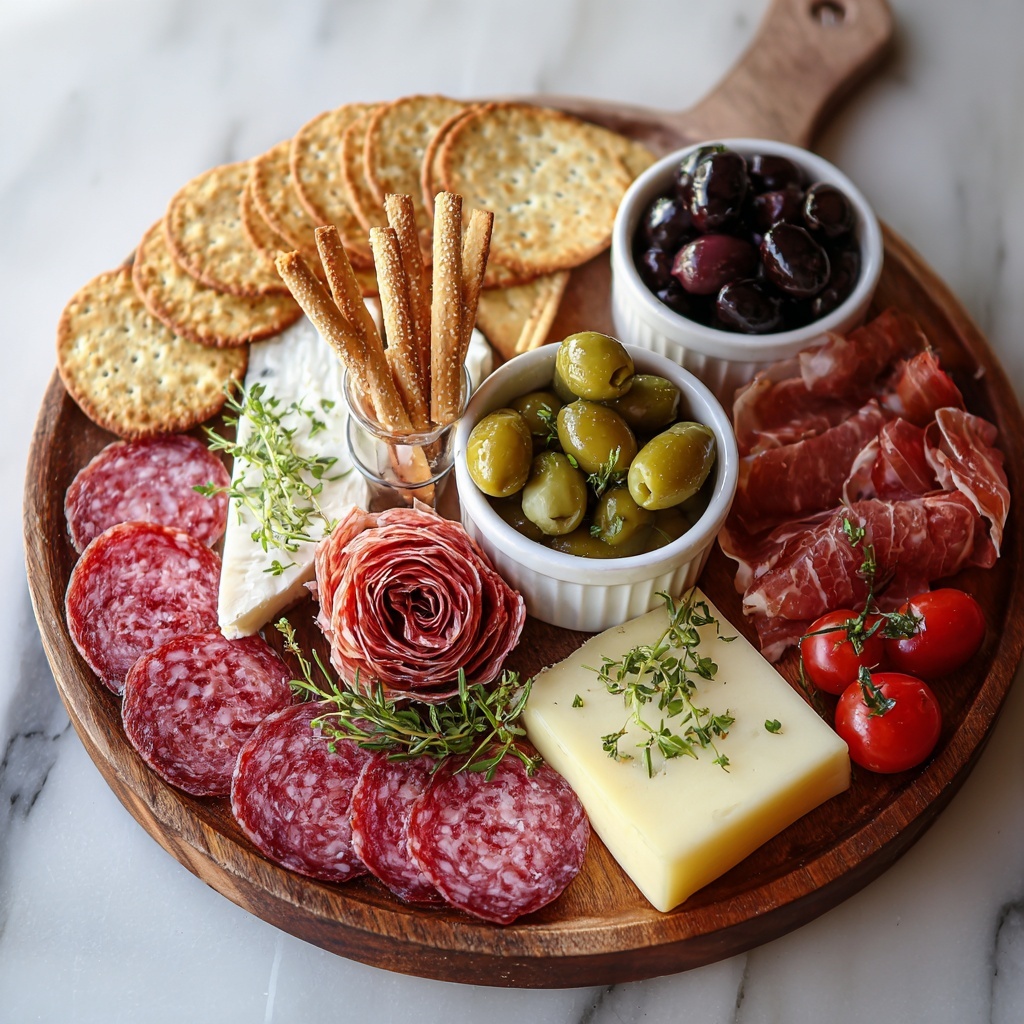
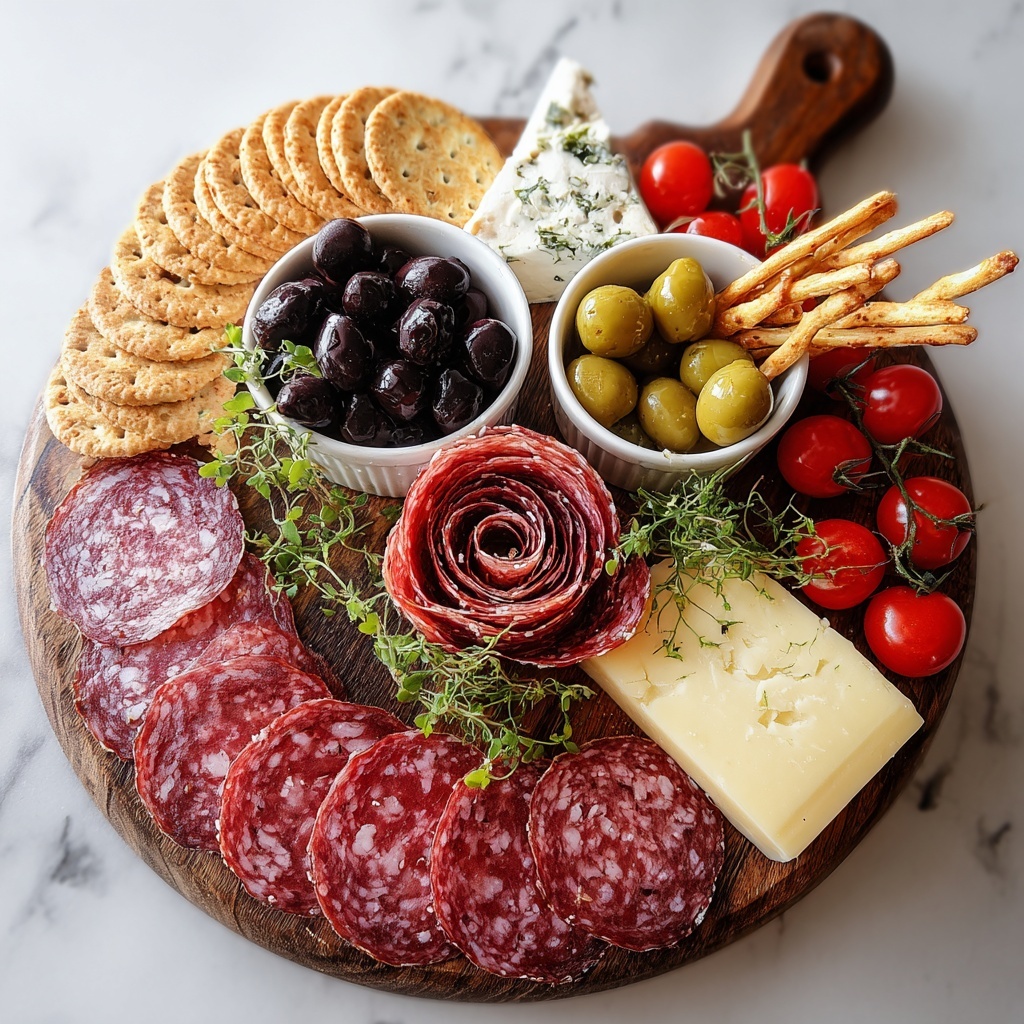
Start by placing your focal points—these can be the salami roses or standout cheeses—in a few strategic spots on your board. Then, surround these with your various salami folds, layering to create depth. Fill every gap with complementary elements like fresh fruit, nuts, olives, and crackers. Don’t forget to tuck in fresh herbs for an inviting pop of color and an aromatic boost. Everything comes together in a composition that looks abundant and thoughtfully curated.
How to Serve Charcuterie Salami Styling – Build a Beautiful Board Recipe
Garnishes
Fresh herbs like rosemary and thyme are your secret weapon when serving. Beyond adding gorgeous green accents, their fragrance elevates the eating experience by stimulating the senses. Fresh edible flowers or thin slices of colorful fruits can also enhance the visual impact while adding contrasting notes to your flavor profile.
Side Dishes
This styled charcuterie board shines best when paired with simple side dishes that don’t overshadow it. Think crusty bread, honey or fig jam, and perhaps a crisp green salad. These sides complement without competing, ensuring your perfectly folded salami and curated accompaniments remain the star of the show.
Creative Ways to Present
Consider using natural wooden boards or slate platters to create a rustic yet elegant backdrop. Layer salami folds and other elements in varying heights and textures to keep things dynamic. You might even scatter edible flowers or a dusting of fresh herbs around the edges for a seasonal touch. For a fun twist, try individual small boards or boards for each guest, allowing everyone to explore their own artful arrangement.
Make Ahead and Storage
Storing Leftovers
If you have any leftovers, cover your board tightly with plastic wrap and place it in the refrigerator. To keep salami from drying out, press parchment paper between layers if stacking. Consume within two days for the best freshness and texture.
Freezing
While freezing is generally not recommended for charcuterie meats styled on boards, you can freeze extra slices of salami separately. Wrap tightly in plastic wrap and foil to prevent freezer burn, then thaw slowly in the fridge when ready to use. This helps preserve flavor and texture better than freezing fully assembled boards.
Reheating
Reheating is not necessary or advised for this board since the meats are cured and meant to be enjoyed cold or at room temperature. If you’d like to warm accompanying crackers or bread, do so separately for optimal texture and flavor.
FAQs
Can I use other types of cured meats?
Absolutely! While this recipe highlights salami and prosciutto, feel free to substitute or add other favorites like chorizo, capicola, or even smoked turkey slices. The folding techniques work well with a variety of thinly sliced cured meats.
How do I keep salami slices from drying out?
The key is to store uncovered slices in airtight containers or tightly wrapped with parchment and plastic wrap. Keeping them chilled but not too cold helps maintain moisture without compromising flavor.
What cheeses are best for this board?
A mix of textures and flavors works best. Try a creamy brie or camembert, a sharp aged cheddar, a tangy goat cheese, and perhaps a firm cheese like manchego. Variety makes each bite interesting and balances the saltiness of the meats.
Is this board suitable for vegans or vegetarians?
This particular styling centers around cured meats, but you can absolutely adapt the principles using plant-based meat alternatives, smoked tofu slices, or colorful vegetables and fruits to create stunning folds and shapes.
How far in advance can I prepare the board?
You can prep most elements a few hours before serving. Assemble the board shortly before your guests arrive to keep everything fresh and visually appealing. Salami roses and folds hold up well for a few hours when kept covered and chilled.
Final Thoughts
Creating a beautiful charcuterie board doesn’t have to be intimidating, especially with the help of the Charcuterie Salami Styling – Build a Beautiful Board Recipe. It truly transforms ordinary slices of salami into edible art that tastes incredible and feels special to share. Next time you entertain or want a treat to impress yourself, give these folding techniques a try. You’ll love the compliments and the joy of building something both beautiful and delicious, one fold at a time.
Print
Charcuterie Salami Styling – Build a Beautiful Board Recipe
- Prep Time: 20 minutes
- Cook Time: N/A
- Total Time: 20 minutes
- Yield: 8 to 10 servings
- Category: Appetizer
- Method: No-Cook
- Cuisine: Charcuterie
Description
Learn how to artfully style salami and prosciutto to create a stunning charcuterie board perfect for entertaining. This guide walks you through folding techniques like salami roses, quarter folds, and fan folds, plus tips on assembling the board with complementary cheeses, nuts, fruits, and garnishes for an elegant presentation that impresses guests.
Ingredients
Meats
- 20–30 thin slices salami (about 8 oz total)
- 10 slices prosciutto or soppressata (optional, ~3 oz)
Accompaniments
- Crackers
- Cheeses
- Nuts
- Olives
- Fresh fruit
Garnish
- Fresh herbs (rosemary, thyme)
Tools
- Small ramekin or wine glass (for rose shape)
- Optional: skewers or toothpicks
Instructions
- Salami Rose: Fold slices of salami in half and layer them overlapping along the rim of a wine glass or small ramekin to form petals. Add 2–3 layers to create a full rose shape, then gently flip it off the glass to maintain the flower’s structure.
- Quarter Fold: Take slices of salami and fold them twice to form petal-like shapes. Stack these folded slices in small clusters to prepare for arranging on the board.
- Salami River: Line up the quarter-folded salami pieces in a flowing S-curve pattern across the charcuterie board to simulate the look of a river or natural flow.
- Fan Fold: Fold slices of salami in half and layer them in a fanned-out pattern, creating a visually appealing shape that adds texture and variety to the board.
- Ribbons (for Prosciutto): Fold long slices of prosciutto or soppressata lengthwise and loosely drape them to resemble ribboned fabric, adding elegance and softness to the meat presentation.
- Board Assembly: Begin assembling the board by placing focal pieces like cheeses and the salami roses. Surround these with the various folded salami shapes to create layers and depth.
- Fill Gaps: Use fruits, nuts, olives, and crackers to fill in any open spaces on the board, ensuring an abundant and balanced look.
- Final Garnish: Add fresh herbs like rosemary or thyme to the board to provide color contrast, aroma, and a polished finishing touch.
Notes
- Use a sharp knife to slice meats thinly if not pre-sliced for best folding and presentation.
- Chill meats slightly before shaping to help them hold their form better.
- Experiment with different cheeses and fruits based on season and preference for personalized boards.
- Skewers or toothpicks can help secure rolled or folded meats if needed.
- Arrange board on a large wooden or slate platter to enhance rustic elegance.
- Let the board come to room temperature before serving for optimal flavor.

